







Projects and Scenes
Updated: 06/25/2026
Adding Scenes
You can create multiple scenes within one project.
There are three ways to add scenes
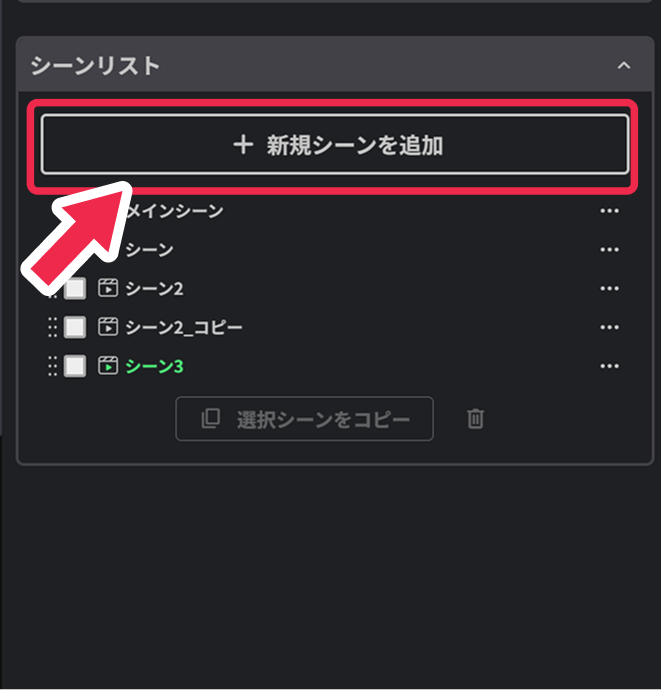
1. Add from the scene list within the workspace project
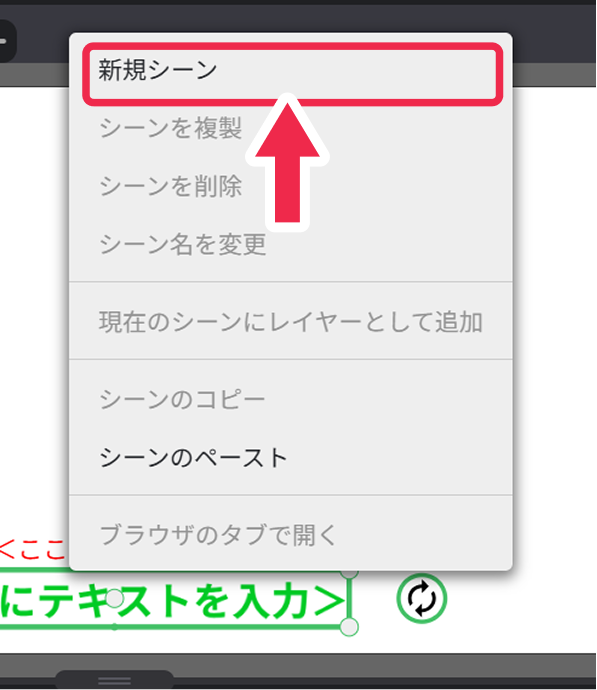
2. Right-click on the blank area to the right of the scene tabs or on a scene name to add
3. Click the “+” button to the right of the scene tabs to add
Add scenes from the “Project” palette
Add scenes by right-clicking
Add scenes with the “+” button

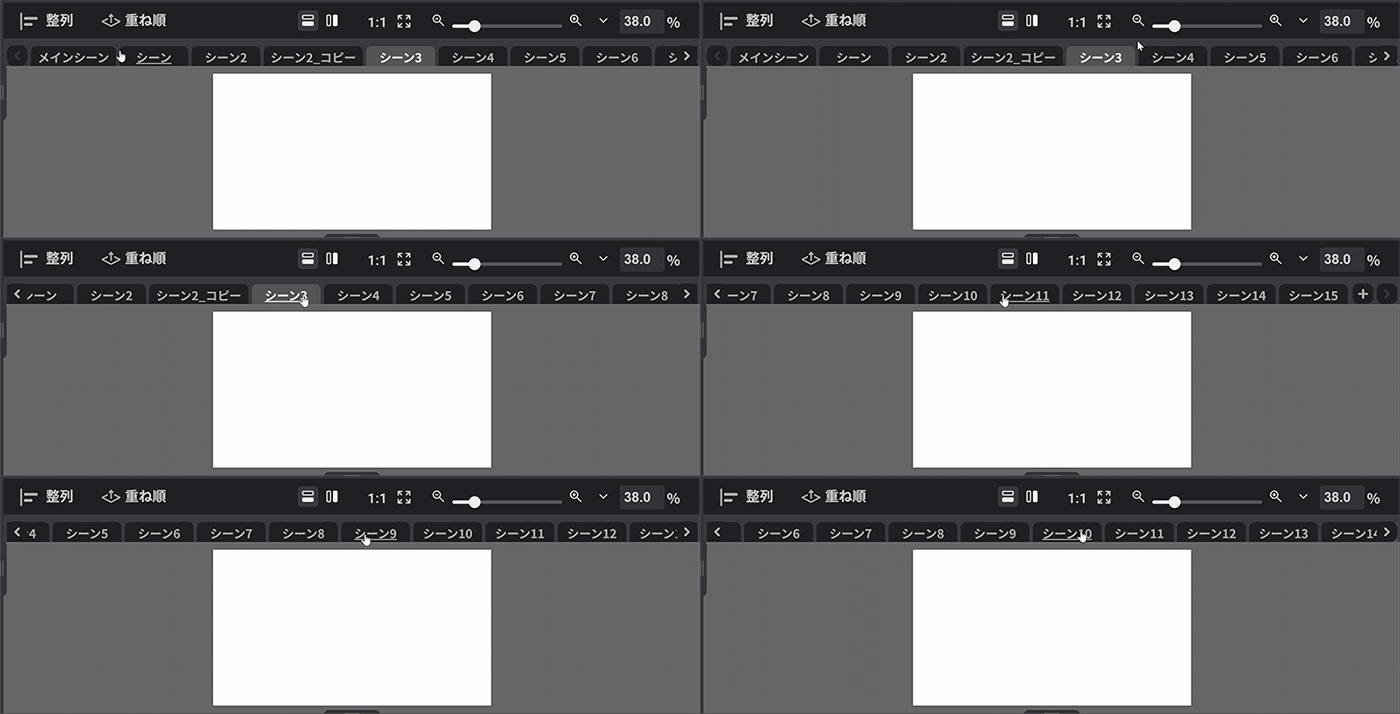
Added scenes are displayed as scene tabs. When there are many scenes,
you can easily find the desired scene by scrolling left or right using the mouse wheel.
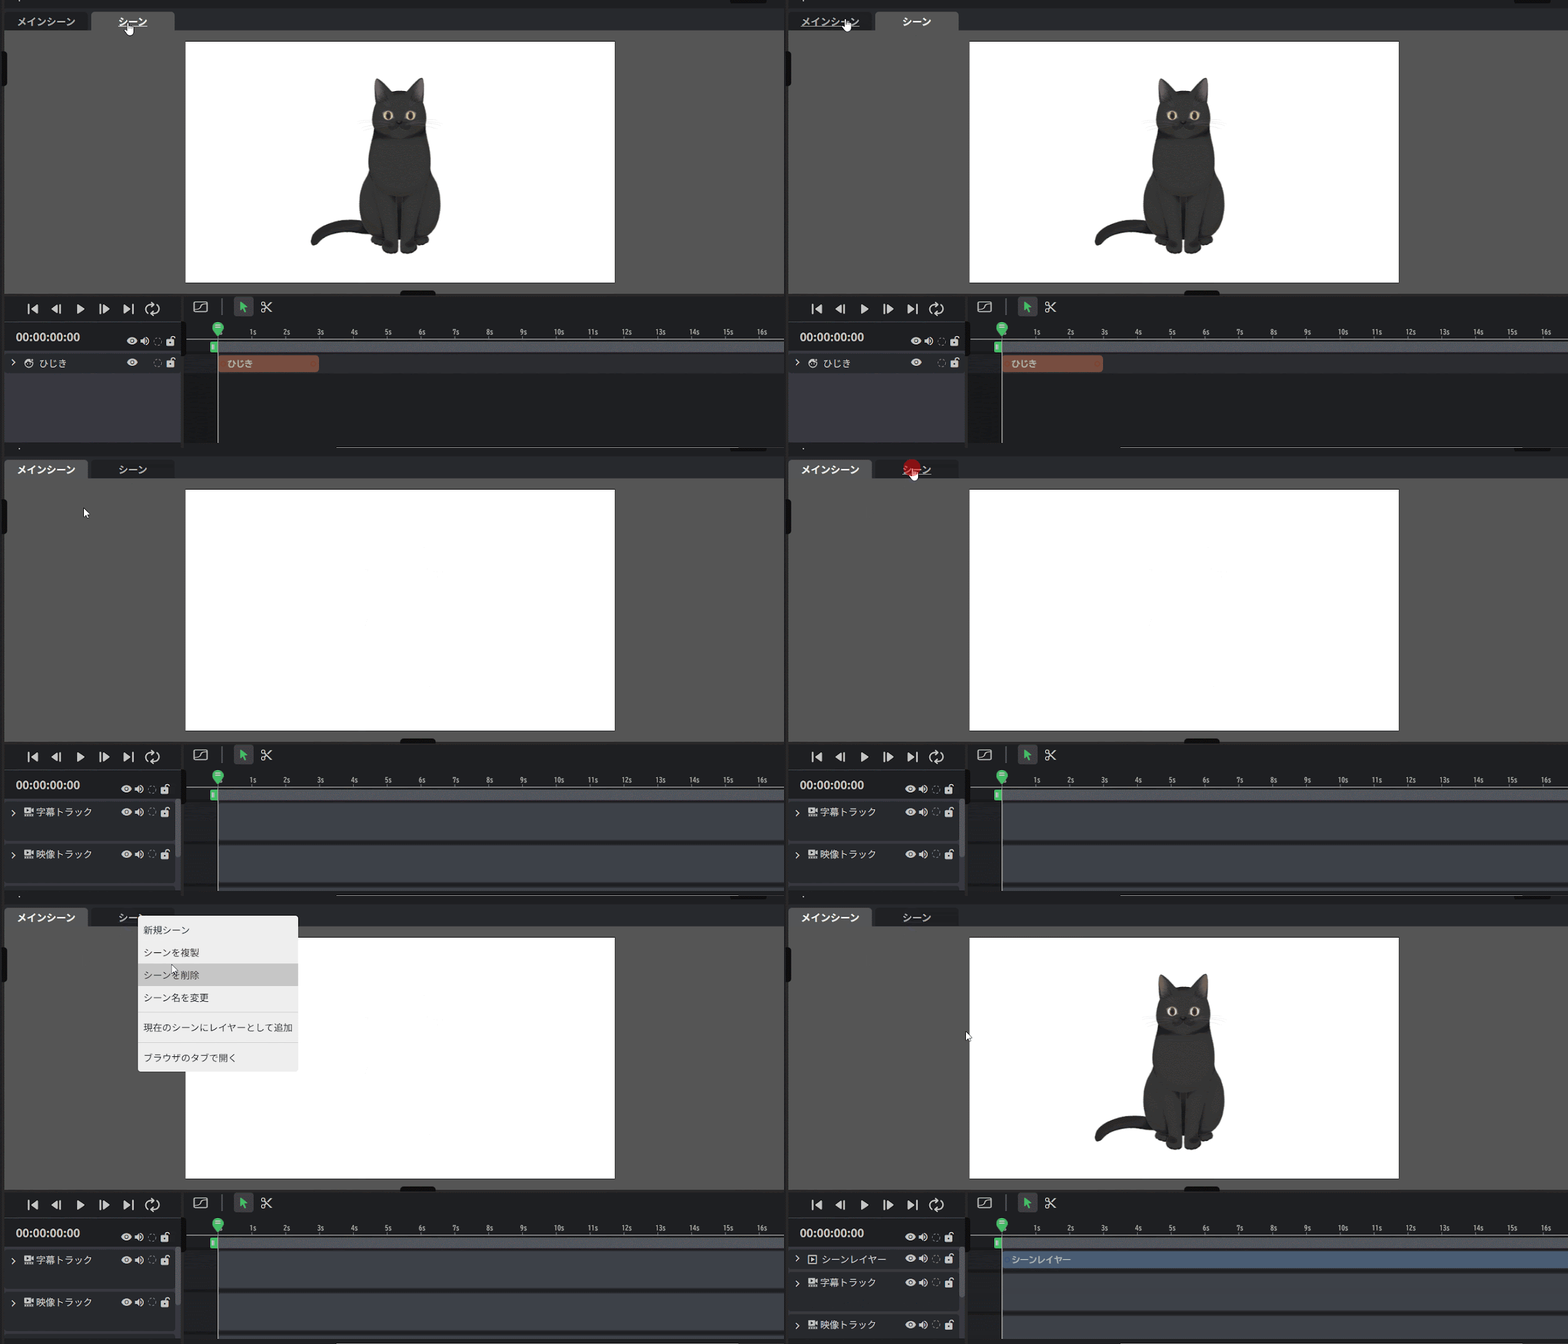
What you create in one scene can be reflected as a layer in another scene.
Add it by right-clicking on the inactive scene tab and selecting “Add as layer to current scene.”
Scene rearrangement
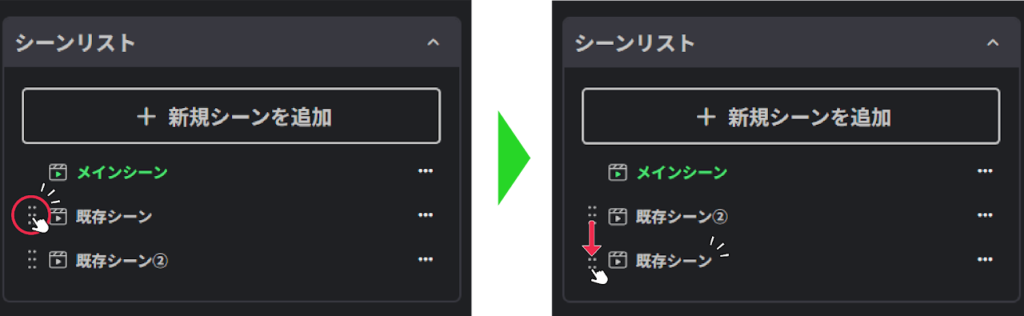
If there are multiple scenes, the order can be freely rearranged in the scene list.
The scene list appears in the Palette when you open the project in the sidebar.
Move the cursor to the left side of a scene to grab it, then drag it to the desired position, and release the cursor to complete the rearrangement.
Note: Only the main scene cannot be rearranged.