How to Use the Live2D Tracking Feature
Updated: 06/25/2026
In nizima ACTION!!, by linking with external tracking apps such as nizima LIVE and VTube Studio, you can reflect movements captured by the camera onto a Live2D model in real time and record them directly as an animation.
Simultaneous audio recording is also supported.
Table of Contents
1.Preparatory Steps
Before using Live2D tracking, prepare the following.
External Tracking Apps
nizima LIVE (Download here)
VTube Studio (Download here)
* This page explains the procedure using nizima LIVE.
You can easily understand how to connect tracking with both nizima LIVE and VTube Studio through videos and text in the tutorial below.
Tutorial: How to Use the Live2D Tracking Feature
https://docs.live2d.com/nizimaaction/en/tutorials/nizimalive-manual/
2.Setting Up nizima ACTION!!
2-1. Add a Live2D Model
From the Assets panel in the sidebar on the left, select the Live2D model you want to use and add it to the canvas.
Alternatively, if you have your own model, drag and drop the model file (.moc3, etc.) onto the canvas, or add it from the Upload tab.
For detailed instructions on how to upload a Live2D model, please refer to this page.
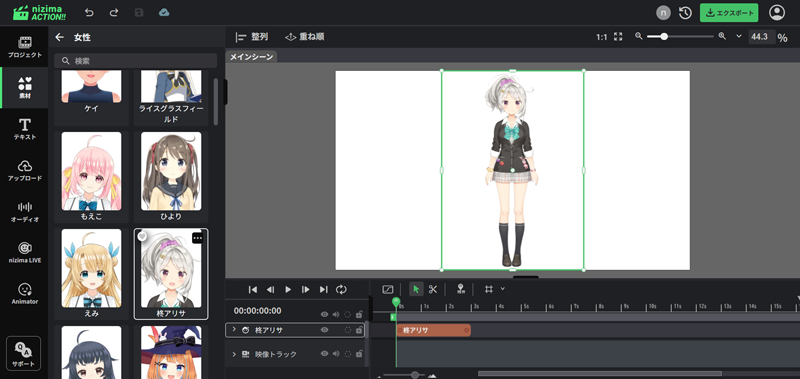
2-2. Adjust the model’s position
Adjust the position and size of the model on the main canvas so that it is properly framed within the video screen.
3.Setting Up the Tracking App
3-1. Launch nizima LIVE and Set Up the Camera
Launch nizima LIVE and select the camera to use from “Camera Settings” in the left menu.
Check the camera feed and confirm that facial expressions and movements are being tracked correctly.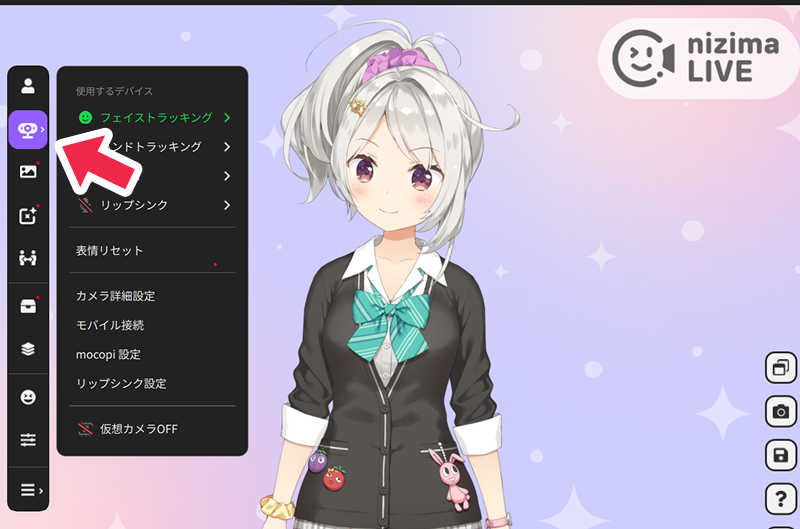
3-2. Open the Plugin Manager
From the nizima LIVE menu, select “Settings & Other” → “Plugins” to open the Plugin Manager.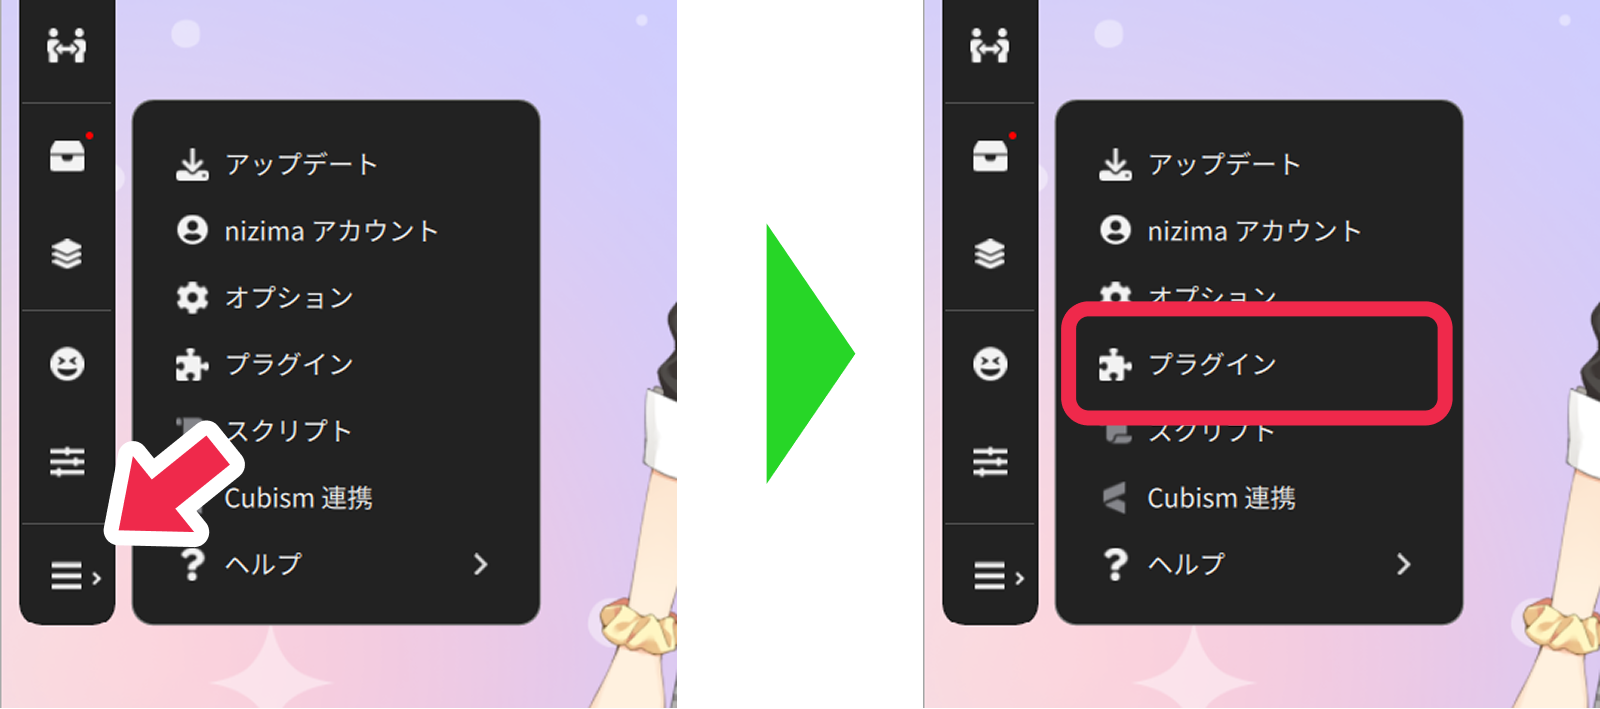
3-3. Enable the Plugin Feature
Turn on the toggle at the top of the Plugin Manager to enable the plugin feature as a whole.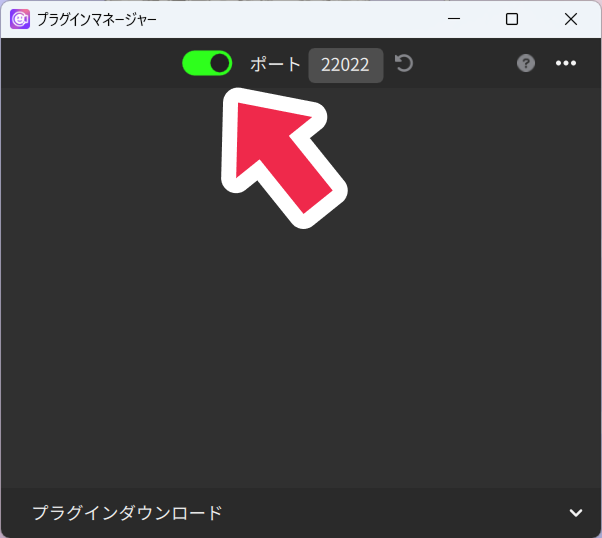
4.Linking nizima ACTION!! with the Tracking app
4-1. Open the Live2D Tracking Panel
Return to nizima ACTION!! and open the Live2D Tracking panel in the sidebar.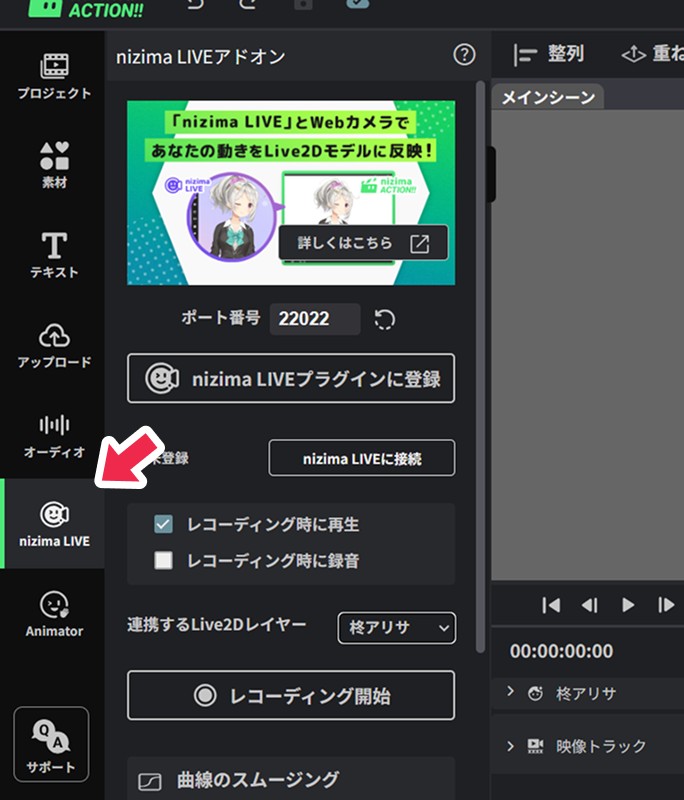
4-2. Select the Live2D layer to link
From the Linked Live2D Layer dropdown list, select the Live2D layer you want to link with the external tracking app.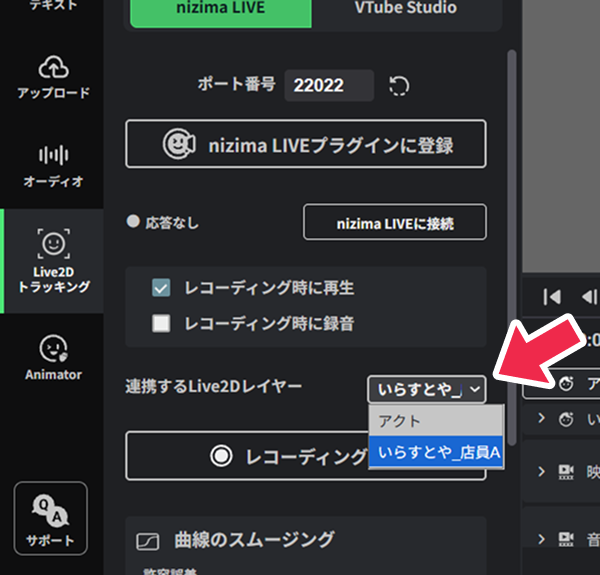
4-3. Register the Plugin for the External App
Click Register nizima LIVE Plugin.
Once registration is complete, the linking plugin will appear in the tracking app.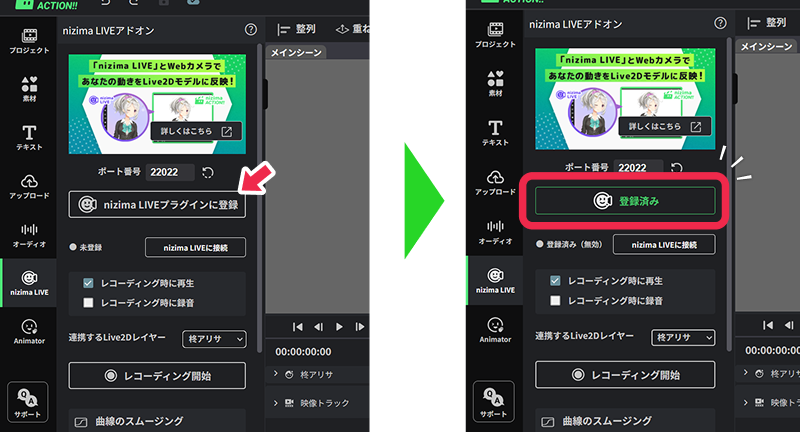
You need to enable the browser permission “Apps on device.”
A permission confirmation popup will appear at the top left of the browser during the first operation.
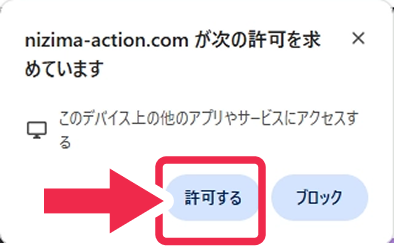
If the popup does not appear and tracking integration with external apps does not work properly,
it may be due to restrictions from browser permission settings.
Please check the browser app permission settings on the following page.
URL: https://docs.live2d.com/nizimaaction/en/manual/browser-app-permission-settings/
4-4. Enable the Plugin in the External App
Return to the tracking app (nizima LIVE) and enable the “nizima ACTION!!” plugin displayed in the Plugin Manager.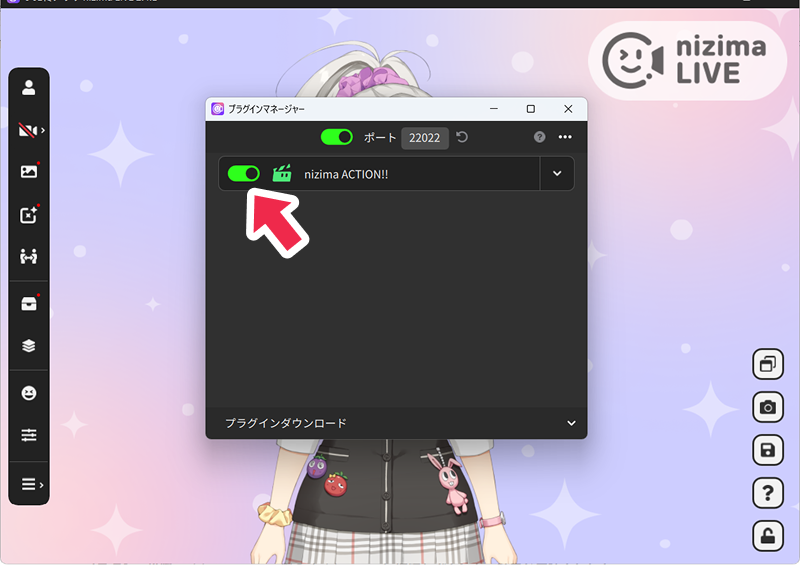
5.Capture and Recording
5-1. Connect to the External Tracking App
Click “Connect to nizima LIVE”.
Confirm that the tracked movements are being reflected on the model in nizima ACTION!! in real time.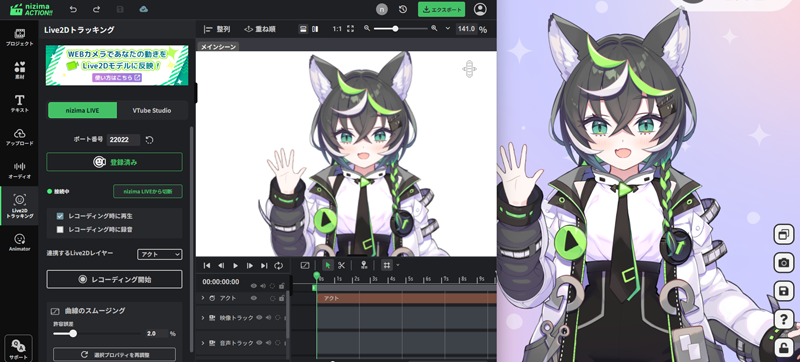
5-2. Start Recording
Click “Start Recording” and recording will begin after a 3-second countdown.
Move the model to capture the desired motions.
5-3. Stop Recording
Recording ends in one of the following ways:
- The playback position reaches the final frame.
If the video plays through to the final frame, recording will end automatically without pressing the stop button, and the model’s movements will be reflected in the timeline. - Click “Stop Recording”.
If you click “Stop Recording” during recording, the model’s movements from the start of recording up to the point of stopping will be reflected in the timeline.
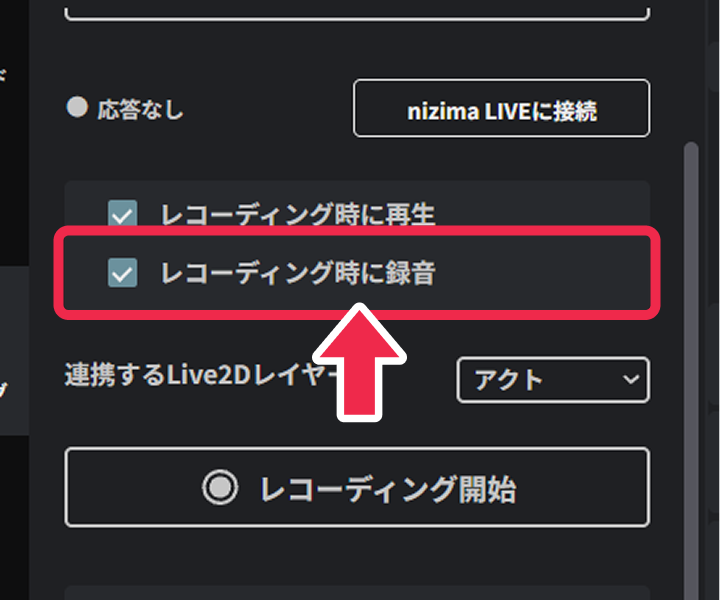
* If “Record Audio During Recording” is enabled, microphone audio will also be recorded simultaneously.
6.Review and Adjustment After Recording
When recording is performed using the nizima LIVE integration, a data called “nizima LIVE Motion” will be automatically created in the model’s properties.
The recorded movements are reflected in the timeline with keyframes already set for this “nizima LIVE Motion”.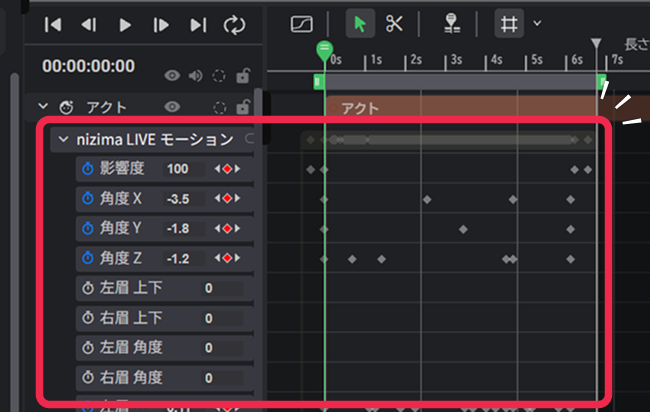
Adjusting Movements
You can edit parameters in detail using the dope sheet or curve editor on the timeline.
For instructions on how to edit, please refer to the Timeline page.
Curve Smoothing
After recording, you can adjust the number of keyframes and the smoothness of the curves from “Curve Smoothing” in the Live2D Tracking palette.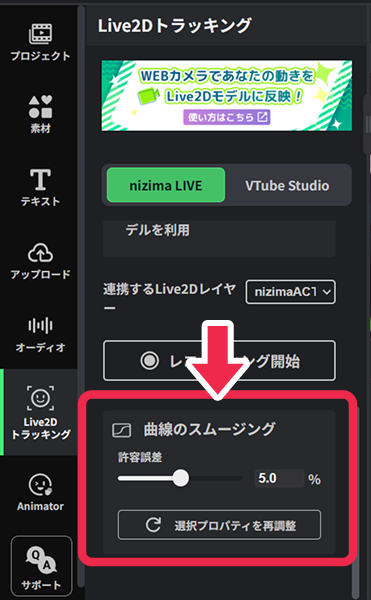 Select the property you want to adjust, then modify the Tolerance value.
After that, click “Re-adjust Selected Properties” to apply the settings.
Increasing Tolerance: Reduces the number of keyframes, resulting in a smoother curve. Movements appear smooth with less jitter.
Decreasing Tolerance: Retains finer movements, resulting in more keyframes being set. Movements are reflected in greater detail.
Deleting Properties
The created “nizima LIVE Motion” can be deleted by right-clicking it.
After deletion, you can use Live2D Tracking again to re-record the movements.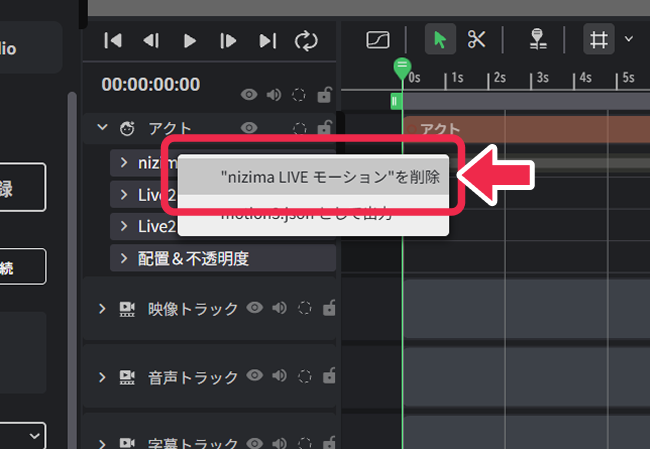
Exporting motion3.json
You can also export a Live2D motion file (motion3.json) from the created “nizima LIVE Motion”.
Right-click “nizima LIVE Motion”, select “Export as motion3.json”, and export the file.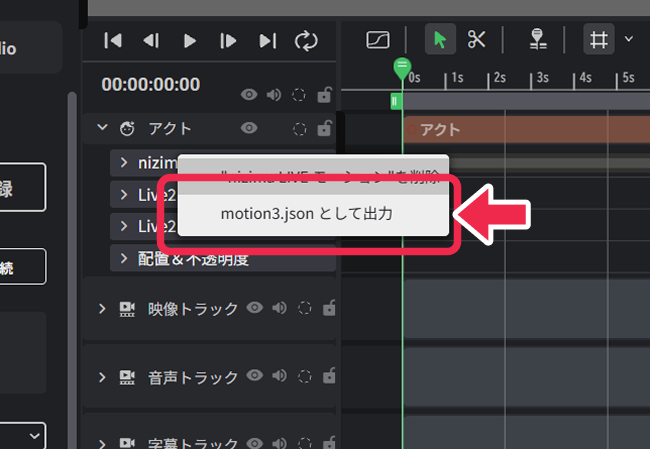
7.Options During Recording
Play During Recording
Use this option when you want to record the model’s movements in sync with video playback while the video is playing.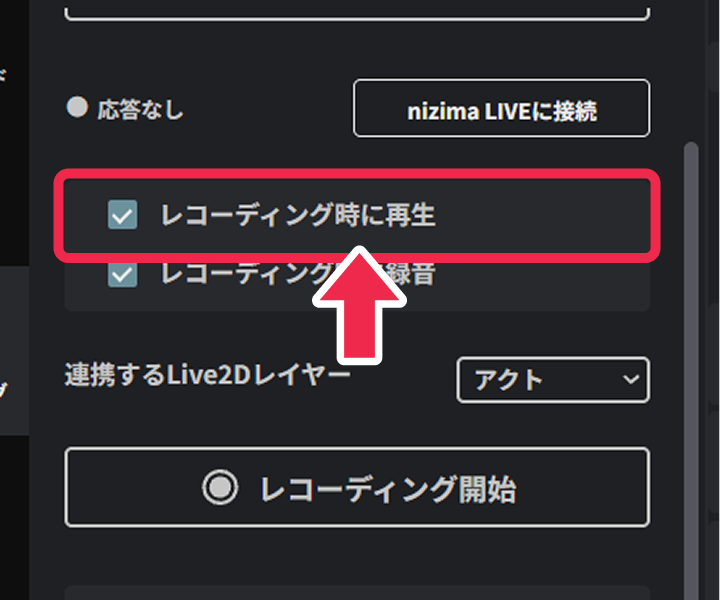
Record Audio During Recording
Use this option when you want to record audio from the microphone into the video simultaneously with the model’s movements.