How to Use Live2D Tracking (Formerly: How to connect with nizima LIVE)
Updated: 12/16/2025
Live2D Tracking Feature Tutorial
The Live2D Tracking feature allows you to link with tracking apps such as nizima LIVE or VTube Studio to capture and record Live2D model movements in real time.
You can also record audio simultaneously with the movements. We hope you find this helpful alongside the video!
Table Of Contents
▽▼ Check out the video to see how to use it ▼▽
Note: The screens shown in the video are under development. Actual display, design and specifications may differ.
\ Click here to download nizima LIVE! /
Note: The free version of nizima LIVE can also be linked to nizima ACTION!!
1. Preparing nizima ACTION!!
【Step 1】Adding a Live2D Model
Select the Live2D model you want to use from the “assets” panel in the left sidebar and add it to your project. If you have your own model, please upload the model file (.moc3, etc.).
For detailed instructions on how to upload a Live2D model, please refer to this page.
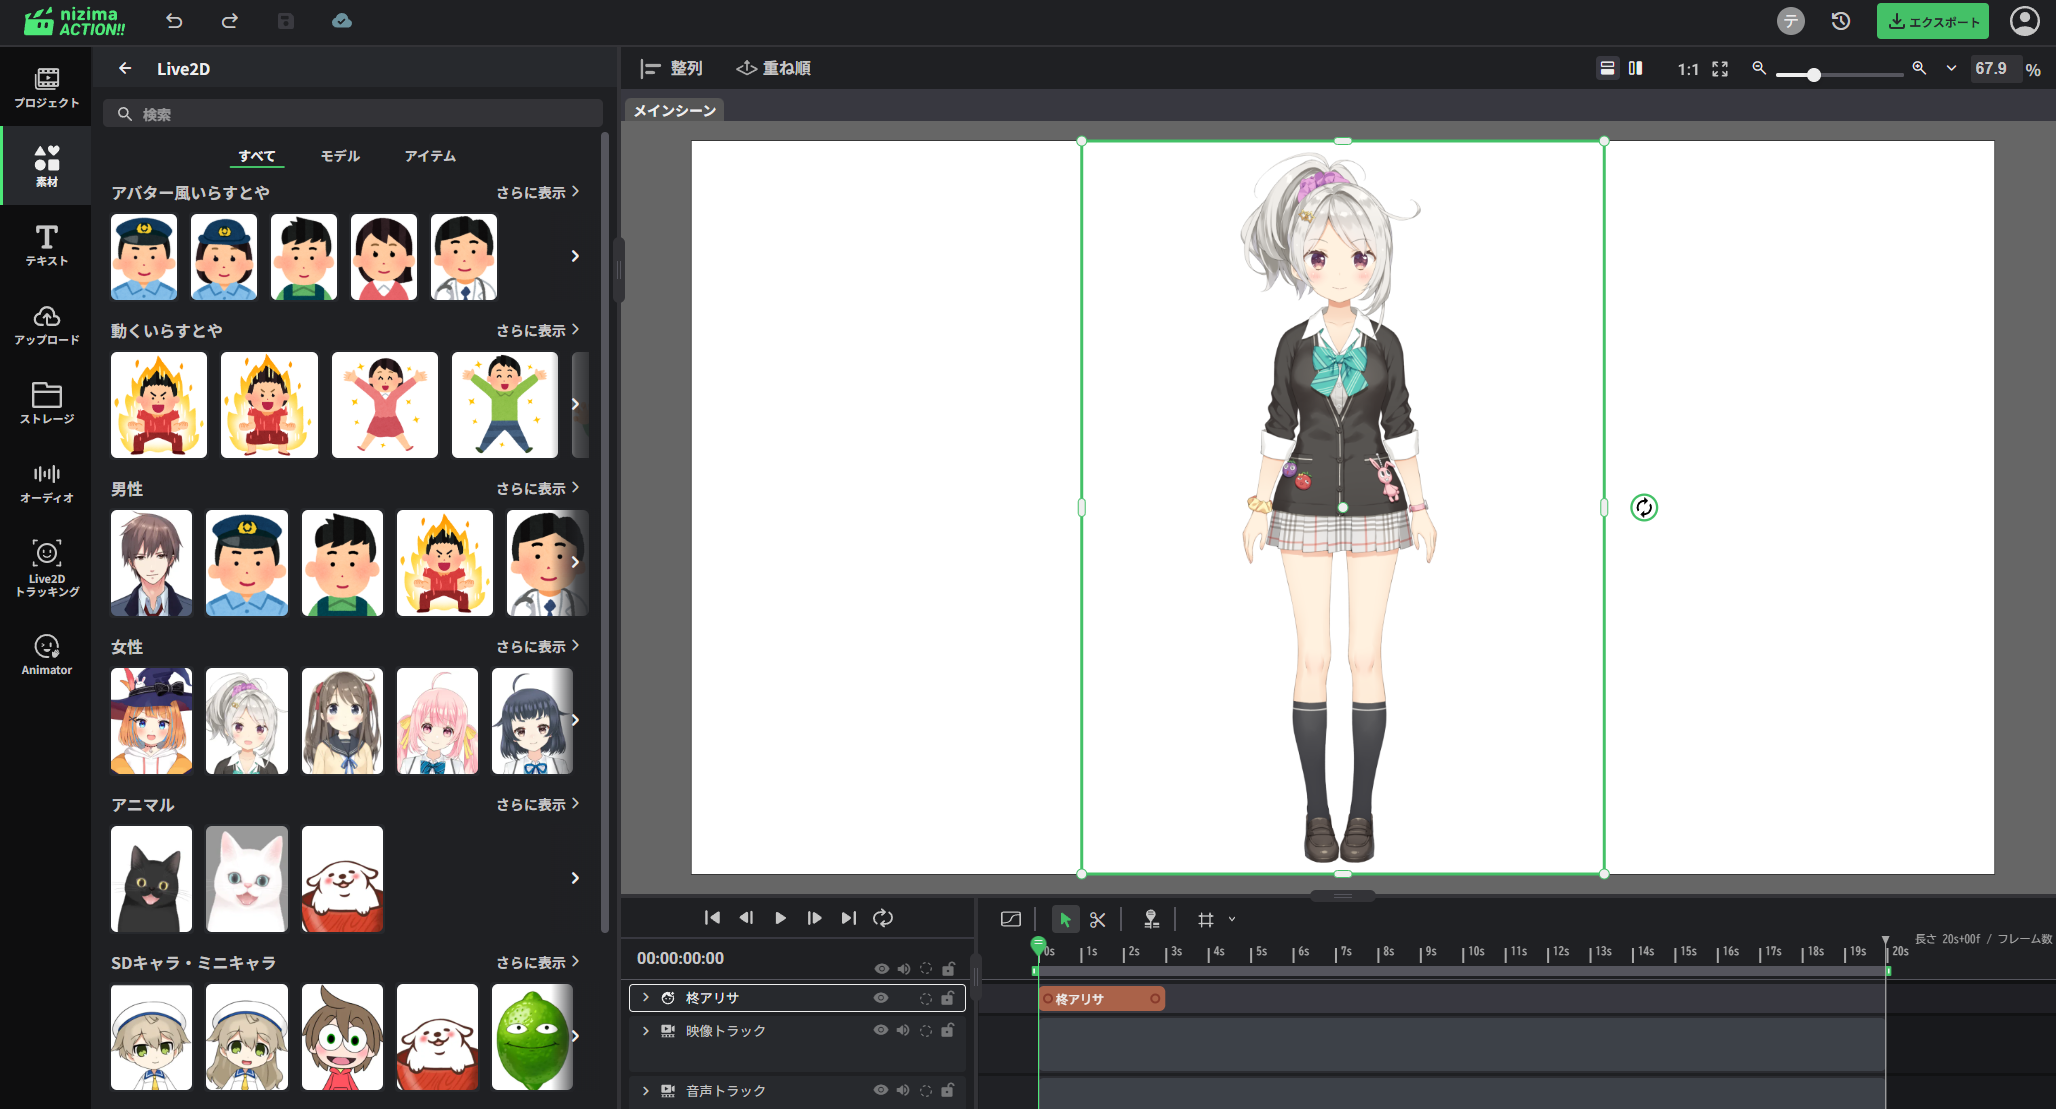
【Step 2】Adjusting the Model Position
Move, scale, or resize the model on the main canvas to position it nicely within the video frame.
2. How to Connect with a Tracking App (nizima LIVE & VTube Studio)
In nizima ACTION!!, you can animate a Live2D model by connecting with either nizima LIVE or VTube Studio. This section explains how to connect with each tracking app.
We will first explain how to connect with nizima LIVE.
VTube Studio users, please skip to the “How to Connect with VTube Studio” section.
【How to Connect with nizima LIVE】
Download nizima LIVE from the official nizima LIVE website in advance.
nizima LIVE can be linked even with the free version.
Plugin Settings on the nizima LIVE Side
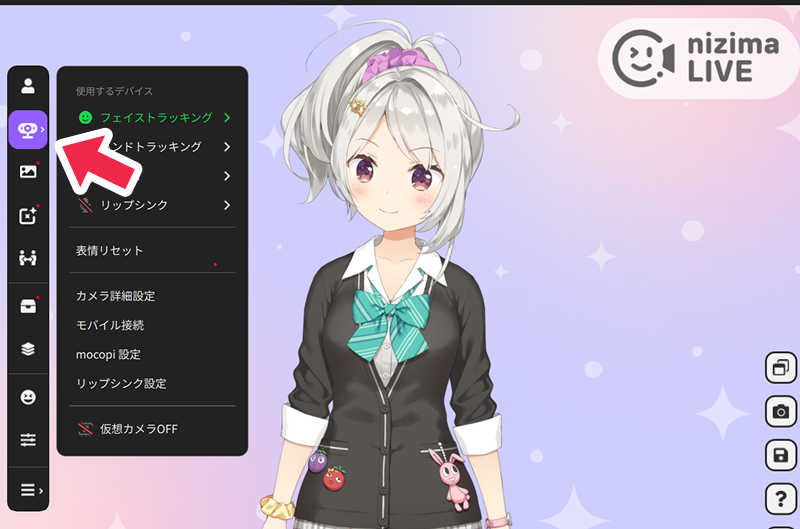
【Step 1】Launching nizima LIVE and Configuring the Camera
Launch nizima LIVE and configure your camera settings.
Select the camera you want to use from “Camera Settings” in the left menu, and confirm that your facial expressions and movements are being tracked in nizima LIVE.
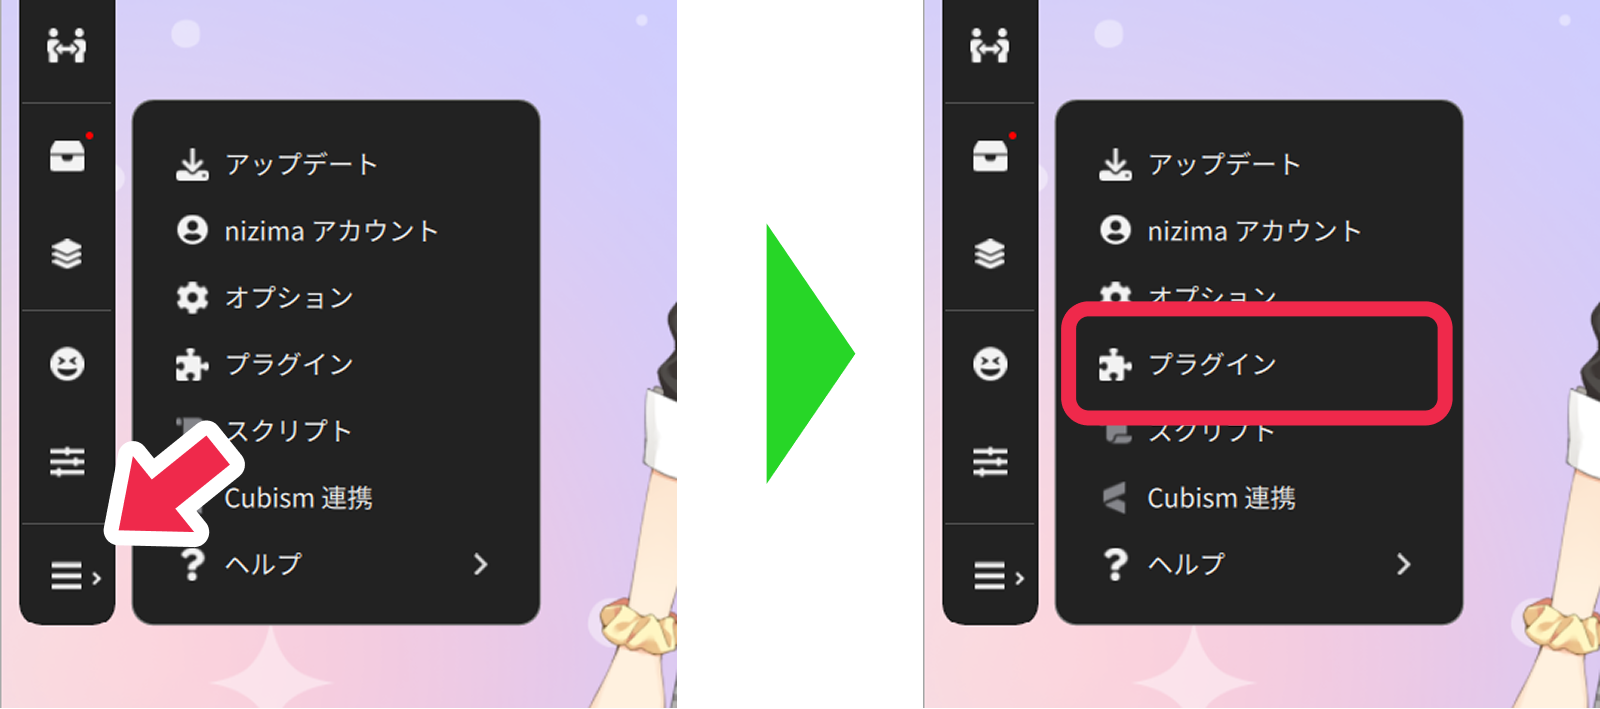
【Step 2】Opening the Plugin Manager
From the nizima LIVE menu, go to “Settings & Others” → “Plugins” and open the “Plugin Manager.”
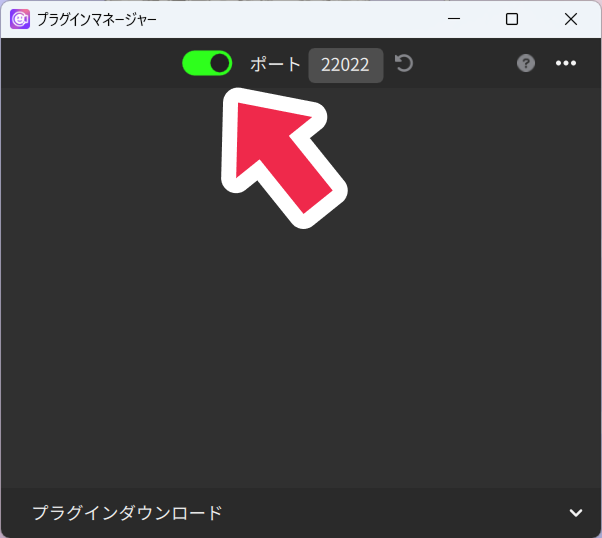
【Step 3】Enabling the Plugin Feature
Click the toggle at the top of the Plugin Manager to enable the plugin feature globally.
Connecting with nizima LIVE
【Step 1】Opening the Live2D Tracking Panel in nizima ACTION!!
In nizima ACTION!!, open the “nizima LIVE” tab from “Live2D Tracking” in the sidebar.
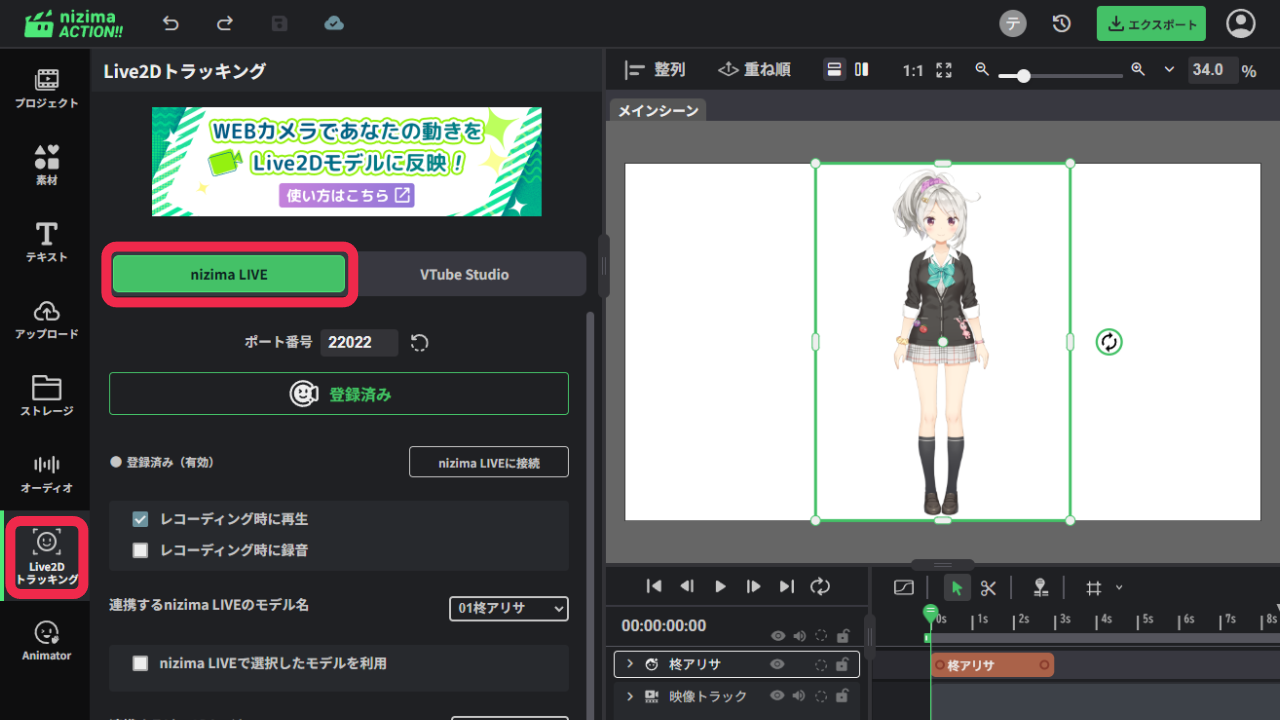
【Step 2】Selecting the Model to Link
From “Live2D Layer to Link,” select the model (Live2D layer) you want to connect to nizima LIVE.

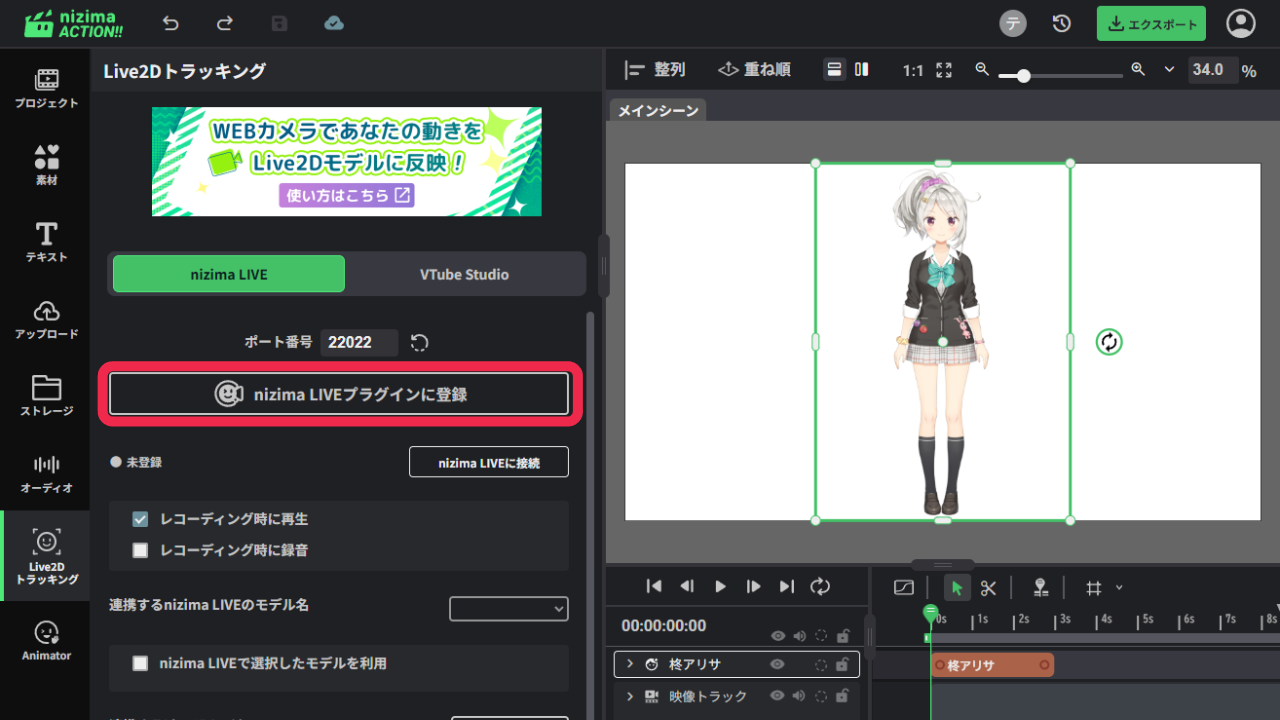
【Step 3】Registering the Plugin
Click “Register to nizima LIVE Plugin” and the plugin will appear on the nizima LIVE side.
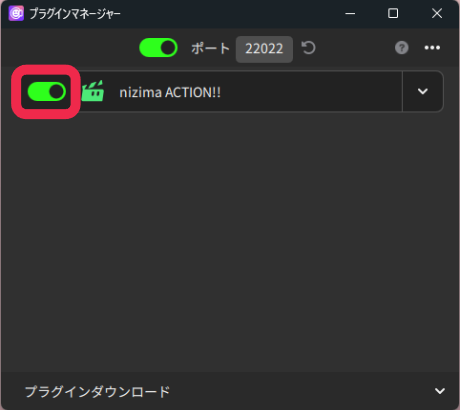
【Step 4】Enabling the Linked Plugin in nizima LIVE
Return to nizima LIVE and click the toggle for the plugin displayed in the Plugin Manager (shown as “nizima ACTION!!”) to enable it.
Once the toggle turns green, you are ready to go.
Capture
Connecting to nizima LIVE (Real-Time Capture)
Return to the Live2D Tracking panel in nizima ACTION!! and click “Connect to nizima LIVE.”
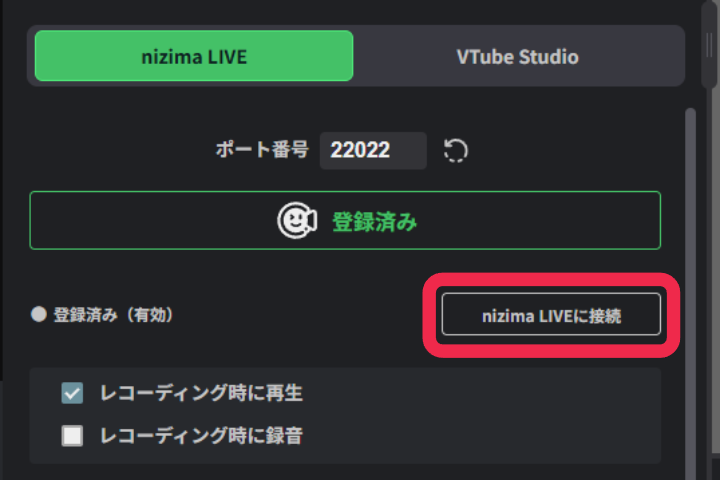
The nizima LIVE connection setup is now complete. Confirm that your movements captured in nizima LIVE are being reflected in real time on your model in nizima ACTION!!.
【How to Connect with VTube Studio】
Plugin Settings on the VTube Studio Side
【Step 1】Launching VTube Studio
Launch VTube Studio, which is downloaded on your computer.
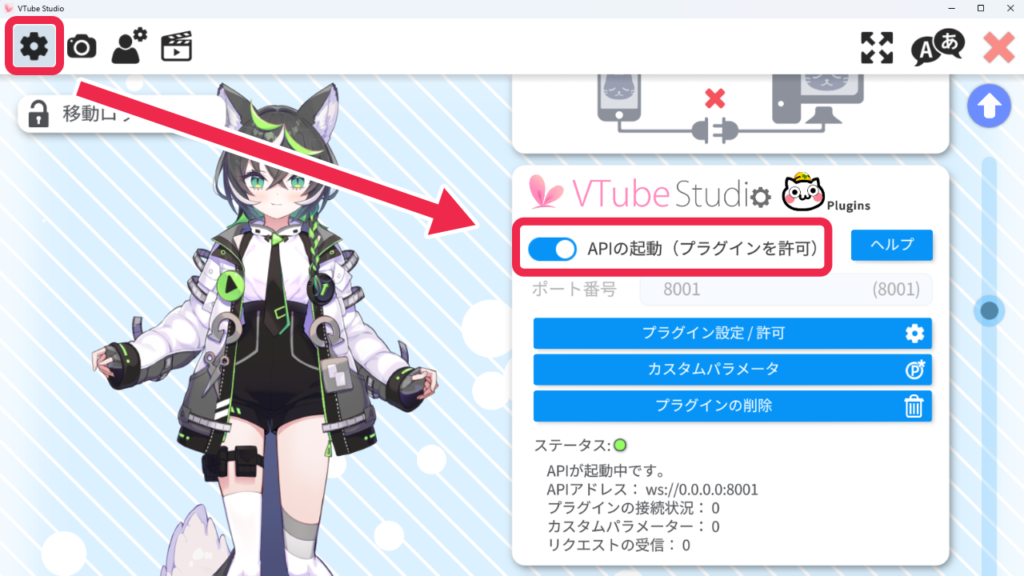
【Step 2】Opening the Plugin Manager
Open the settings screen and scroll down to “VTubeStudioPlugins.”
【Step 3】Enabling the Plugin Feature
Enable the “Start API (Allow Plugins)” toggle.
Connecting with VTube Studio
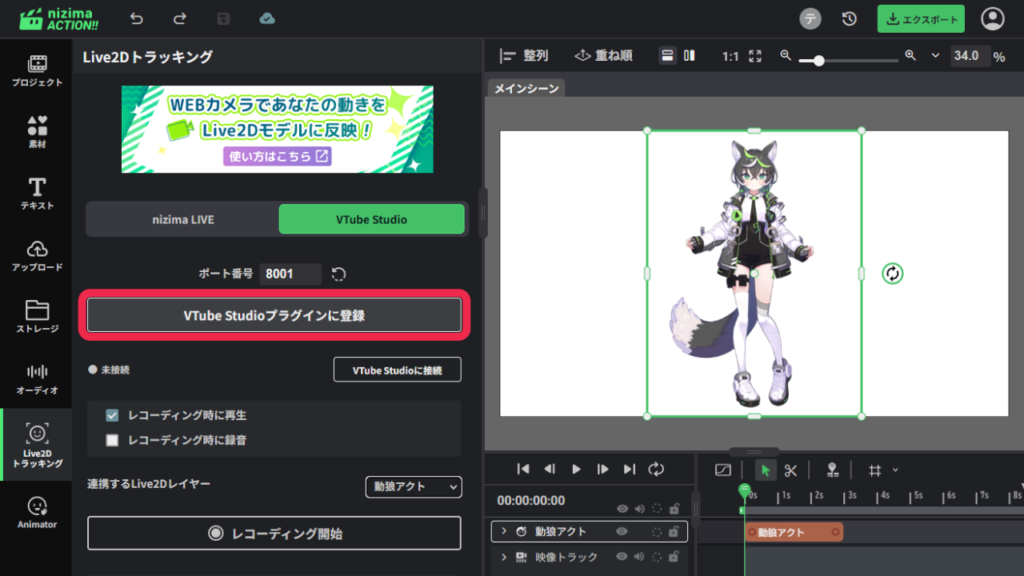
【Step 1】Opening the Live2D Tracking Panel in nizima ACTION!!
In nizima ACTION!!, open the “VTube Studio” tab from “Live2D Tracking” in the sidebar.

【Step 2】Selecting the Model to Link
From “Live2D Layer to Link,” select the model (Live2D layer) you want to connect to VTube Studio.

【Step 3】Registering the Plugin
Click “Register to VTube Studio Plugin” and the plugin will appear on the VTube Studio side.
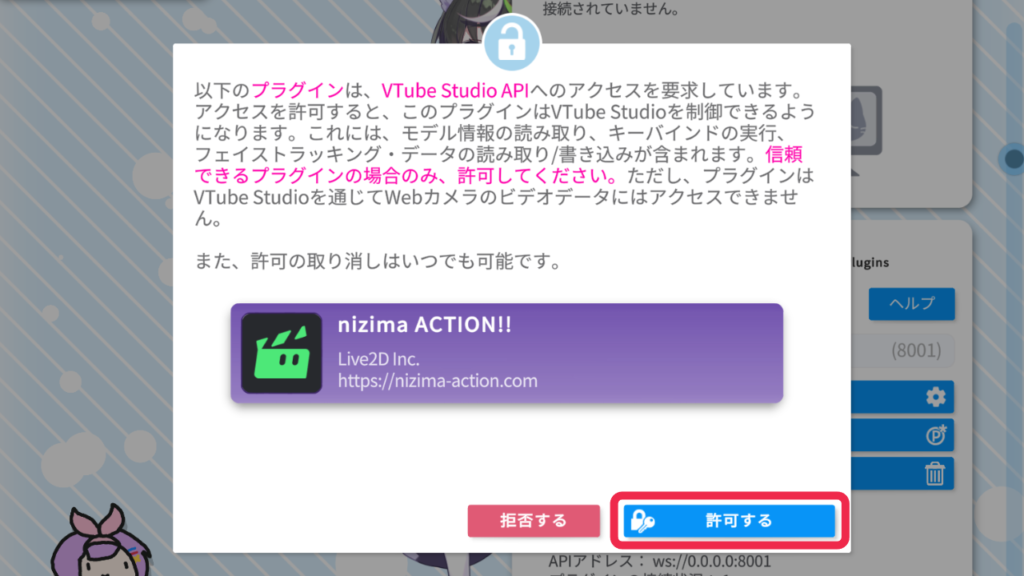
【Step 4】Enabling the Linked Plugin in VTube Studio
Return to VTube Studio and click “Allow” for the plugin displayed in the Plugin Manager (shown as “nizima ACTION!!”) to enable it.
Capture
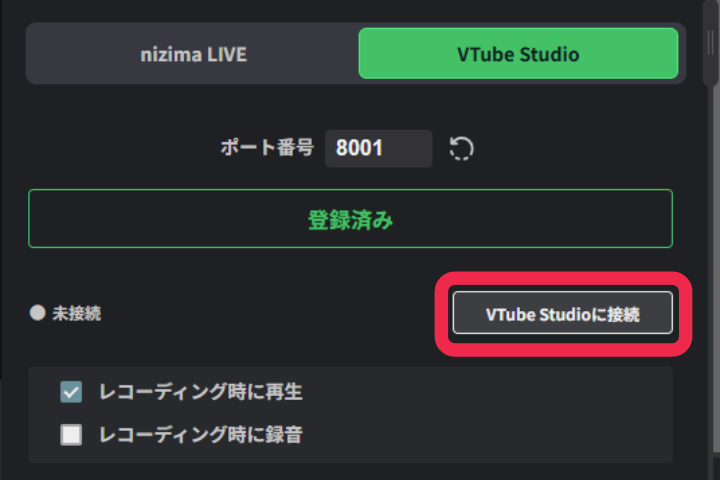
Connecting to VTube Studio (Real-Time Capture)
Return to nizima ACTION!! and click “Connect to VTube Studio” to link VTube Studio’s movements to your model in nizima ACTION!! in real time.
3. Recording (Common to nizima LIVE & VTube Studio)
This section explains how to record while connected to a tracking app.
【Step 1】Recording
Click “Start Recording” from the menu of your tracking app. After a 3-second countdown, the movements of the model connected to nizima LIVE or VTube Studio will be reflected in the video.
Click “Stop Recording” to finish recording.
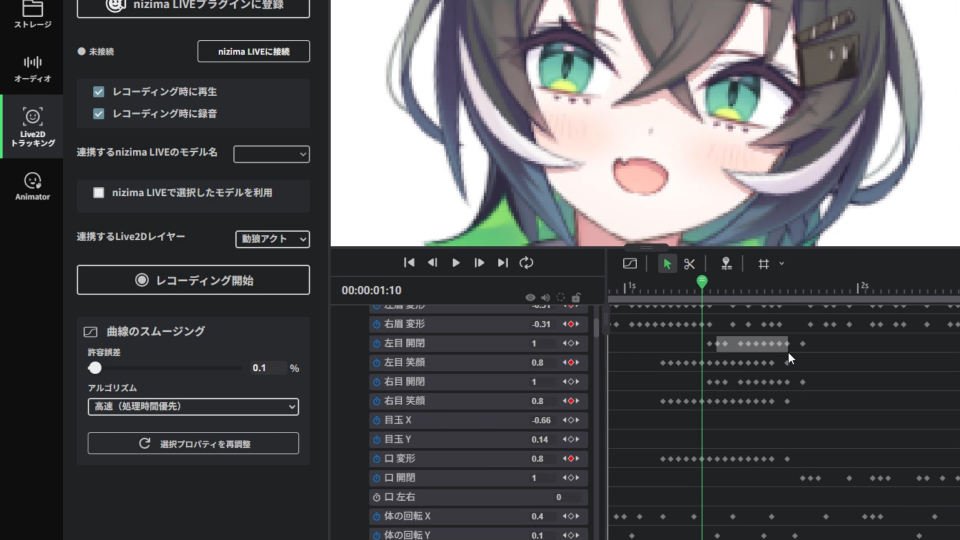
【Step 2】Reviewing the Recorded Movements
Play back the video on the timeline to review the recorded movements.
If you wish to adjust the movements, you can either redo the Live2D Tracking capture, or edit the parameters using the Dope Sheet or Curve Editor on the timeline for fine-tuning.
Useful Options During Recording
The following options are available during recording depending on your needs.
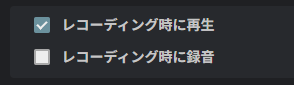
- Check “Play During Recording”
You can record movements in sync with the video as it plays back. - Check “Record Audio During Recording”
Audio from your microphone will be recorded along with the model’s movements.