表情・ポーズを切り替える
最終更新: 2020年1月30日
ここでは、UnityのMecanimを用いて表情変化・服装変化を行うための説明ページとなっています。
概要
Cubism 2.1では表情を変えるためにexpression.json、Pose.jsonがありましたが、Cubism 3 で廃止されました。
Cubims 3 以降のCubism SDK for UnityではUnityの機能であるMecanimを用い、それに代わる実装が可能になっています。
表情と服装のどちらも、Animatorに作成したBlendTreeの値をスクリプトから操作することで表現します。
詳細
Cubism 2.1ではexpression.json、Pose.jsonがありましたが、Cubism 3で廃止されました。
そのため、表情・服装の変化はUnityの機能であるMecanimを用いて行います。
今回は、モデルにアニメーションを適用させた状態から表情の切り替えを行います。
モデルにアニメーションさせるまでは「アニメーションの再生」をご覧ください。
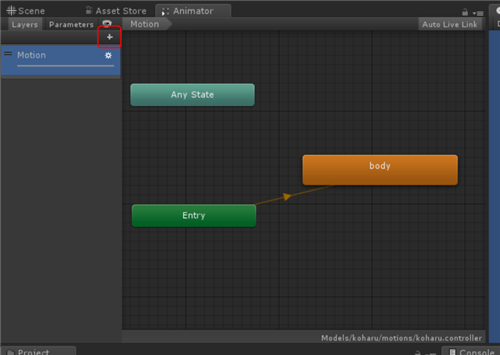
ここでは、AnimatorControllerのレイヤーの名前を“Motion”に変更しています。
この状態で、AnimatorウィンドウのLayersに新規レイヤーを作ります。
赤枠内の+ボタンを押し、新規レイヤーを作成し、名前を“Expression”にします。
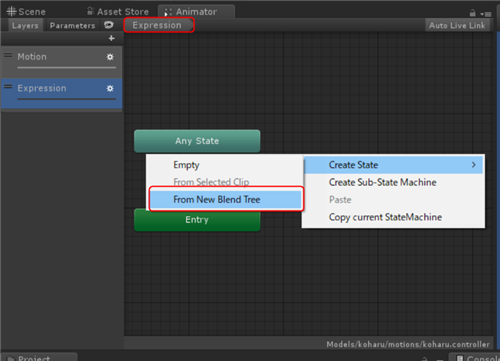
その後、Expressionレイヤーを選択した状態で“右クリック”→“Create State”→“From New Blend Tree”を選択し、新規BlendTreeを追加します。
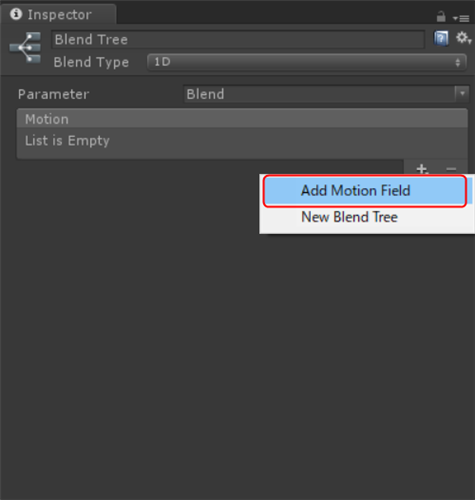
追加後、BlendTreeをダブルクリックし、BlendTreeの編集画面へ移動します。
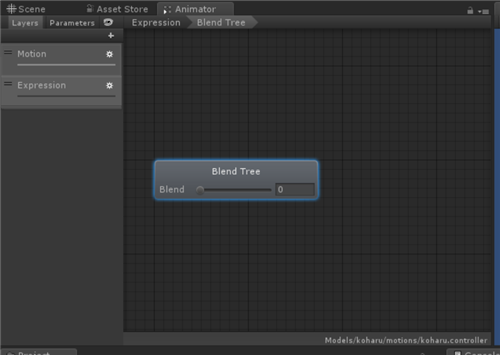
BlendTreeクリック後、InspectorウィンドウのMotionの+ボタンを押し、“Add Motion Field”を押します。
そうするとブレンドするためのモーションを追加する項目が現れます。
今回は2つの表情をブレンドするのでもう一度“Add Motion Field”を押し、モーションの項目を増やします。
その後、以下のように2つの表情を適用させます。
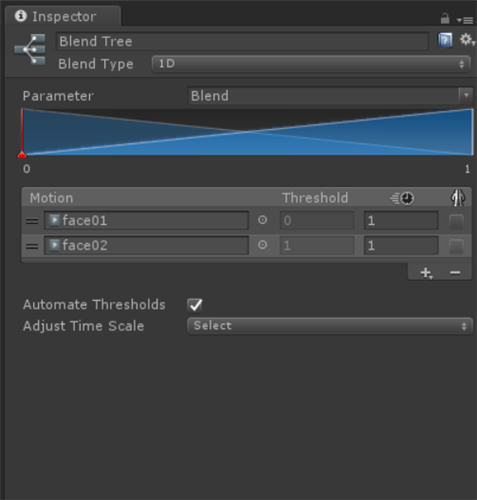
このExpressionレイヤーのWeightと内部のBlendをスクリプト上から変更します。
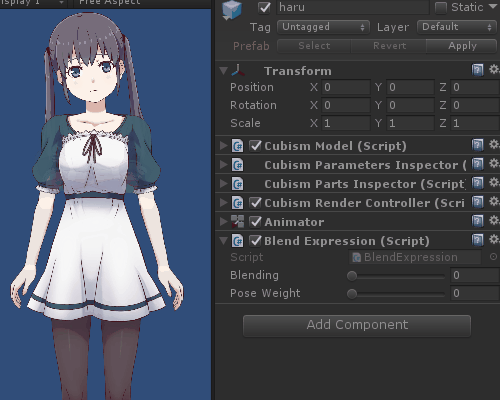
新規でC#スクリプトを作成し、名前を“BlendExpression.cs”とします。
using UnityEngine;

public class BlendExpression : MonoBehaviour
{
    private Animator _blendTree;
    private int _expressionIndex;

    [SerializeField, Range(0f, 1f)]
    public float Blending = 0f;

    [SerializeField, Range(0f, 1f)]
    public float ExpressionWeight = 1f;

    void Start()
    {
        _blendTree = GetComponent<Animator>();

        _expressionIndex = _blendTree.GetLayerIndex("Expression");
    }

    void Update()
    {
        //Fail getting animator.
        if (_blendTree == null)
        {
            return;
        }


        //Setting Blend Param and Weights.
        _blendTree.SetFloat("Blend", Blending);

        if (_expressionIndex != -1)
            _blendTree.SetLayerWeight(_expressionIndex, ExpressionWeight);

    }
}
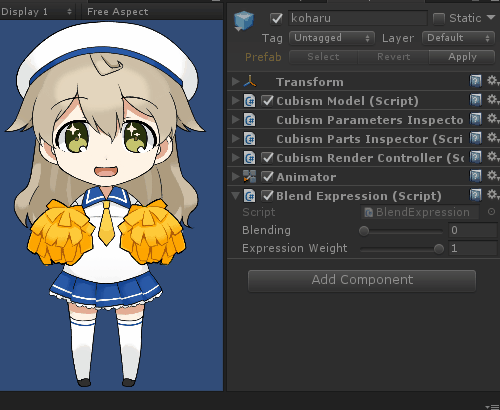
コードを記述後、koharuを選択し、“Add Component”から“BlendExpression”と検索し、スクリプトを追加します。
これでスクリプト上から表情の切り替えが行えるようになりました。
“ExpressionWeight”は、AnimatorのLayersに作成したレイヤーのWeightに適用します。
また、同様にBlendTreeのWeightを取得し、スクリプト上から数値を変更することで、服装を変更することができます。