尝试使用跟踪功能
我们将详细介绍如何在Adobe® After Effects®software中使用Cubism AE插件的跟踪功能使粒子跟随。
Cubism AE插件是一个可以直接在After Effects上显示Cubism模型并处理动态的插件。
更多信息请参考Editor手册中的“关于AE插件”。
什么是跟踪功能?
该功能允许您针对特定的图形网格跟随层。
可以使图像和效果等更有效地跟随模型的动作。
有关详细信息,请参考Editor手册中的“跟踪功能”。
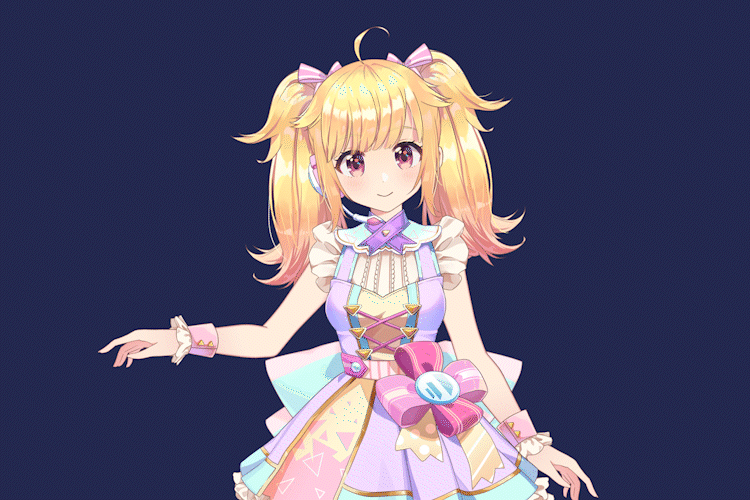
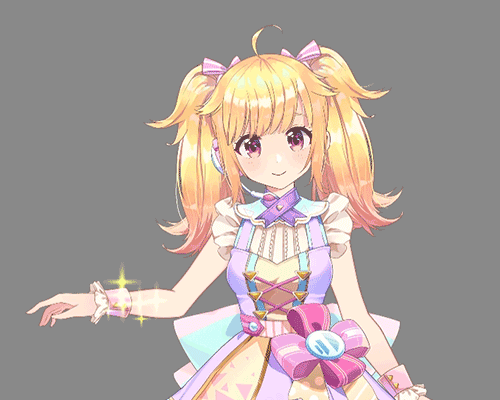
这次,将介绍导入使用Cubism Editor创建的模型和动态文件并使光粒子跟踪右手的步骤。
前期准备
输出嵌入数据
从Cubism Editor输出必要的嵌入数据。
有关输出方法,请参考Editor手册的“嵌入数据”。
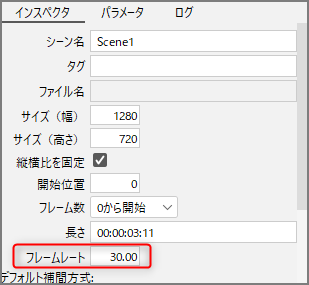
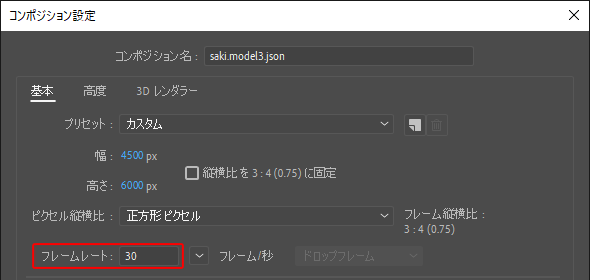
TIPS
确保动态文件和合成的帧率相同。
下载插件
从以下网站下载Cubism AE 插件并安装。
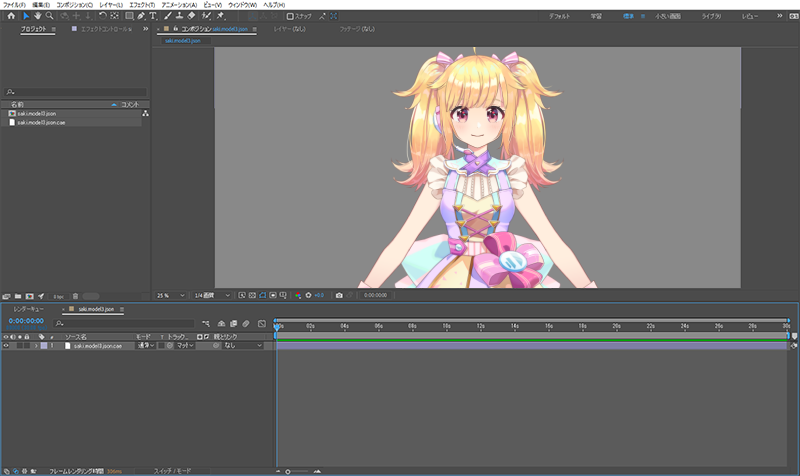
在Adobe After Effects中显示模型
有关详细步骤,请参考Editor手册的“显示模型”。
导入动态文件
有关详细步骤,请参考Editor手册的“动态导入/输出”。
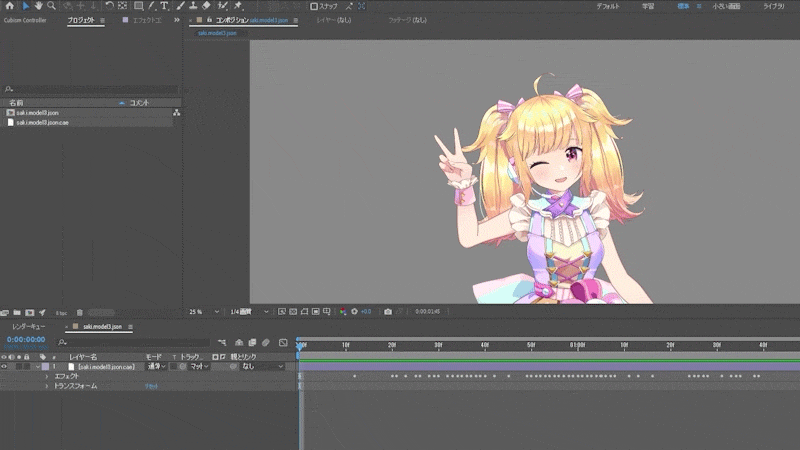
设置附加点
指定进行跟踪的图形网格。
这次,我们在手腕上设置一个附加点。
打开Cubism Tracker
打开设置动画的模型层的[Live2D Cubism Renderer]效果,单击[Tracking] → [Open]。
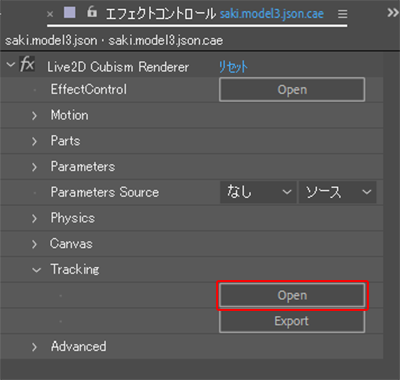
TIPS
如果没有显示面板,则选中[Window]菜单 → [Extensions] → [Cubism Tracker]。
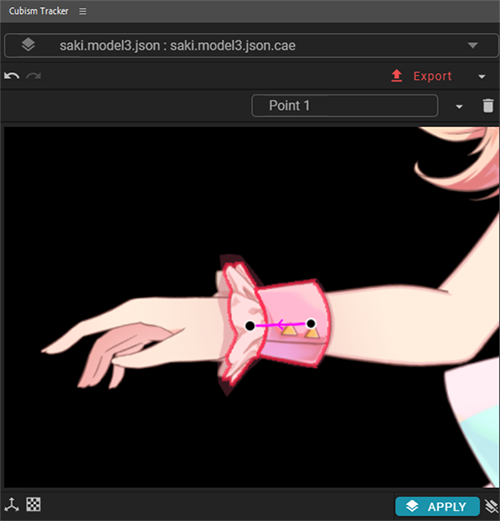
在您想要跟踪的图形网格上设置附加点
将鼠标悬停在建模视图上,图形网格的颜色会发生变化,拖动鼠标设置附加点。
输出跟踪信息
设置好附加点后,点击[Export]按钮保存跟踪信息。
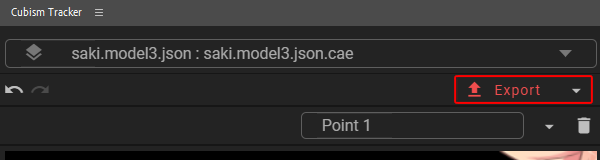
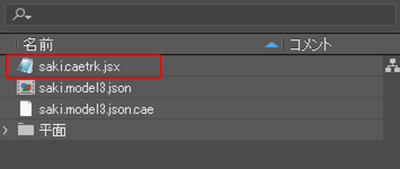
输出完成后,跟踪信息将输出到[.jsx]文件并自动注册到项目面板中。
注意事项
注意不要删除[.jsx]文件。
创建空层并应用跟踪
创建空层
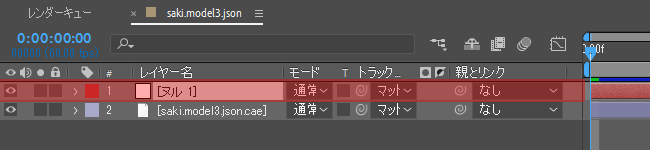
选择[层]菜单→[新建]→[空物体],创建一个应用跟踪的空层。
空层已追加到时间线中。
TIPS
通过对空层应用跟踪,可以有效地进行编辑。
例如,您将能够只处理部分参数,灵活地应对结构变化。
将跟踪应用于空层
选择之前创建的空层(①)与Cubism Tracker面板中的“附加点”(②)。
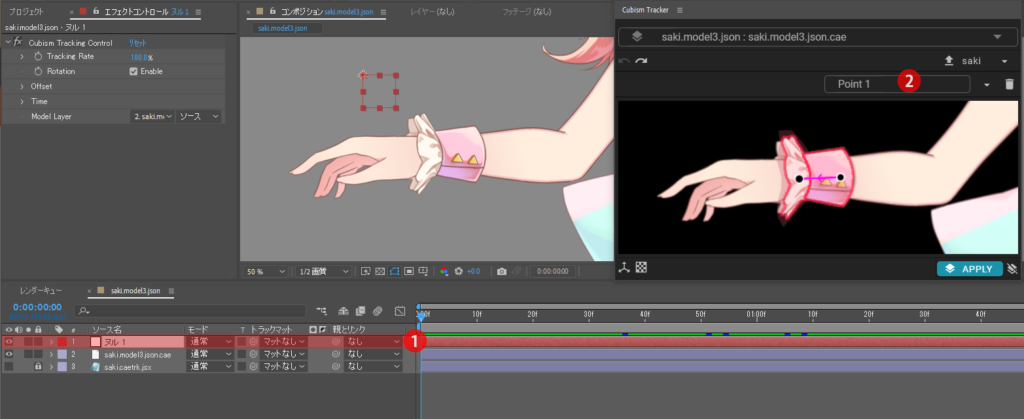
单击Cubism Tracker面板中的[APPLY]按钮(③)。
效果和表达式将追加到选择层以操作跟踪。
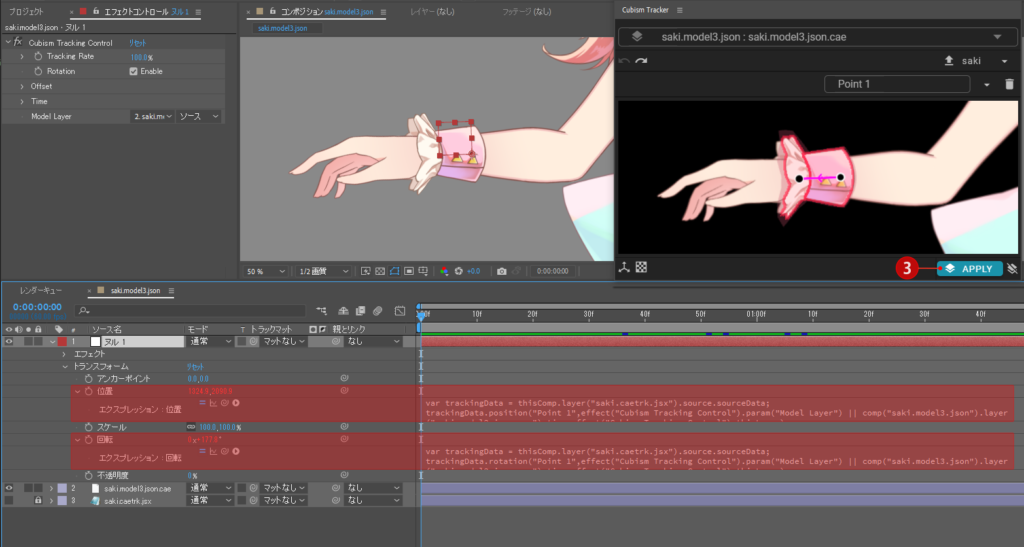
设置了附加点的图形网格已经能够跟踪空层。

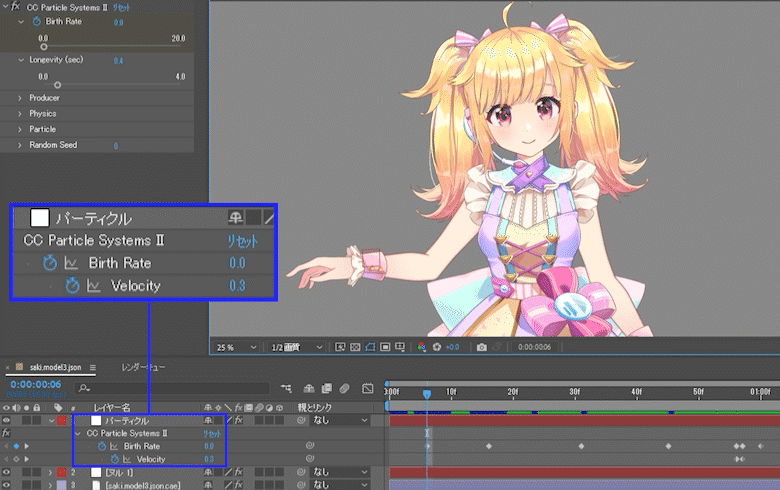
创建粒子
选择[层]菜单→[新建]→[平面],为粒子创建平面层。
请将名称更改为“粒子”。
选择创建的粒子层,选择[效果]菜单→[模拟]→[CC Particle SystemsⅡ]。
层中追加了[CC Particle SystemsⅡ]效果。
打开效果操作并根据喜好创建粒子。
这次设置的值如下。
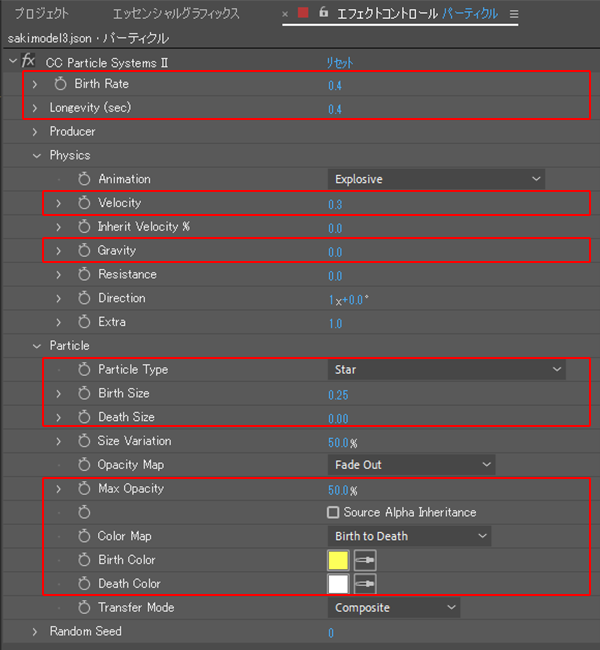
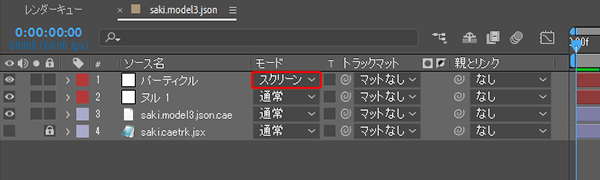
将粒子渲染模式设置为[屏幕]。
让粒子跟踪
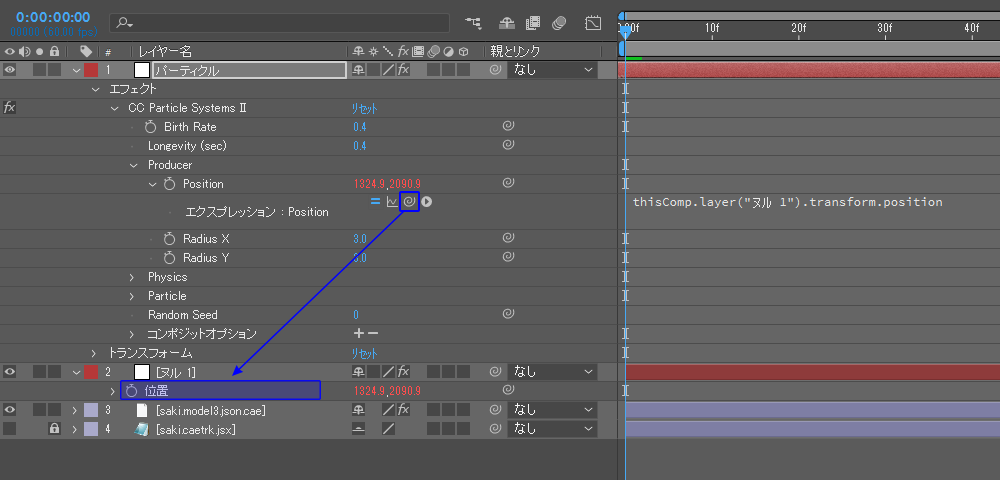
链接到应用了跟踪的空层的座标。
拖动鼠标至粒子层[变换]→[位置]旁边的“链接到父级”标记,将父级和子级附加到空层的[变换]→[位置]。
TIPS
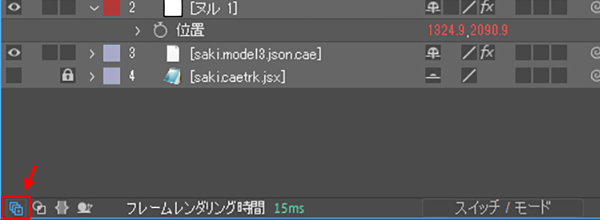
如果看不到“链接到父级”标记,请单击左下角的“显示切换”按钮。
座标已链接,现在可以跟踪粒子。
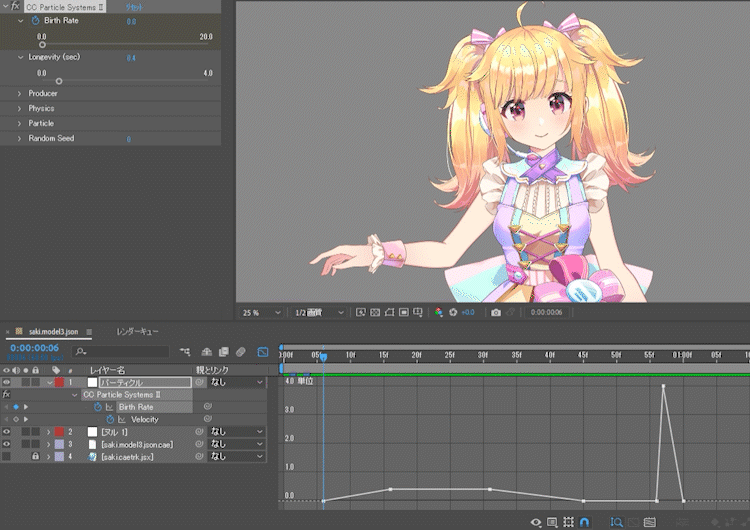
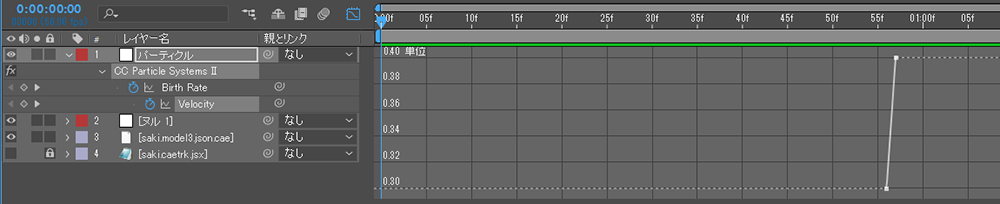
调整粒子
请通过调整粒子的外观和扩散来使动画更加丰富。
这次,将调整“CC Particle SystemsⅡ”效果的“Birth Rate”和“Velocity”值。
| 项目 | 说明 |
|---|---|
| Birth Rate | 在决定姿势之前,将值设置为“0.0”,一旦决定姿势,将其设置为“4.0”,然后设置为“0.0”来调整效果量。 |
| Velocity | 姿势确定后,将值增加到“0.4”并设置为当效果消失时扩散。 |
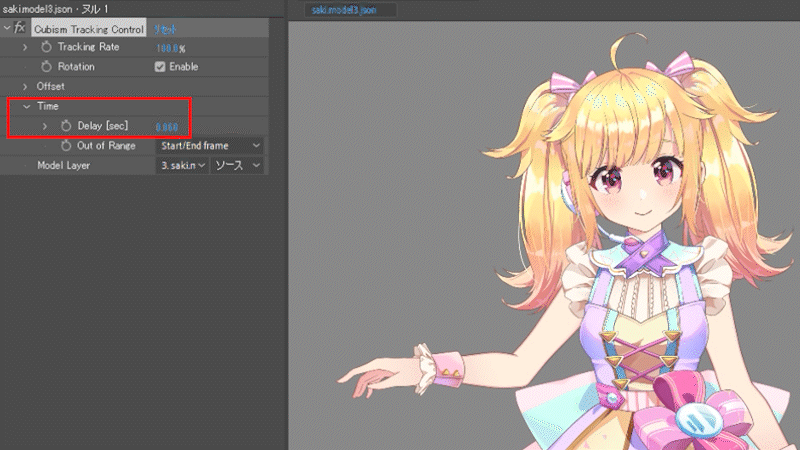
应用篇 调整时机
亦可延迟粒子跟踪,以实现粒子跟随手的表达。
打开空层的效果操作。
将[Cubism Tracking Control] → [Time] → [Delay]值变更为0.06。
现在能够调整粒子跟踪的时机。
此外,您还可以在跟踪功能设置中进行详细调整。
有关详细信息,请参考Editor手册中“跟踪功能”中的“追加调整”。