Transition
By using transitions, you can effectively switch scenes, layers, etc. in your video and add accents to the production.
Make use of a variety of transitions to create attractive videos.
Adding transitions
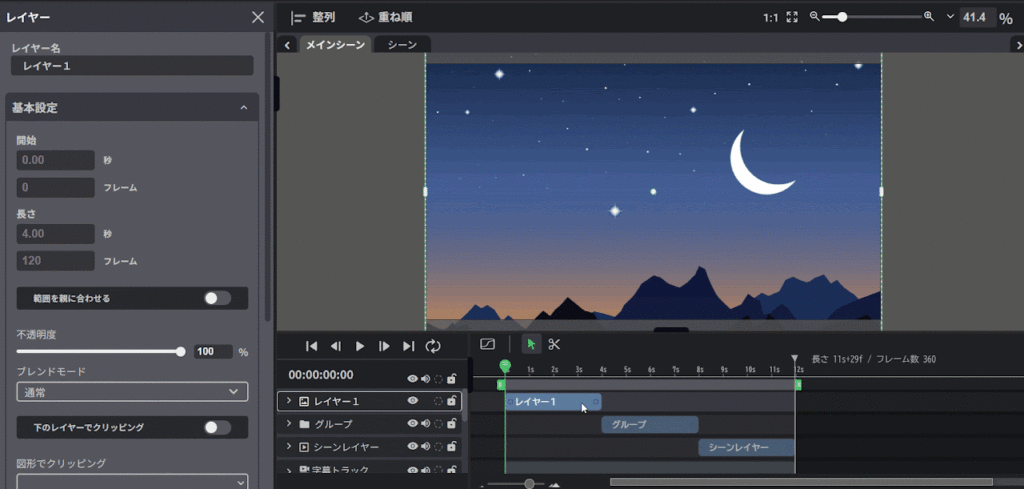
Prepare two layers on the timeline to which you want to apply a transition.
Note: Transitions can be added not only to layers but also to groups and scene layers.
Hover over the circle at the back edge of the first layer, and the circle will turn green.
Click and drag it to the front edge of the second layer you wish to connect. Move the cursor to the circle at the front edge of the second layer, which will turn green, and release the cursor at that position.
When the layers are connected to each other by green lines, it indicates that the transition is ready to be set.
Because the effect is not set at this point, select the effect you want to use (Dissolve, Wipe, etc.) from the “Transition list” displayed in the palette.
Side-by-side layers in a track can also have transitions set.

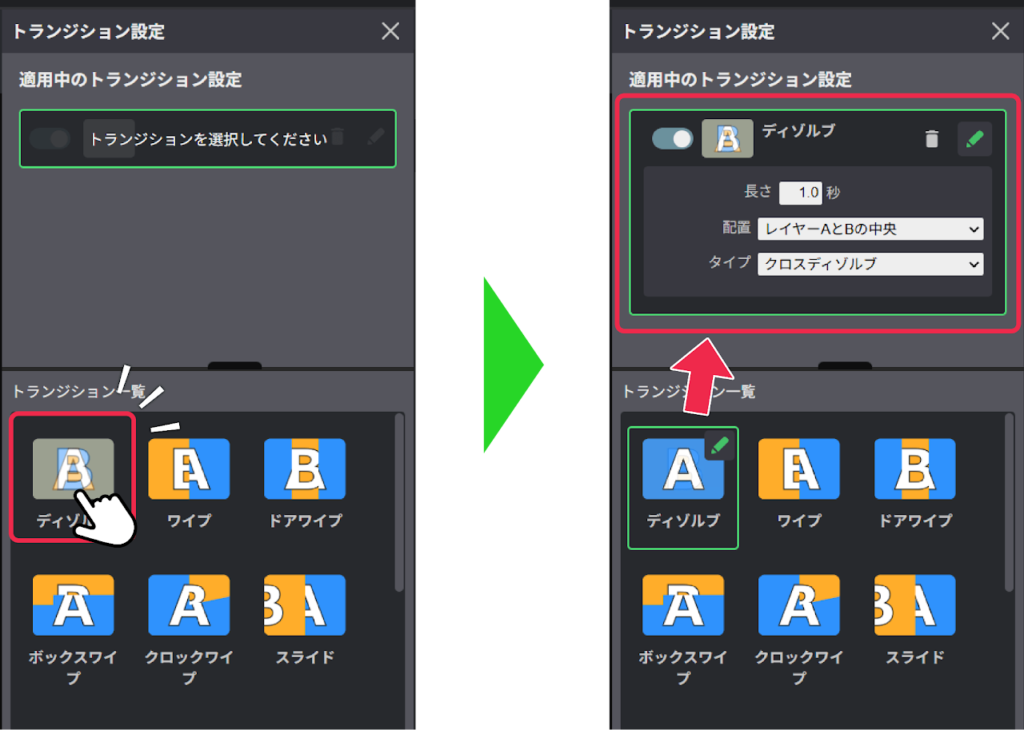
Editing transitions
When layers are connected to each other, “Transition settings” will appear in the palette.
The effect is applied by selecting the transition you wish to use from the list.
The length of the transition, the position where the transition starts, and the type of effect can be set from “Settings for the transition being applied.”
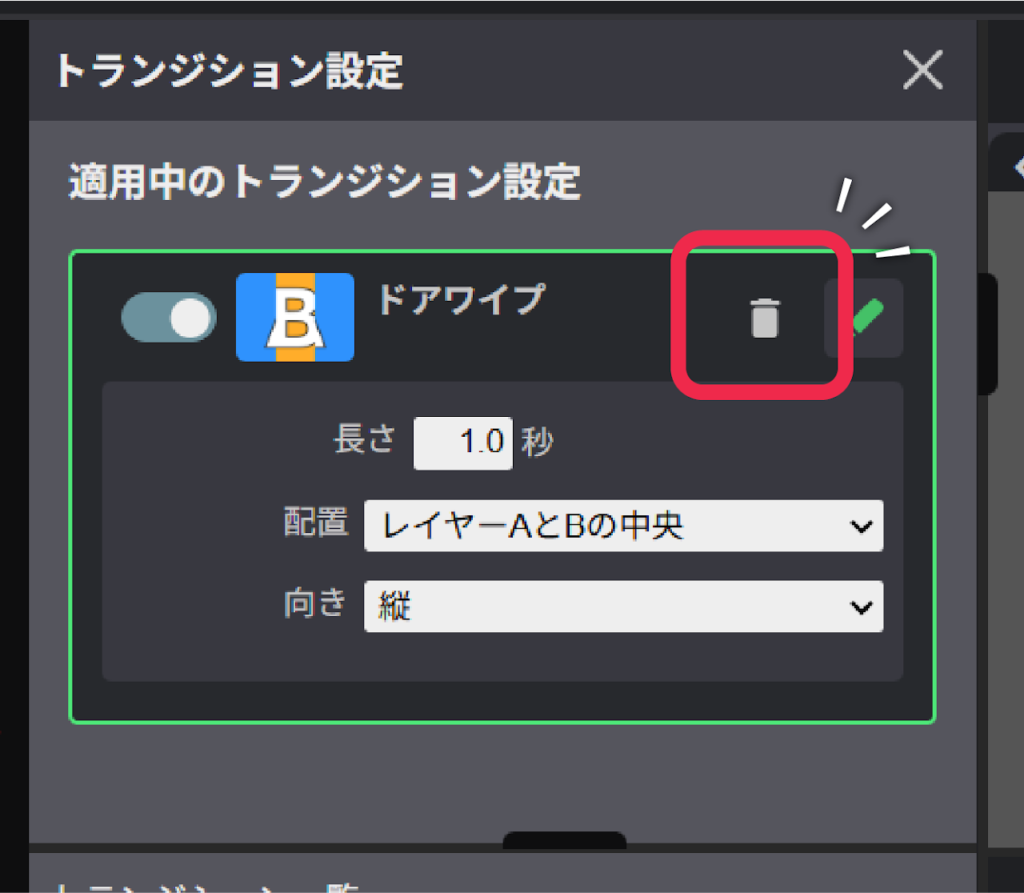
Deleting transitions
Transitions that are no longer needed can be deleted with the trash can icon in the “Settings for the transition being applied” section.
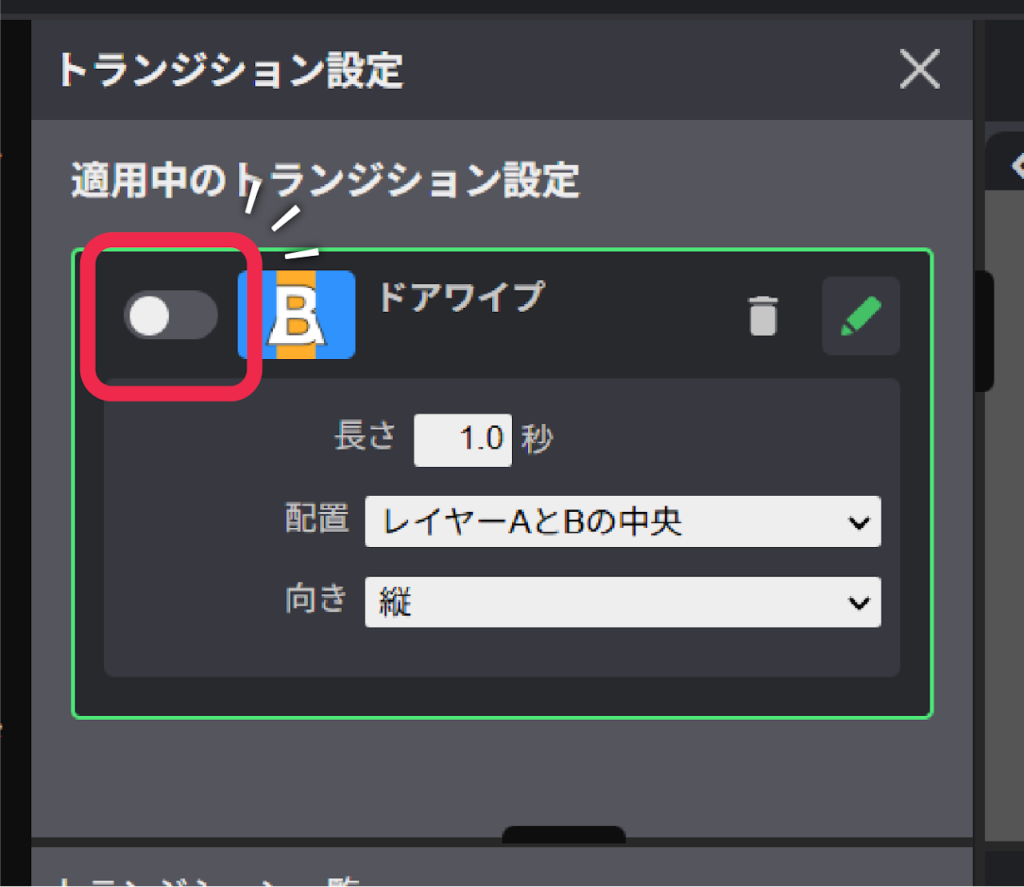
You can also temporarily turn off the transition.
Transition types

Dissolve
The first layer gradually fades out while the next layer fades in and overlaps it.

Wipe
As soon as the first layer disappears, the next layer appears from a specific direction.

Door Wipe
The first layer splits vertically or horizontally from the center and switches to the second layer, like a door opening and closing.

Box Wipe
The second layer appears as it rotates toward the center or appears randomly.
Radial Wipe
The next layer appears, spreading out in a circular pattern like the hands of a clock turning.

Slide
The second layer appears as a slide from one direction to the other, up, down, left, or right.

Push
The second layer appears on the screen as if it is pushing out the first layer.

Split
The first layer is split from the center to the left, right, or top and bottom, and a second layer appears.

Band Slide
The second layer appears as it slides in multiple banded parts.

Iris
The second layer appears with a cross, circle, or other spreading effect.

Zoom
The first layer is enlarged while the second layer is reduced.

Page Turn
The second layer appears in a page-turning motion.
Transition notes
Transitions can be applied between layers belonging to different groups only if the groups have no effect on the expression.
Otherwise, the transition line is displayed in red and the transition effect is disabled.
Cases where the groups have no effect on the expression
- Group rendering mode is “High speed.”
- The opacity of the group is 100%.
- No effects, coordinate transformations, or animation effects are applied to the group.
- No clipping mask is applied to the group and the group is not used as a clipping mask.
- The blend mode of the group is “Normal.”