Pattern layer
Updated: 06/17/2025
Tiling and scrolling makes it easy to create backgrounds and decorations with movement.
How to create a pattern layer
The layer function for generating repeating patterns and background designs.
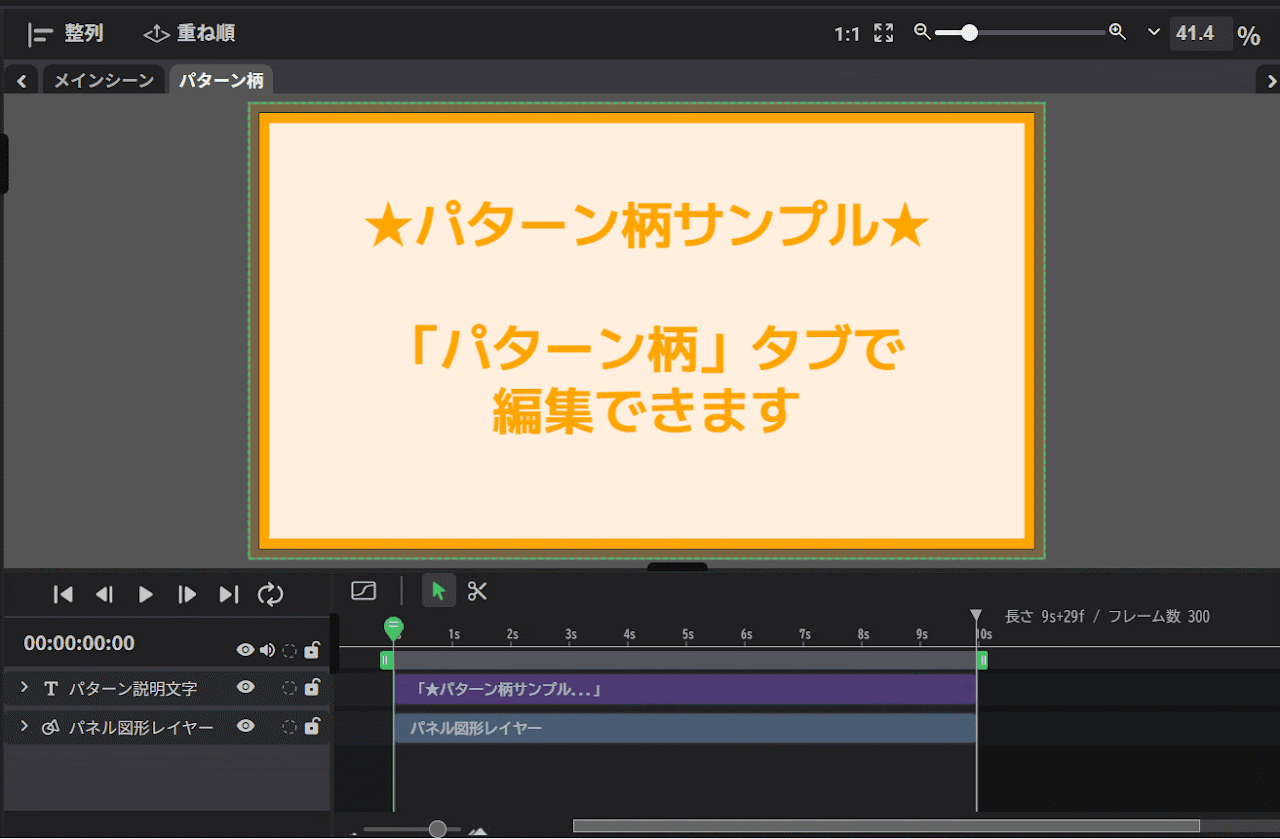
Select “New layer ▶” from the right-click menu and select “Pattern” to create a new pattern layer.
When the pattern layer is created, the “Pattern” tab is created on the canvas.
Switch to the tab and edit the layer, which will be reflected on the canvas in the main scene.
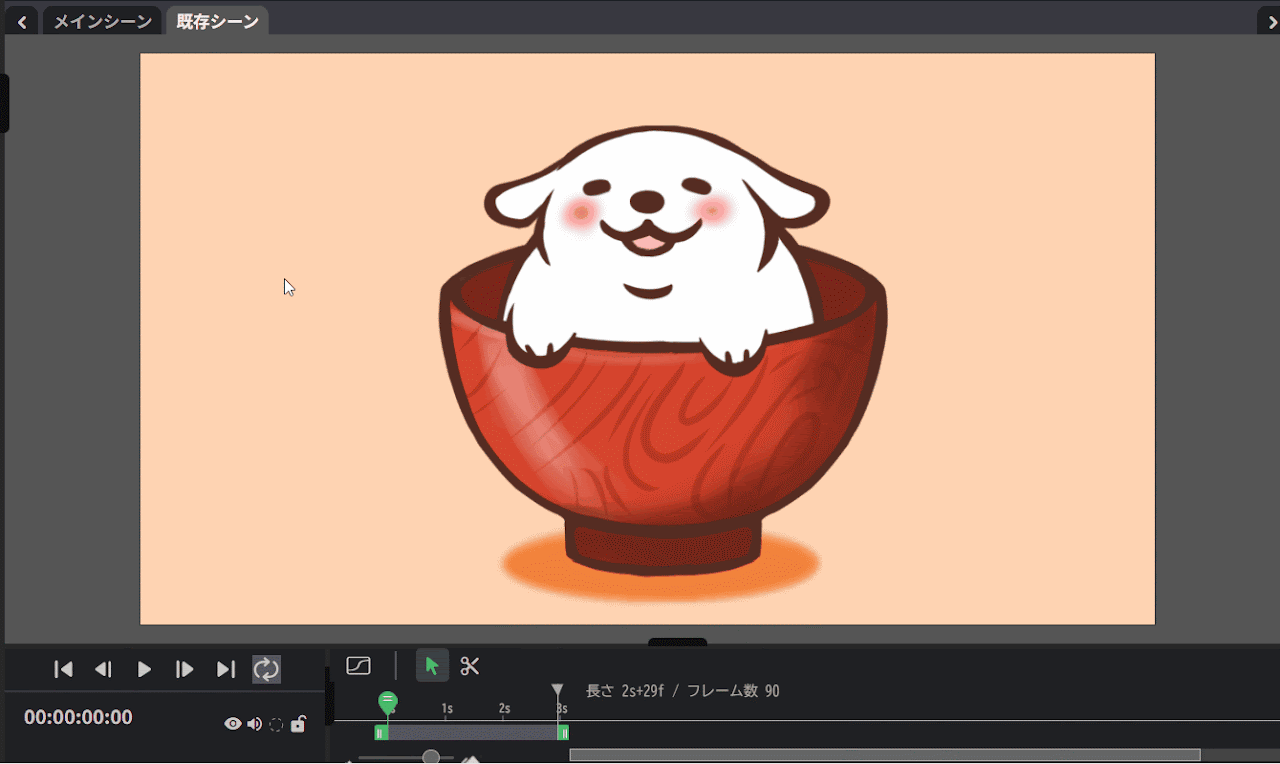
Creating from existing layers
When a new pattern layer is created, the existing scene, if any, is automatically incorporated as a pattern layer.
To use another scene as a pattern, select it from “Pattern scene” in Pattern Settings.
Pattern layer settings
Adjust the size of the asset and the scrolling speed from the palette.
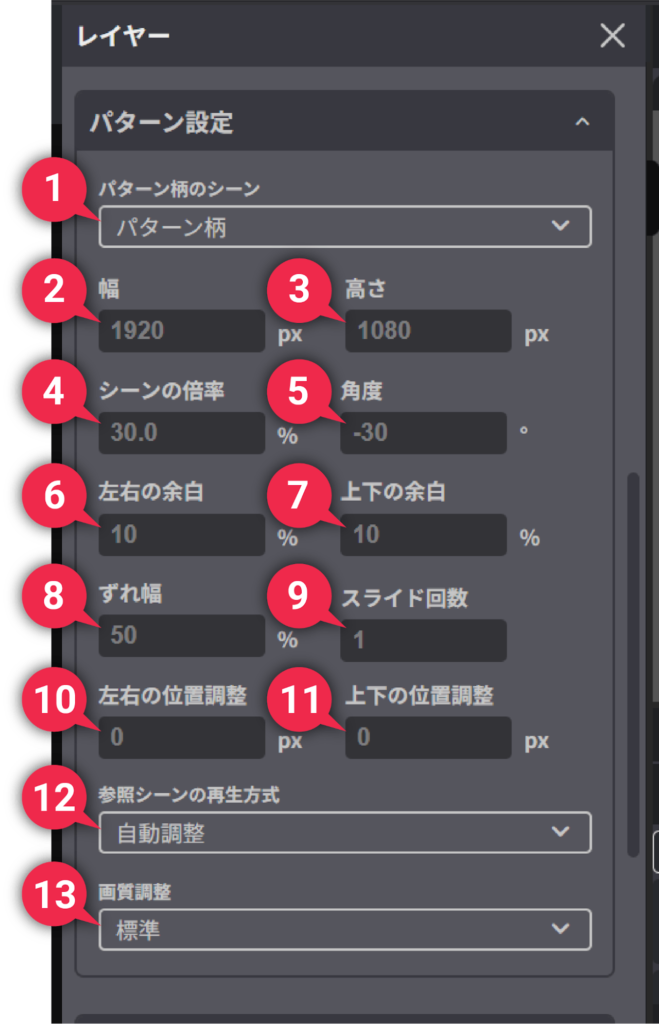
- (1) Pattern scene:
- Specify the scene to be applied to the pattern layer.
The scene set here is displayed repeatedly in the pattern layer. - (2) Width:
- Set the horizontal size of the pattern layer. This will be the width of the image to be used internally for pattern generation.
If used as a background for a scene, it should match the width of the scene. - (3) Height:
- Set the vertical size of the pattern layer. This will be the height of the image to be used internally for pattern generation.
If used as a background for a scene, it should match the height of the scene. - (4) Scene scale:
-
Adjust the display scale of the scene referenced in the pattern layer.
- Increasing the value enlarges the reference scene and makes it appear larger.
- Decreasing the value reduces the size of the reference scene and makes it appear smaller.
- If set to 100%, the image will be displayed at the same size as the original scene.
- (5) Angle:
-
Adjust the angle of the entire pattern layer.
- Increasing the value rotates the pattern clockwise.
- Decreasing the value rotates the pattern counterclockwise.
- (6) Horizontal margins:
-
Set how much margin to add to the left and right of the scene in the pattern.
- Increasing the value creates more space on the left and right sides, increasing the distance between the scenes in the pattern.
- Decreasing the value results in a closer alignment of the left and right sides, decreasing the distance between the scenes in the pattern.
- (7) Vertical margins:
-
Set how much margin to add above and below the scene in the pattern.
- Increasing the value creates more space above and below, increasing the distance between the scenes in the pattern.
- Decreasing the value results in a closer alignment of the top and bottom, decreasing the distance between the scenes in the pattern.
- (8) Deviation:
- Adjust how much the pattern in each row is shifted in the repeated placement of the pattern.
- (9) Slide count:
-
Set the number of times the pattern will slide between the beginning and the end of the scene where the pattern layer is placed.
Note: The number of slides from the beginning to the end of a scene is limited to an integer number in order to facilitate the creation of videos in which the pattern continues to move indefinitely by repeat playback of the completed video.
- Increasing the value slides the pattern more in the scene. In addition, the shorter the scene, the faster the movement.
- Decreasing the value decreases the number of slides, and a negative value slides the pattern in the opposite direction.
- If set to 0, the pattern will not slide and will remain fixed.
- (10) Horizontal position adjustment:
-
The display position of the scene referenced in the pattern layer can be adjusted horizontally.
The pattern position can be shifted from the center of the screen or aligned to a specific position.- Increasing the value moves the pattern to the right.
- Decreasing the value moves the pattern to the left.
- If set to 0, the pattern will be placed in the default center position.
- (11) Vertical position adjustment:
-
The display position of the scene referenced in the pattern layer can be adjusted vertically.
The pattern position can be shifted from the center of the screen or aligned to a specific position.- Increasing the value moves the pattern to the lower side.
- Decreasing the value moves the pattern to the upper side.
- If set to 0, the pattern will be placed in the default center position.
- (12) Reference scene playback method:
-
There are three types: “No adjustment,” “Auto adjustment,” and “Auto adjustment (excluding the last frame).”
These settings control how the scene referenced by the pattern layer is played back, allowing you to adjust the pattern’s movement and timing.
Using these settings facilitates the creation of videos in which the pattern continues to move indefinitely by repeat playback of the completed video.- No adjustment: Plays back the reference scene at the same speed with no change. Because no special adjustments are made, the original motion of the scene can be reflected as is. If you want infinite loop playback, you must match the length of the reference scene with the scene where the pattern layer is placed.
- Auto adjustment: Automatically adjusts the playback speed of the reference scene so that its length matches the length of the scene where the pattern layer is placed.
- Auto adjustment (excluding the last frame): Works in basically the same way as “Auto adjustment” but excludes the last frame of the reference scene from playback. This is effective for making the loop joint less noticeable.
For more information on how to make use of these settings, refer to [Tip] How to create a video with an infinitely looping pattern below.
- (13) Image quality adjustment:
-
Use “Standard” as the basic setting. Note: This setting may be removed in the future.
[Tip] How to create a video with an infinitely looping pattern
This section explains the key points for creating a video in which the pattern continues to move indefinitely by repeating playback.
The reference scene must be set so that the first and last moments of it are connected smoothly when played back alone.
To loop a character layer infinitely:
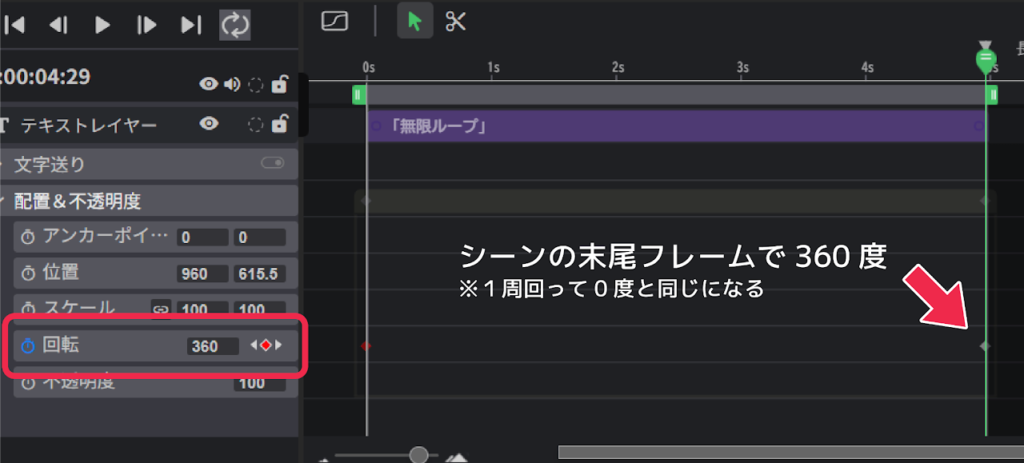
- Set a key to 0 degrees at the first frame of the scene.
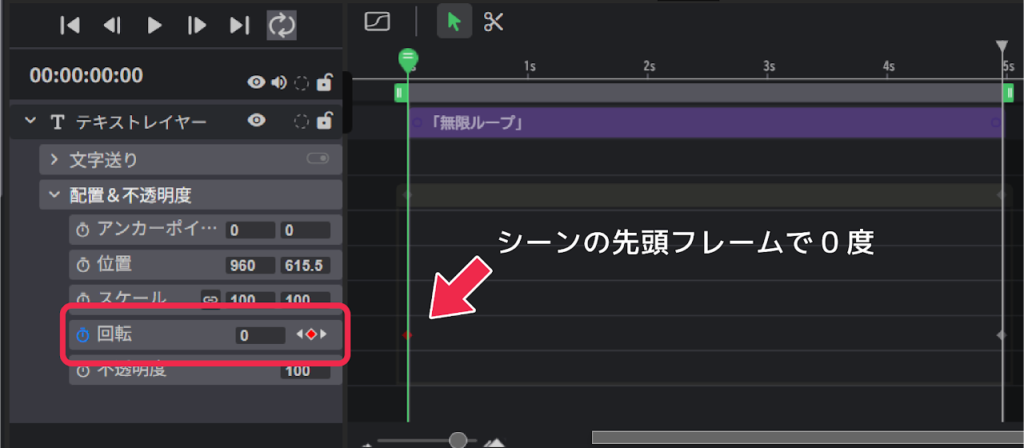
• Set a key at the last frame of the scene to rotate 360 degrees (one full rotation, which returns to 0 degrees).
• The scene can be looped indefinitely as shown below.
However, if the last frame is set to 360 degrees, the same 0 degree status will be displayed for two frames, as in [358 degrees ⇒ 359 degrees ⇒ 360 degrees (last) ⇒ 0 degrees (first)], where 360 degrees (= 0 degrees) at the end and 0 degrees at the beginning.
Therefore, a loop that was rotating smoothly may appear to stop for a moment at the end with a jerk, resulting in an unnatural loop.
How to prevent the loop connection from jerking
- Method (1) Place a key corresponding to 360 degrees to the right of the last frame (outside the scene range).
-
For this method, select “No adjustment” or “Auto adjustment” for “(12) Reference scene playback method.”
However, with “No adjustment,” the lengths of the destination and reference scenes must match.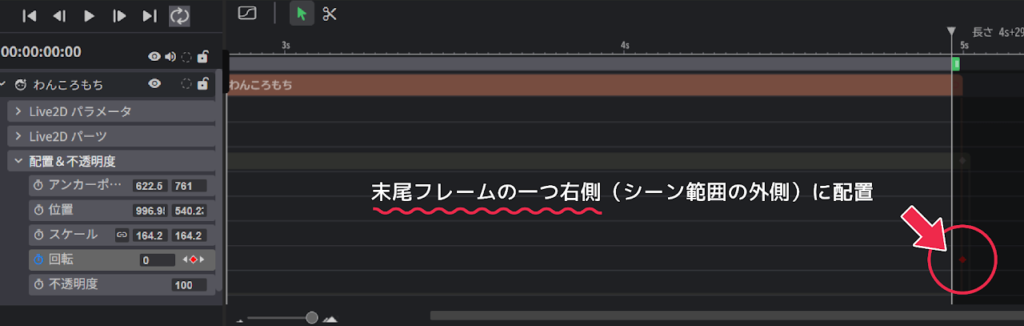
In this case, for better quality, we recommend matching the length (number of frames) of the reference scene to the length of the destination scene.
Auto adjustment will match the movement even if the lengths are mismatched, but if the lengths are different, the keyframes of the movement will be referenced out of position, which may not result in the best possible movement.
- Method (2) Set the key corresponding to 360 degrees at the last frame and set “Auto adjustment (excluding the last frame).”
-
If you choose “Auto adjustment (excluding the last frame)” to avoid the momentary jerk caused by drawing the last frame twice, you can express the movement smoothly without setting a key outside the range, as in Method (1).
In this case, for better quality, it is recommended that the length (number of frames) of the reference scene be one frame longer than the length of the destination scene.