Panorama layer
This layer allows 360-degree panorama images to be placed in a scene.
This makes it possible to create expansive backgrounds and spatial effects.
How to create a panorama layer
Panorama layers can be created in the following three methods.
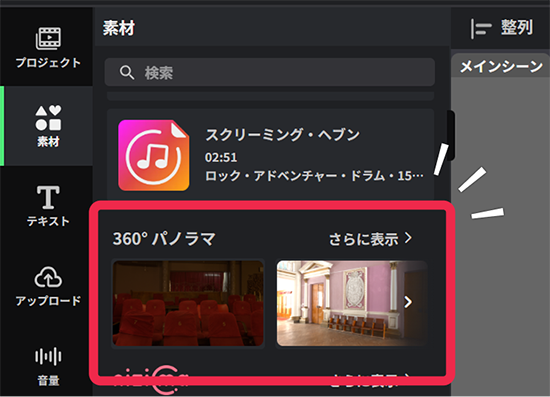
Method 1: Using panorama assets from the asset library
nizima ACTION!! comes with several panorama assets (HDR images).
Panorama assets can be selected from the “Assets” tab in the sidebar and added to the scene with a simple click.
You can also view other panorama assets from “View More.”
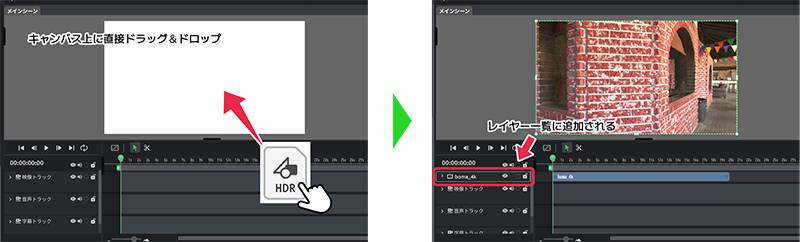
Method 2: Creating from a panorama image (HDR) file
Panorama layers can also be created by importing a panorama image (HDR format) file using one of the following methods.
[Dragging and dropping onto the canvas]
Panorama layers can be added to the scene by dragging and dropping files onto the canvas.
[Importing from “Upload”]
To add a panorama layer to the scene, open “Upload” on the left sidebar and drag and drop a file inside the dotted line or select a file from the “Select file” button.
HDR files that can be used as panorama images can be downloaded free of charge from the following site.
Note: Panorama images are large files, so please be aware of upload restrictions.
Method 3: Converting an image layer to a panorama layer
A panorama layer can be generated by right-clicking an image on the canvas or an image layer in the layer list and selecting “Convert to panorama” from the displayed menu.
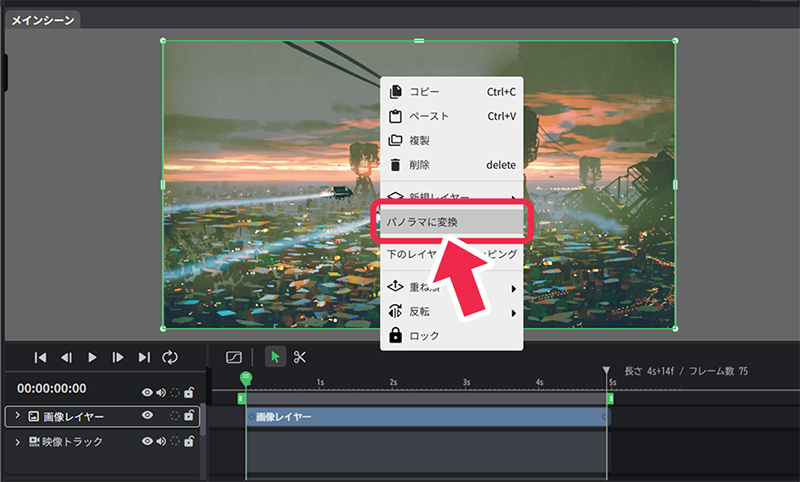
When converted to a panorama layer, the layer will be added on top of the original image layer.
Note: The original layer will not be deleted. Delete or hide the layer if necessary.

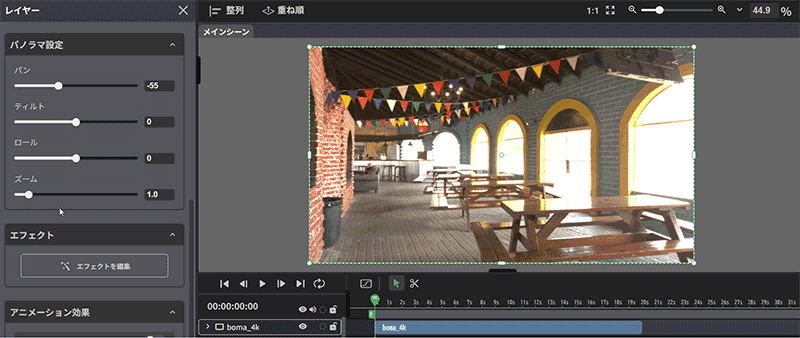
Panorama layer settings
The palette can be used to adjust the viewpoint direction, tilt, zoom, etc.
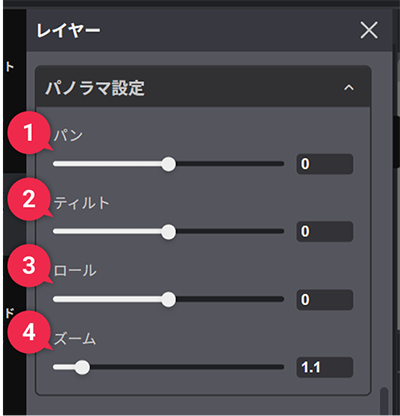
(1) Pan: Left/right movement of viewpoint

(2) Tilt: Vertical movement of viewpoint
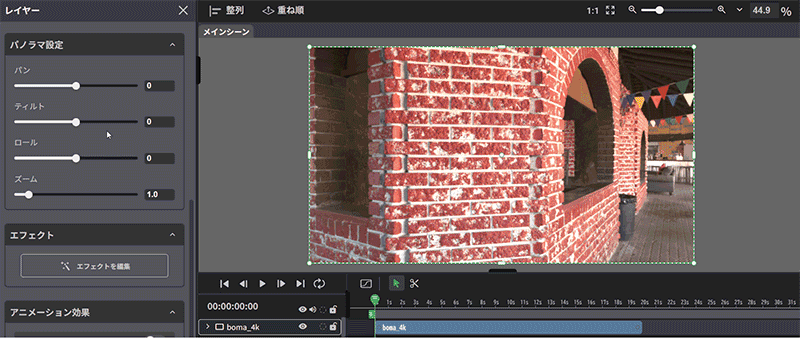
(3) Roll: Adjustment of viewpoint tilt

(4) Zoom: Zoom in/out of viewpoint
Advanced viewpoint adjustment and animation settings
To perform advanced adjustment of values, the values can also be set from “Property” at the bottom of the screen.
Property also allows for rotation values beyond 180 degrees (e.g., 270 degrees), allowing for more flexible viewpoint control.
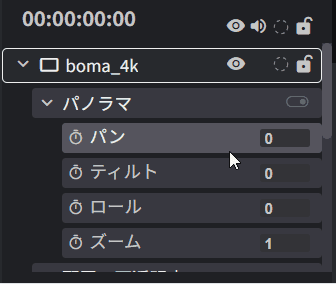
To add motion, you must also set keyframes from the timeline.
Keyframes cannot be set in the palette; they must be manipulated on the timeline.