Layers
Updated: 12/17/2025
Selecting an object in the layer list or on the canvas opens the Layer Palette.
How to Create a New Layer
You can create a new layer by right-clicking on the canvas, layer list, or Timeline and selecting “New layer ▶” from the menu that appears.
[All layers – Common settings]
Layer Name
Layers can be named.
Basic Settings
| Start | You can set the starting time of the layer. |
| Duration | You can set the playback time of a layer. |
| Allign range to parent | Turning this setting on matches the playback time of the layer to the playback time of the project. |
| Opacity | Layer opacity can be adjusted. |
| Group Render Mode | You can set the rendering mode (Fast, Normal, or Pass-Through) for the group. Note: This button is displayed only when a group is selected. |
| Blend Modes | You can set the blend mode for the layer. |
| Clip to layer below | By turning this setting on, the opaque areas of the selected layer, the layer directly below the group, or the group can be used as a mask. |
| Clipping by shapes | Clipping can be performed by setting a shape layer. |
Effects and Animation Effects
Click on the “Edit Effects” or “Edit Animation Effects” buttons to open each lists.
Effects can add visual and motion effects to a layer, and multiple effects can be applied to a single layer.
Animation effects can be set at each timing: “in (Start),” “All (Loop),” and “Out (End).” You can also apply multiple animation effects to each timing.
*It cannot be set for audio layers.
See the Effects and Animation Effects page for more information.
[Video and audio layers – Common settings]
Video and audio settings
| Start Position | You can specify the position where the layer starts to play. |
| Playback speed | The higher the value, the faster the playback. |
| Loop playback | Repeats the video/audio sound. |
| Auto Pitch Adjustment | When turned on, you can change only the playback speed without altering the pitch of the sound. |
| Volume | You can set the volume of the selected layer. |
| Pan | Moves the sound source position (from which direction the sound is heard) to the left or right. |
| Pitch | You can adjust the pitch of music, voices, and other audio. |
| Fade In | Gradually increases the volume of the layer. |
| Fade Out | Gradually decreases the volume of the layer. |
[Live2D layer]
Live2D layers are used to place Live2D models in a scene and apply facial expressions, motion, etc.
See the Live2D Layer page for more information.
[Live2D Action Frames]
A Live2D action frame allows you to frame a specified scene in nizima ACTION!! into the texture of a Live2D model that has been animated with Live2D Cubism Editor.
Target Scene
This is a setting item for incorporating a specified scene in a Live2D action frame layer.
You can display a specified scene within a specific frame and create expressions combined with productions and backgrounds.
- See How to use Live2D action frames for more information on using Live2D action frames.
- See How to make Live2D action frames for more information on creating Live2D action frames.
[Group layer]
You can select how to draw the layers in a group. The range of effects and other factors differ according to the processing method.
See the Group page for more information.
[Pattern layer]
The layer function for generating repeating patterns and background designs.
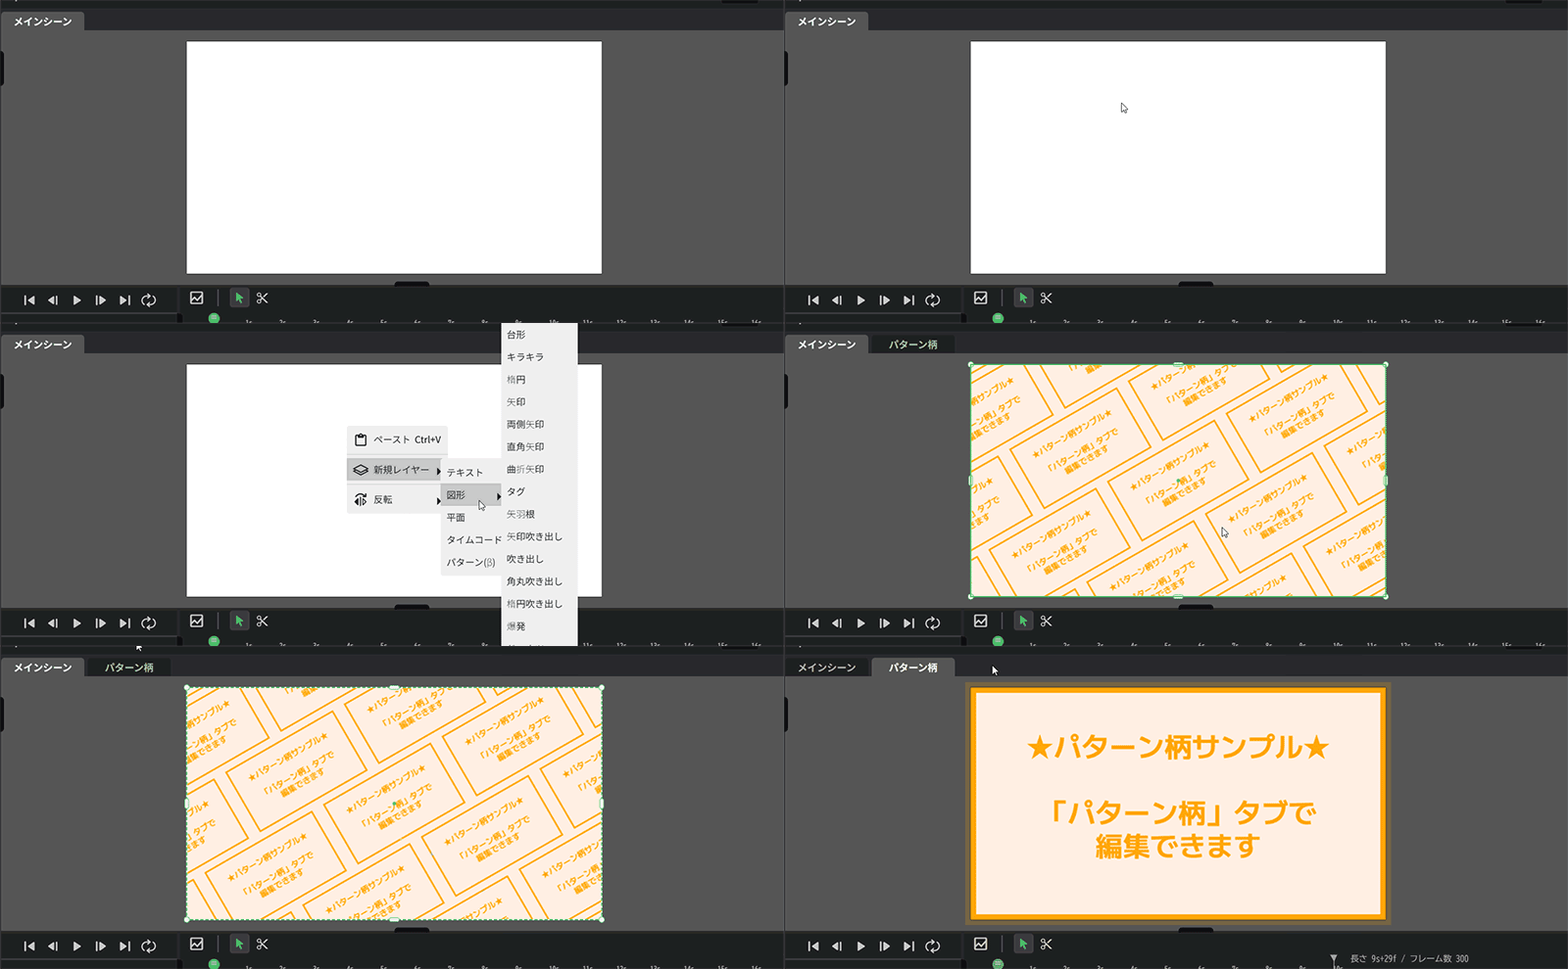
Select “New layer ▶” from the right-click menu and select “Pattern” to create a new pattern layer.
See the Pattern Layer page for more information.

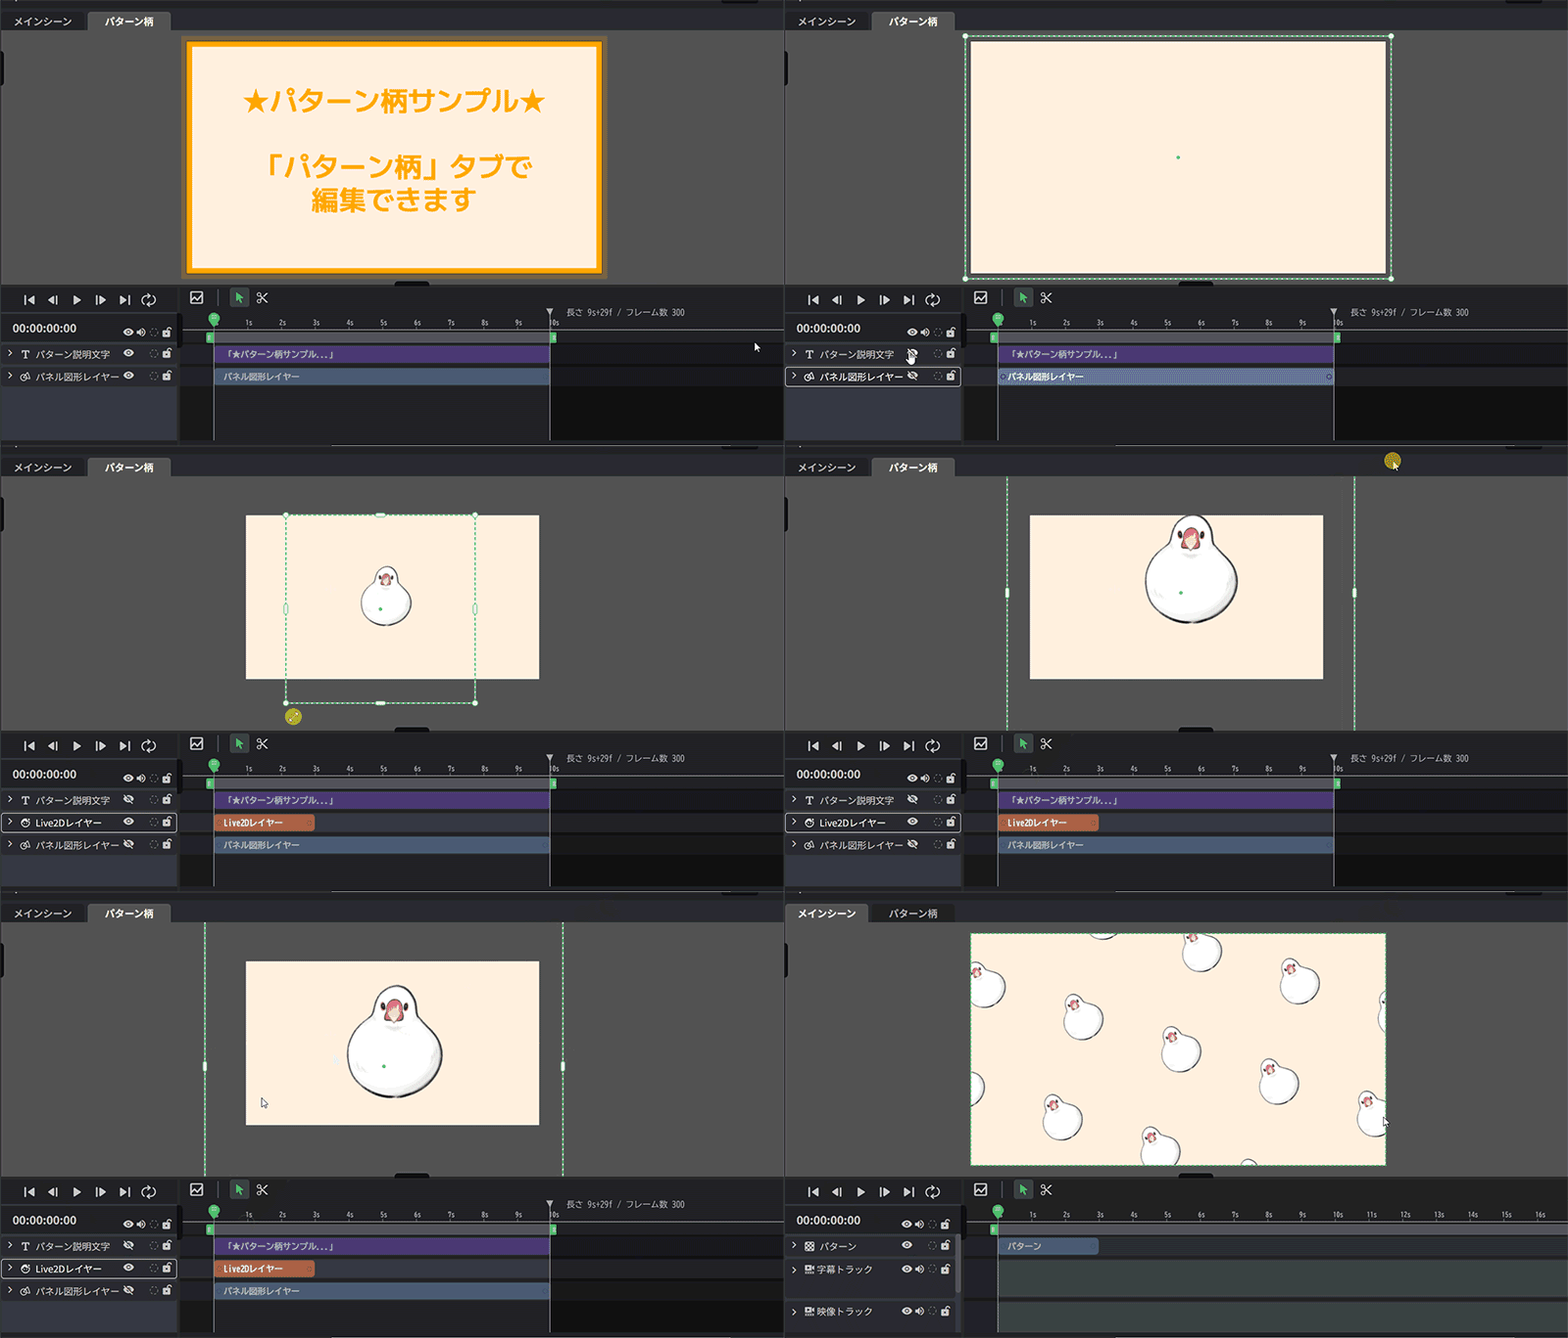
When the pattern layer is created, the “Pattern” tab is created on the canvas.
Switch to the tab and edit the layer, which will be reflected on the canvas in the main scene.

