Import SDK
Updated: 06/25/2021
This tutorial covers the process of importing a model file exported from the Cubism Editor for embedding into a Unity project and displaying it on the screen.
What to prepare
The Unity version supported by the Cubism SDK for Unity for Cubism 3 and later versions is 2019.x.
If the version is prior to 2018.3, the information serialized in the assets in the SDK (e.g., .mat) will be discarded.
Click here for more information on installing Unity.
Also, please download the Cubism SDK for Unity in advance.
This is distributed as a package in unitpackage format.
The SDK is also available on GitHub, but this does not include libraries, so please use the package when incorporating models.
When working with Live2D models in the SDK, you need to export them as built-in models, not as .cmo3 or .can3 for editing.
See “Data for Embedded Use” for information on how to export models for embedded use.
The data to be exported are the .moc3 file, the .model3.json file, and the folder containing the textures.
Please keep these in one folder.
Import the SDK into a Project
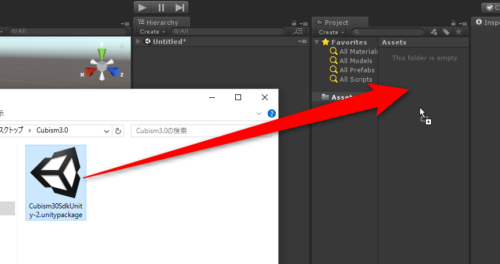
Create a new Unity project in 2D Mode and import the Cubism SDK for Unity (.unitypackage file) by dragging and dropping it into the Project View.
Click here for more information on creating a new Unity project.
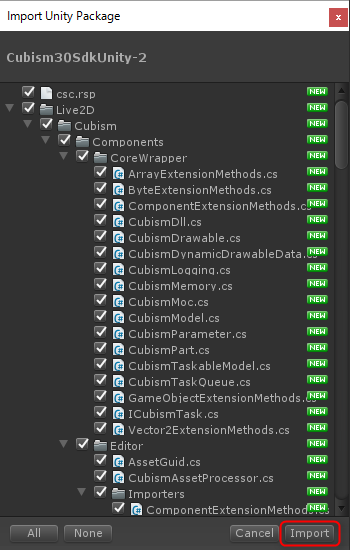
Once the import is complete, close Unity and reopen the project again.
Tips
If you encounter errors when importing models as described below, please update CubismComponents at this time.
Click here for instructions on how to update CubismComponents.
Import Models
Drag and drop a set of models exported from the Cubism Editor for embedding into the Project View, folder by folder.
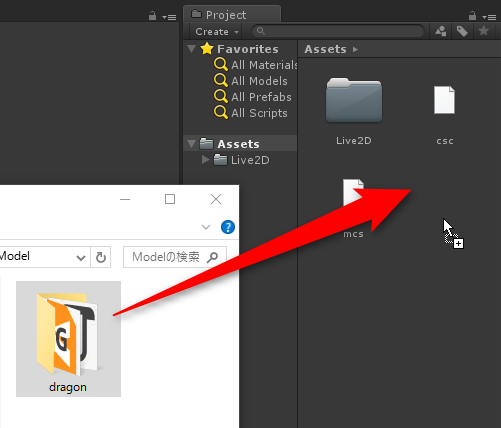
After successful import, a Prefab is automatically generated by Cubism’s Importer included in the SDK.
This generated Prefab is a Live2D model converted to a state that can be handled by Unity.
The display of parameters and parts can be manipulated from the Hierarchy View at this stage.
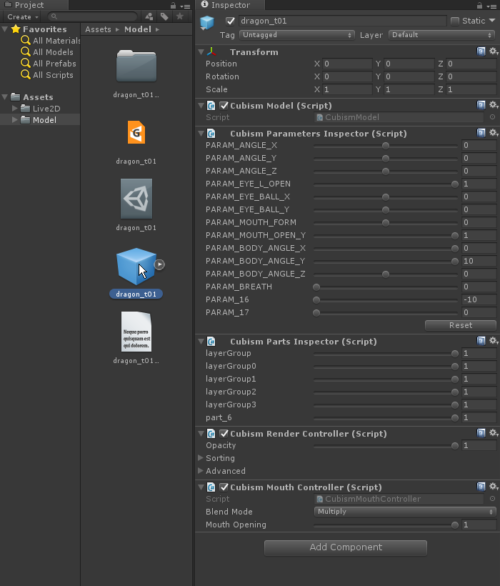
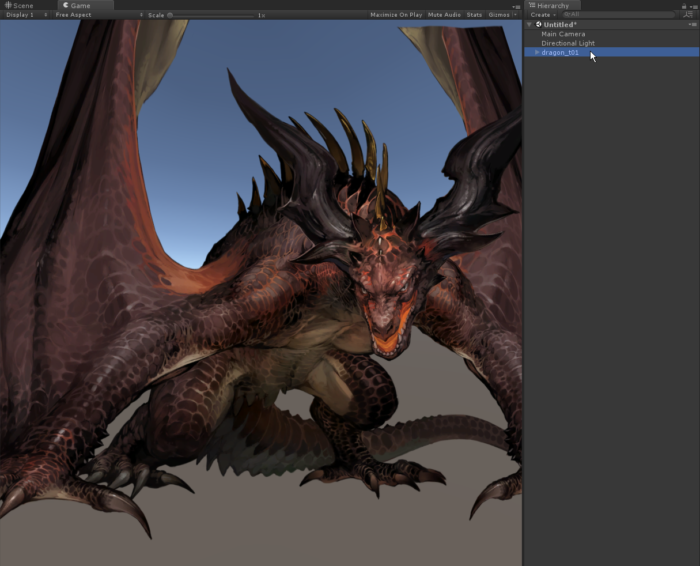
The model can be placed by adding the generated Prefab to the Hierarchy or Scene View and running the scene.
Tips
Prefab will not appear on the screen immediately after import, even if it is placed in the scene.
This is because the Cubism SDK for Unity sets the mesh at the time of each frame update process.
After the Prefab is placed, it will appear once the scene is run.
Original Workflow Method
[Added on 01/31/2019]
When importing a model using the Original Workflow method added in R11, before dragging and dropping it into the Project window, check Live2D > Cubism > Original Workflow > Should Import As Original Workflow in the menu bar.
[Added on 01/12/2021]
Starting with the Cubism 4 SDK for Unity R2, the Original Workflow method of import is enabled by default.
To import models using the conventional method, uncheck Live2D > Cubism > Original Workflow > Should Import As Original Workflow in the menu bar.

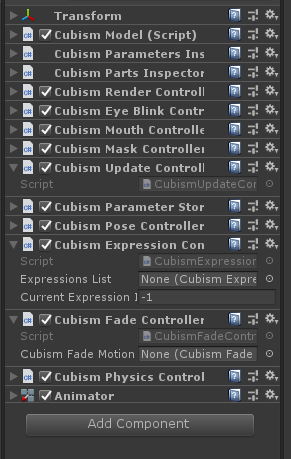
When importing with this checked, an additional OW method component will be attached to the generated Prefab.
Tips
The center of the Prefab generated by the above process will be at the coordinates of [Center of model X] and [Center of model Y] set at the time of moc3 export.
Also, the default size is the value set in [Canvas Width] and [Canvas Height], which is treated as the Unity unit.
Click here for details.
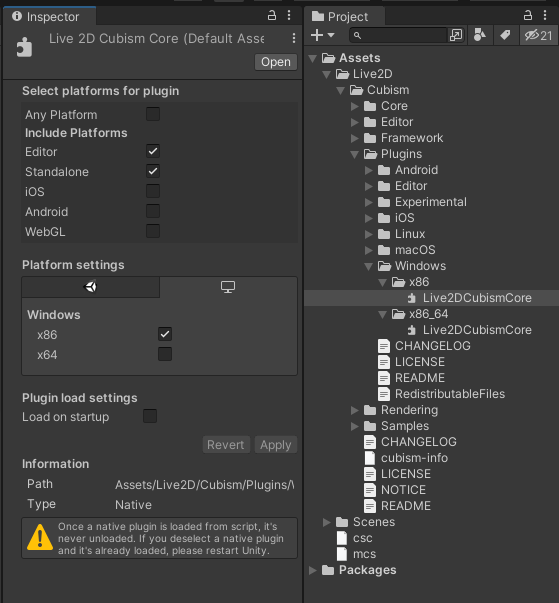
If the Console View displays DllNotFoundException, the model cannot be converted because the library is not loaded.
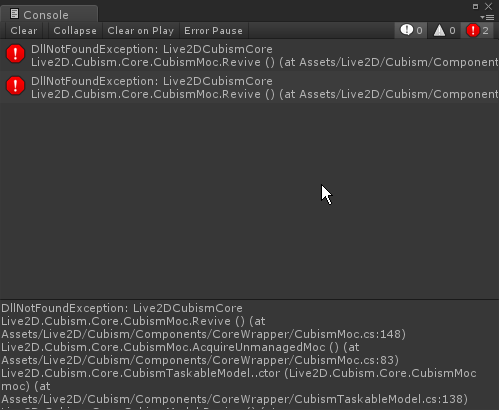
Importing a model without restarting Unity will result in an error.
The errors vary depending on the version of Unity.
This error occurs because Unity loads the libraries bundled with the SDK at the time of Unity startup.
Restart Unity to load the library.
If the error still occurs after restarting, the platform settings for using the library may have been changed.
If this is the case, modify the library’s platform settings from the Inspector View.
The library files are located at
Assets/Live2D/Cubism/Plugins/[Platform]
Note: Some platforms are further divided into folders by architecture, etc.
