런타임으로 모델 로드
업데이트: 2020/01/30
여기에서는 스크립트로 모델을 초기화하고 표시하는 방법을 설명합니다.
개요
2.1에서는 Init,loadModel,setTexture를 사용하여 모델 초기화, 모델 로드 및 텍스쳐 설정을 실시했습니다.
3.0 이후 버전에서는 LoadAtPath,ToModel을 사용하면 모델의 초기화, 모델의 로드, 텍스쳐 설정 외에도 업데이트 및 그리기를 할 수 있게 되었습니다.
방법은, 처음에 패스에서 모델을 불러오기 위한 스크립트를 만듭니다.
그리고 읽어들인 모델은 ToModel()을 사용해 모델을 표시시킵니다.
이번에는 StreamingAssets에서 읽도록 스크립트를 기술했습니다.
상세
2.1까지는 Live2D.Init()로 Live2D를 초기화 후 Live2DUnity.loadModel로 모델의 로드를 실시했습니다.
Live2D.Init();
var live2dModel = Live2DModelUnity.loadModel((T)Resources.Load(path) as T);
그 후 이하와 같은 형태로 텍스쳐를 설정해 ALive2DModel.update()나 ALive2DModel.draw() 로 모델의 업데이트, 묘화가 이루어졌습니다.
live2dModel.setTexture(textureNumber, texture);
3.0 이후의 버전에서는 처리가 새로워져 CusbimModel3Json.LoadAtPath를 이용해 모델을 읽어들인 후, .ToModel()을 호출하면 모델이 표시됩니다.
또 Prefab를 작성해 표시하고 스크립트상에서 .update()나 .draw()의 업데이트 묘화를 기술하지 않아도 묘화 업데이트되도록 되어 있습니다.
그럼 실제로 Cubism 3 SDK for Unity를 사용하여 모델을 초기화 및 표시하고자 합니다.
먼저, 패스에서 모델을 로드하기 위한 스크립트를 작성합니다.
새 C# 스크립트를 만들고 이름을 “InitModel.cs”라고 합니다.
InitModel.cs를 다음과 같이 기술합니다.
using System;
using System.IO;
using Live2D.Cubism.Framework.Json;
using UnityEngine;

/// <summary>
/// Initialize model.
/// </summary>
public class InitModel : MonoBehaviour {

	void Start ()
	{

        //Load model.
        var path = Application.streamingAssetsPath + "/koharu.model3.json";
        var model3Json = CubismModel3Json.LoadAtPath(path, BuiltinLoadAssetAtPath);

        var model = model3Json.ToModel();
	}

    /// <summary>
    /// Load asset.
    /// </summary>
    /// <param name="assetType">Asset type.</param>
    /// <param name="absolutePath">Path to asset.</param>
    /// <returns>The asset on succes; <see langword="null"> otherwise.</returns>
    public static object BuiltinLoadAssetAtPath(Type assetType, string absolutePath)
    {
        if (assetType == typeof(byte[]))
        {
            return File.ReadAllBytes(absolutePath);
        }
        else if(assetType == typeof(string))
        {
            return File.ReadAllText(absolutePath);
        }
        else if (assetType == typeof(Texture2D))
        {
            var texture = new Texture2D(1,1);
            texture.LoadImage(File.ReadAllBytes(absolutePath));

            return texture;
        }

        throw new NotSupportedException();
    }
}
Hierarchy 창을 오른쪽 클릭한 후 “Create Empty”를 클릭하여 빈 GameObject를 만듭니다.
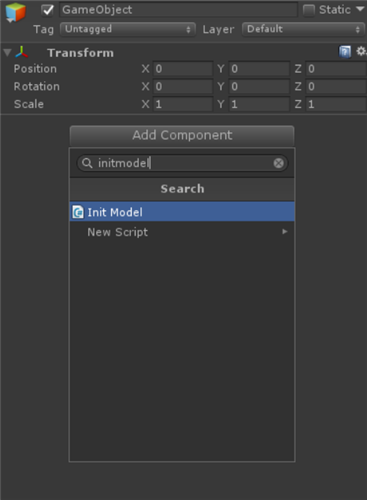
그 후 만든 GameObject에 InitModel.cs를 연결합니다.

그런 다음 가져올 모델을 Assets 폴더에 추가합니다.
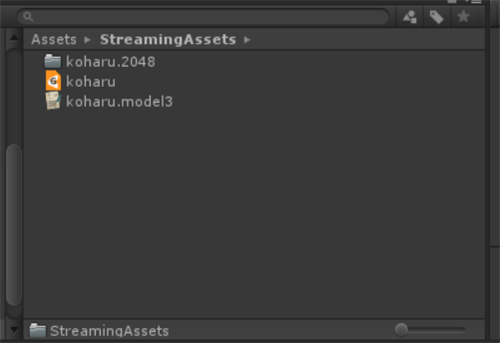
이번에는 StreamingAssets에서 읽으려고 하므로 Assets 폴더를 선택하고 Project 창을 오른쪽 클릭한 다음 새 폴더를 만듭니다.
새 폴더의 이름은 “StreamingAssets”으로 변경합니다.
StreamingAssets에 관해서는 Unity – 매뉴얼: 스트리밍 에셋을 참조하세요.
StreamingAssets에 모델을 이미지처럼 추가합니다.

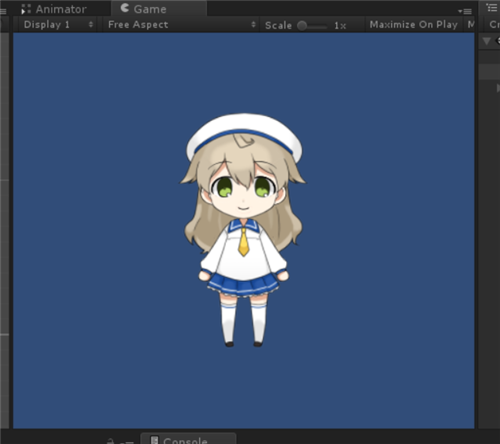
마지막으로 Unity의 플레이 버튼을 누르고 모델이 표시되면 완료됩니다.
이로써 모델의 초기화·표시를 스크립트상에서 실시할 수 있게 되었습니다.

또 ToModel()을 이용한 예시가 있습니다.
이하에 링크가 있으므로, 꼭 함께 봐 주세요.
[Live2D GitHub]CubismModel3Json.cs
https://github.com/Live2D/CubismUnityComponents/blob/develop/Assets/Live2D/Cubism/Editor/Importers/CubismModel3JsonImporter.cs
여기에서는 AssetImporter에서 가져오기 이벤트를 후크로 ToModel에서 모델 GameObject를 생성합니다.
[Live2D GitHub]CubismViewer.cs
https://github.com/Live2D/CubismViewer/blob/develop/Assets/Live2D/Cubism/Viewer/CubismViewer.cs
여기서는 절대 경로에서 모델 파일을 읽은 후 ToModel에서 모델을 생성합니다.
Original Workflow 방식에 대하여
[2019/01/31 추가]
.ToModel()로 작성하는 Prefab를 Original Workflow 방식으로 할 경우 CubismModel3Json.ToModel()의 인수에 true를 전달합니다.
var model = model3Json.ToModel(true);
