How to Use Live2D Tracking (Formerly: How to connect with nizima LIVE)
Updated: 12/16/2025
Note: A tutorial related to integration with VTube Studio is currently in preparation.
The instructions for connecting with nizima LIVE and VTube Studio on nizima ACTION!! are almost the same, so please refer to the explanations on this page for now.
For plugin settings in VTube Studio, please check the app’s instruction page.
Let’s link nizima LIVE and nizima ACTION!!
Register nizima LIVE as a plugin in nizima ACTION!!
You can capture and record nizima LIVE movements in real time.
You can check the operational flow in the video and detailed procedures in the text.
▽▼ Check out the video to see how to use it ▼▽
Note: The screens shown in the video are under development. Actual display, design and specifications may differ.
\ Click here to download nizima LIVE! /
Note: The free version of nizima LIVE can also be linked to nizima ACTION!!
nizima LIVE Integration Function Operation Manual
The nizima LIVE Integration Feature is a convenient feature that reflects your movements captured in nizima LIVE onto your model in nizima ACTION!! in real time, allowing you to record them directly as a video. Of course, you can also record audio along with your movements.
Please make sure to download nizima LIVE from the official nizima LIVE website in advance. The integration works even with the free version.
1.Setup on the nizima ACTION!! side
【Step 1】Add a Live2D Model
From the “Assets” panel on the left sidebar, select the Live2D model you want to use and add it to your project.
Of course, you can also upload your own model (.moc3, etc.).
For details on how to upload a Live2D model, please refer to [here].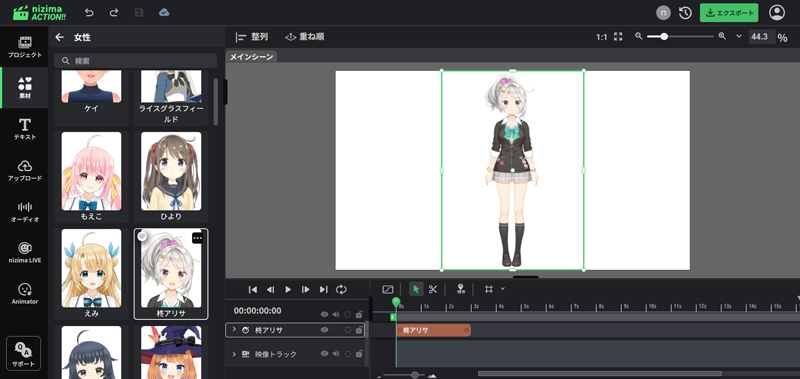
【Step 2】Adjust Model Position
Move and resize the model on the main canvas.
2. Set Up Plugins on the nizima LIVE Side
【Step 1】Launching nizima LIVE and Configure Camera Settings
Launch nizima LIVE and configure your camera settings. From “Camera Settings” in the left menu, select the camera you want to use and verify that your facial expressions and movements are being tracked in nizima LIVE.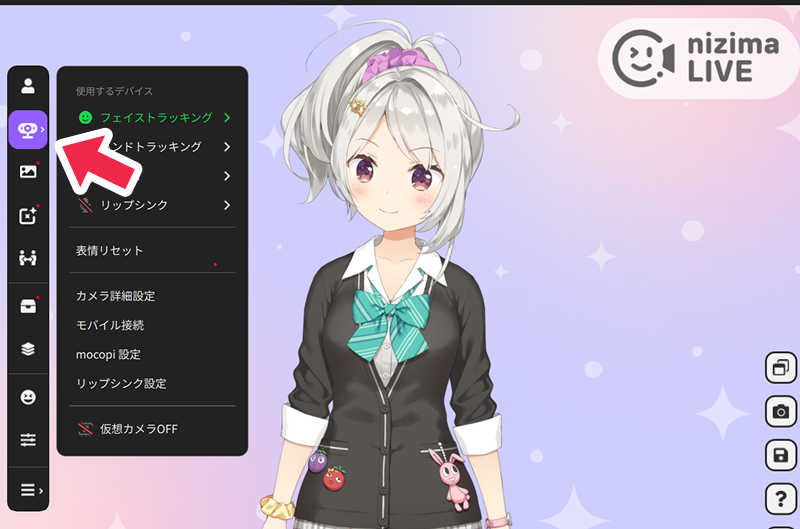
【Step 2】Open the Plugin Manager
From the nizima LIVE menu, select “Settings/Other” → “Plug-in” and open the “Plug-in Manager”.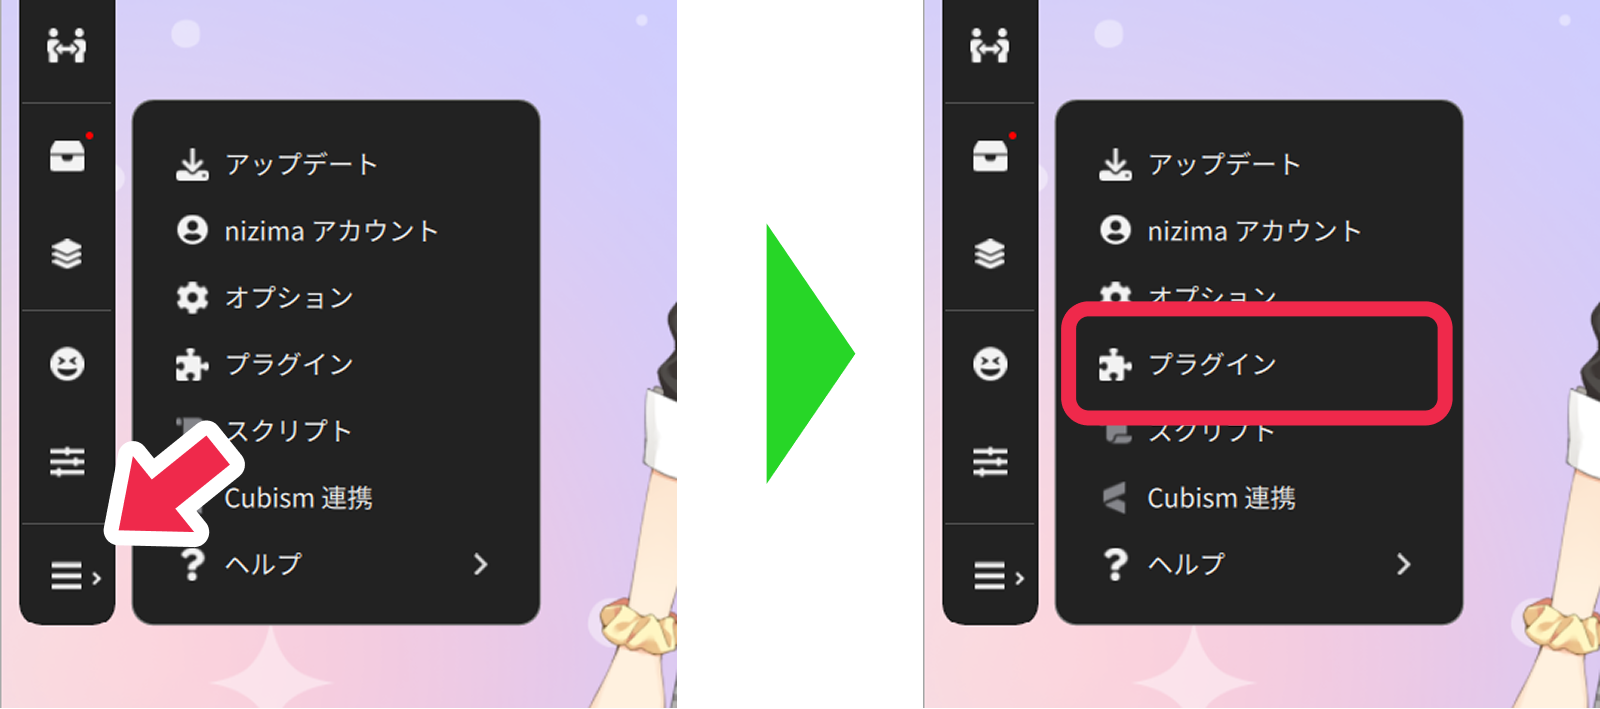
【Step 3】Enable the Plugin Feature
Click the toggle at the top of the Plugin Manager to enable the entire plugin feature.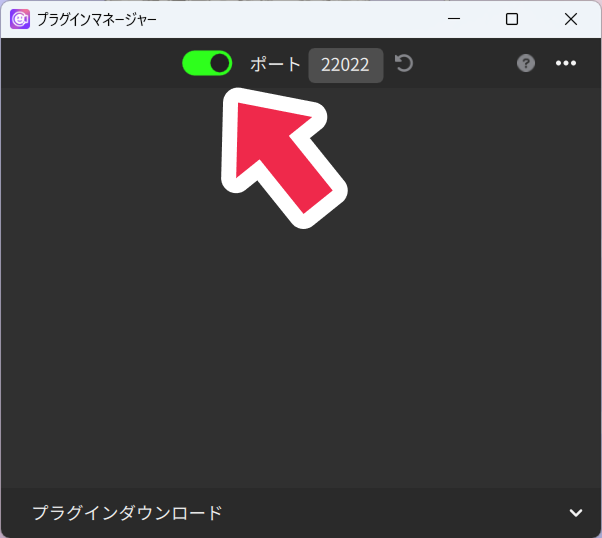
3. Link with nizima LIVE
【Step 1】Open the Live2D Tracking Panel on the nizima ACTION!! Side
Return to nizima ACTION!! and open the “Live2D Tracking” panel in the sidebar.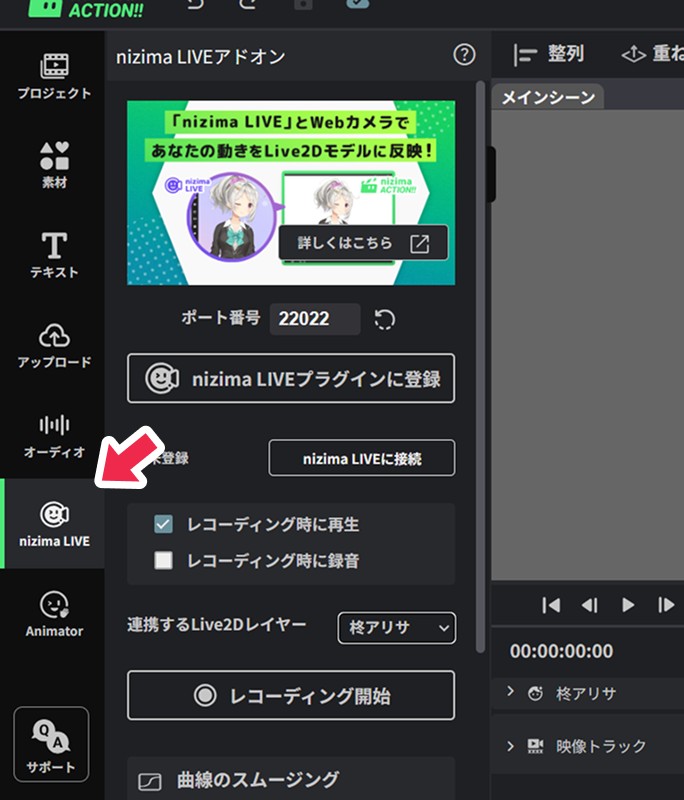
【Step 2】Select the Model to Link
From the dropdown list “Target Live2D Layers”, select the model (Live2D layer) you want to link with nizima LIVE.
【Step 3】Register to the Plugin
Click the “Register to nizima LIVE Plugin” button. The plugin for linking will now appear on the nizima LIVE side.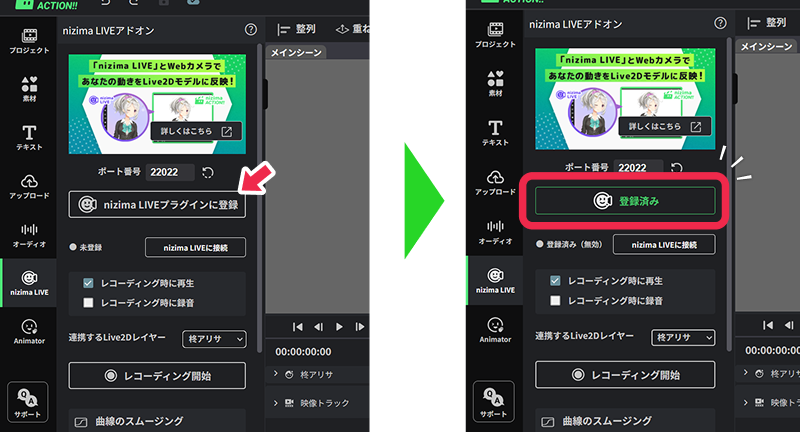
【Step 4】Enable the Linked Plugin on nizima LIVE
Return to nizima LIVE again and click the toggle for the plugin displayed in the Plugin Manager (labeled “nizima ACTION!!”) to enable it.
When the toggle turns green, you’re ready to go!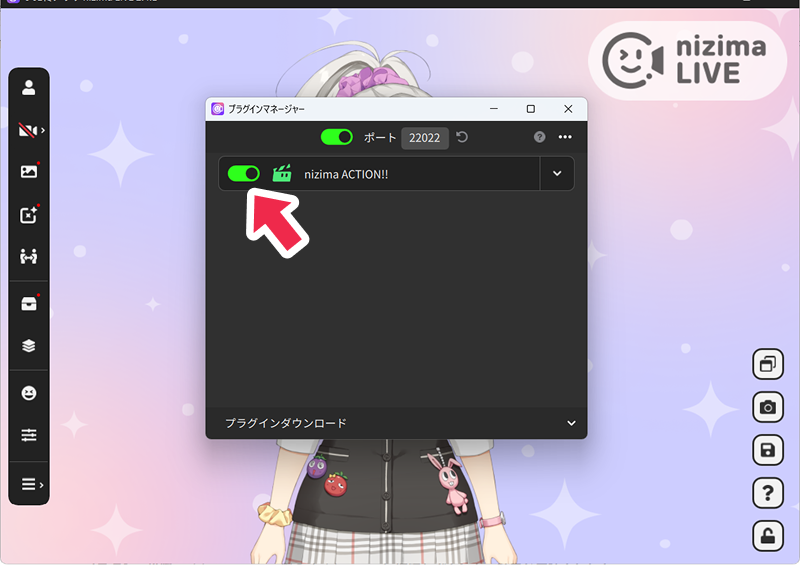
4. Capture and Record
【Step 1】Connect with nizima LIVE (Real-time Capture)
Return to the Live2D Tracking panel in nizima ACTION!! and click “Connect to nizima LIVE”.
Verify that your movements in nizima LIVE are being reflected in real-time on the model in nizima ACTION!!.
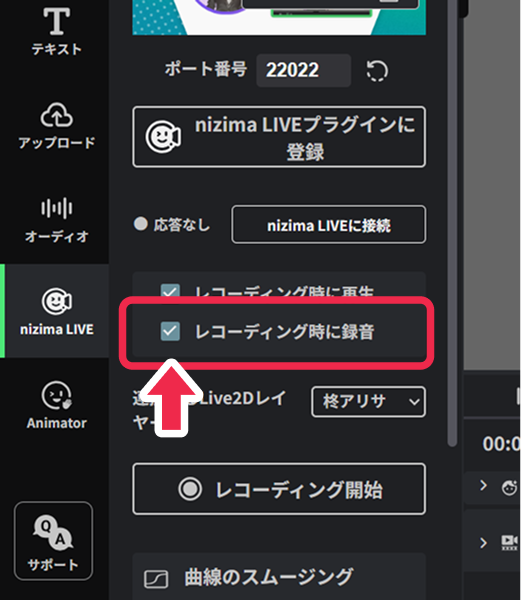
【Step 2】Recording
Click the “Start Recording” button. Recording will begin after a 3-second countdown. Click “Stop Recording” to finish recording the model’s movements.
*If you check “Record audio during recording”, audio from your microphone will also be recorded too.
【Step 3】Check Recorded Movements
Play the video on the timeline and review the recorded movements.
If you want to correct the movements, you can either re-capture the movements using nizima LIVE linking again, or make fine adjustments by editing parameters using the dope sheet or curve editor on the timeline.
Convenient Options During Recording
During recording, you can utilize the following options according to your purpose:
- Check “Play during recording”
Use this when you want to record model movements while playing a video and synchronizing with it.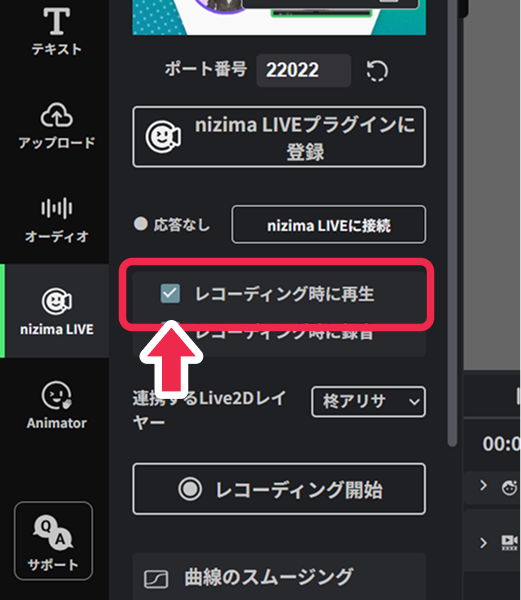
- Check “Record audio during recording”
Use this when you want to record audio from your microphone in the video together with the model’s movements.