【Easily with Template】How to Create a Live2D Showcase
Updated: 12/17/2025
nizima ACTION!! offers several templates for Live2D Showcase. It’s easy enough for beginners to create, so please make use of it!
You can check the operational flow in the video and detailed procedures in the text.
▽▼ Check it out in a video ▼▽
*The screen is a work in progress. The actual display, design, and specifications may differ.
How to Use the Live2D Showcase Template
This manual compiles the steps for creating videos using the “Live2D Showcase” template available in nizima ACTION!! based on the content of the instructional video.
Please check it along with the video!
1. Template Selection and Preparation
【Step 1】Choose Your Template
First, find and select the “Live2D Showcase” template you’d like to use from the bottom of the home screen or the list of templates.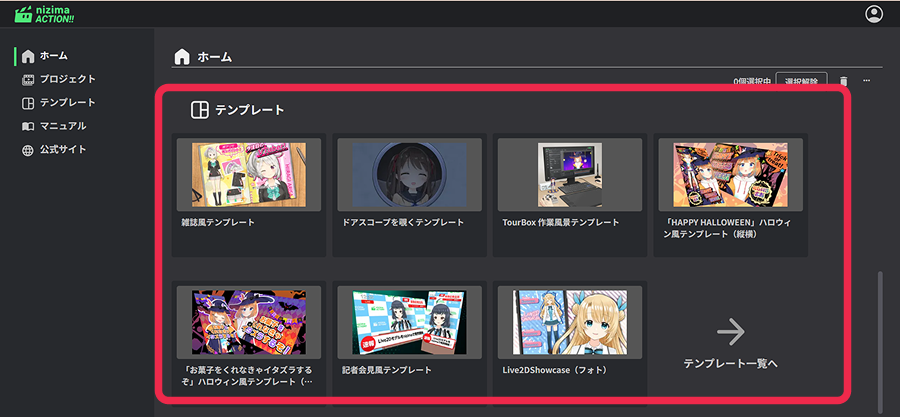
【Step 2】Remove the Usage Guide
Once the template is loaded, you’ll see a layer called “How to Use” at the top. Since we don’t need this guide, hide or delete it.
2. Loading and Replacing Models
【Step 1】Replace the Scene Model
Please try opening “Scene 1,” “Scene 2,” and so on at the top of the screen.
From here, we will replace the sample models originally placed in each scene with the Live2D models you have prepared.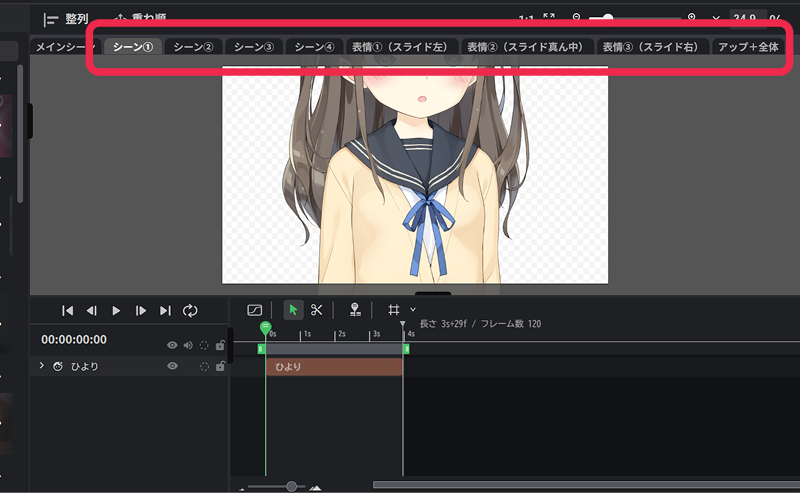
【Step 2】Upload Your Model
To upload your models, simply go to the “Upload” tab in the side menu and choose your files, or you can drag and drop them directly onto the canvas. If you need instructions, check out the page on how to upload Live2D models.
If you’re using models from nizima ACTION!!, select and add your favorite Live2D model from the Asset Library.
【Step 3】Adjust Position and Size
Once you’ve placed the new model, you can adjust its position and size right on the canvas. Delete or hide the sample models that were originally placed.
3. Setting Motion and Expressions
【Step 1】Add Some Motion to Your Model
Open the model layers for each scene and set up the motion and expressions. You can record the model’s movements in real time with nizima LIVE, or spice it up with some parameter adjustments for more dynamic movements.
- Real-time Recording
By connecting with nizima LIVE, you can move your model in real-time and record at the same time.
If you want to know how to connect, just check out the integration guide for nizima LIVE.
- Adjust with Parameters
You can tweak values such as “Angle” from the “Live2D Parameters” in the layer properties to create just the right motion.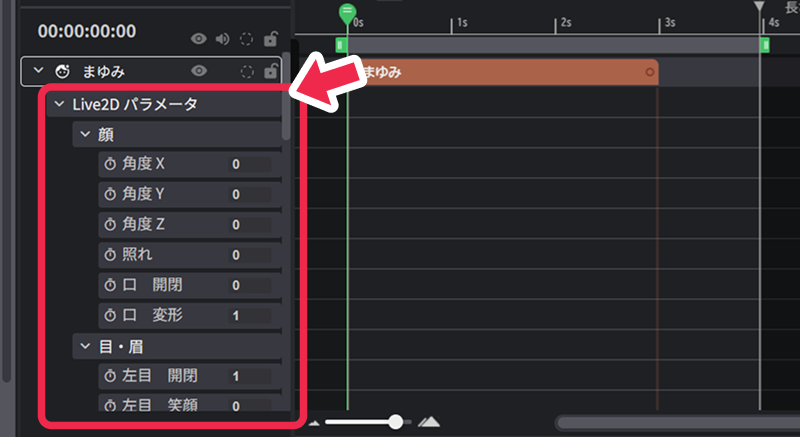
- Apply Motion
If your Live2D model has pre-set expressions and motions, you can easily apply them with a single click from the “Live2D Motion” in the layer palette.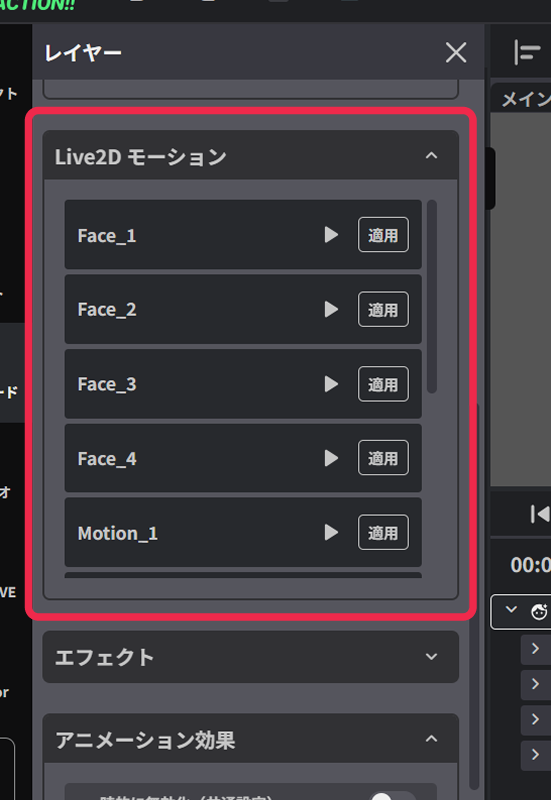
【Step 2】Fine-tune Recorded Movements
When you’re done recording, a new option called “nizima LIVE Motion” will pop up in the model properties.
This means the movements you recorded are all set and ready to be fine-tuned on the timeline if you want!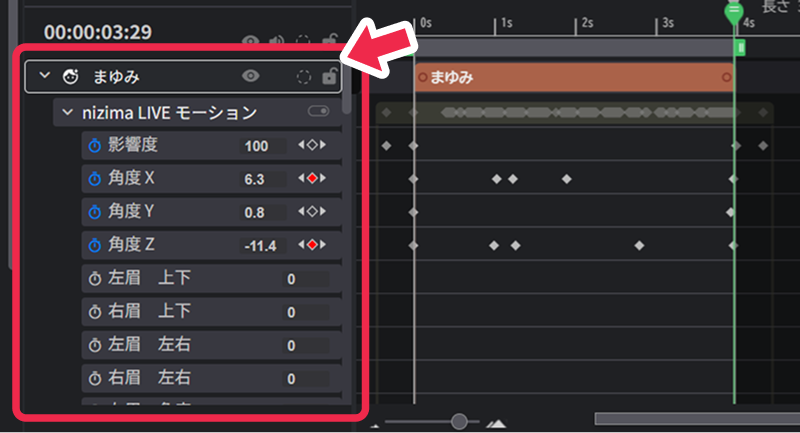
4. Editing Text and Effects
【Step 1】Rewrite the Text
Double-click any text layer on the canvas to change the text freely!
The template includes helpful text like “Please place the character name or logo here.
” Following these prompts will make your work so much smoother.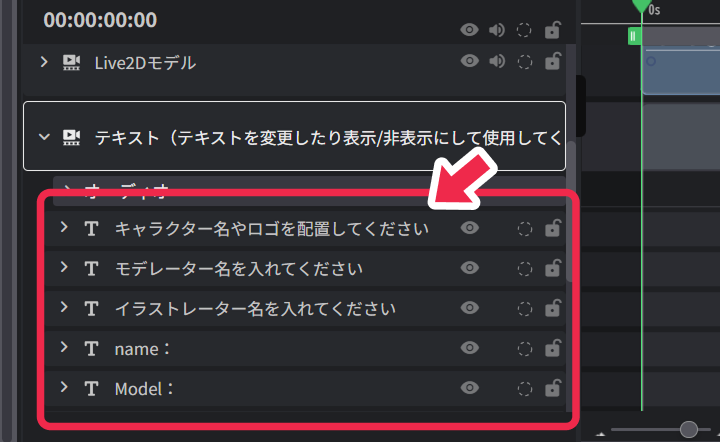
【Step 2】Edit the Background and Colors
Select the background layer and use the “Effects” panel to play around with the background color and ambiance.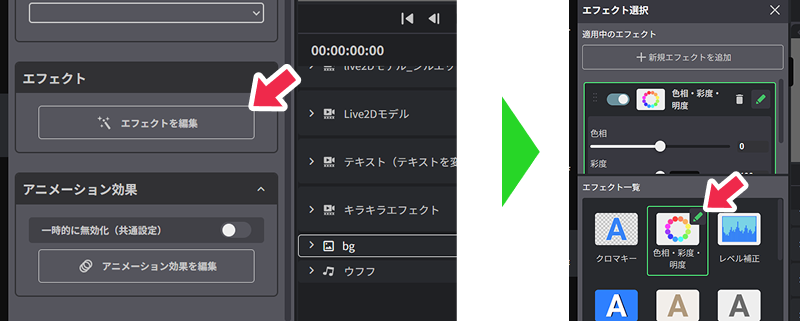
- You can set effects like Hue, Saturation, and Lightness to easily adjust the colors and brightness.
- Feel free to add multiple effects to customize it exactly the way you want!
5. Video Export
Export your videos
When your video is complete, go ahead and click the “Export” button at the top right corner.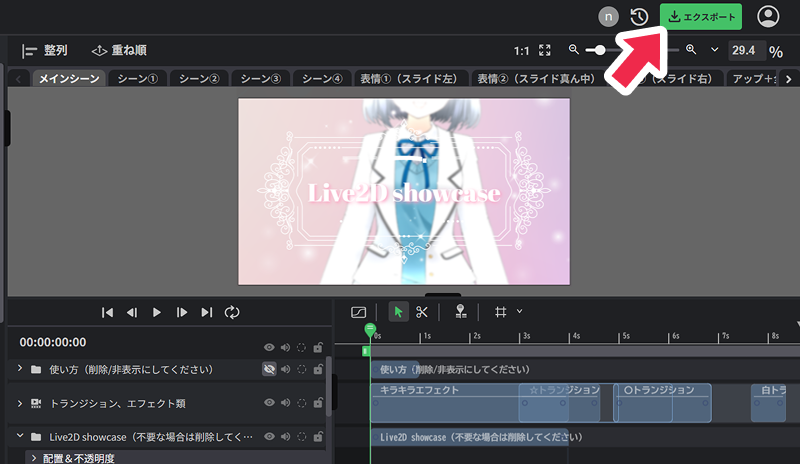
- Choose your favorite format, like MP4 or WebM, under “Video Format.”
- Check your settings (output size, frame rate, etc.) and hit the “Export” button to export your video file.
That’s it for making a video with the Live2D Showcase template.
There are other templates too, so try them out as you like!