How to make Live2D action frames
Updated: 11/06/2024
◆ Data to prepare
- Live2D model of the frame part
-
The frame (the playing card in the sample) can be freely created in the same way as the usual Live2D model creation, so we are omitting the explanation here.
Note: The image to be framed can be placed on a part of the existing Live2D model and used as an action frame.
Note: Live2D model of the frame part can be prepared before or after the image for framing.
- A PNG file of the image to be framed (as the destination where the scene will be framed, usually a 1920 × 1080 size image)
-
The file can be downloaded from the following link.
★ Download the PNG file of the image to be framed ★Note: Images used for action frames can be of any content or size. The images distributed here are examples.
However, when using images other than Full HD, it is necessary to change 1920,1080 in “layout: 10,10,1920,1080” as described below to the actual image size.
(1) Import the PNG of the image to be framed into Live2D Cubism Editor.
Add it to the model as an ArtMesh.
The ArtMesh generated from the image to be framed (the image drawn as 1920 × 1080) is named “☆1920*1080” in this manual, and is described below under that name. (You are free to use any name or ID for the actual creation.)
(2) Adjust the mesh of the ArtMesh.
For “☆1920*1080,” use the “Automatic Mesh generator” function of the Live2D Cubism Editor, etc. to divide the image into smaller pieces.
If you want a Curved Surface transform, divide it into even smaller pieces. Adjustments can be made later.
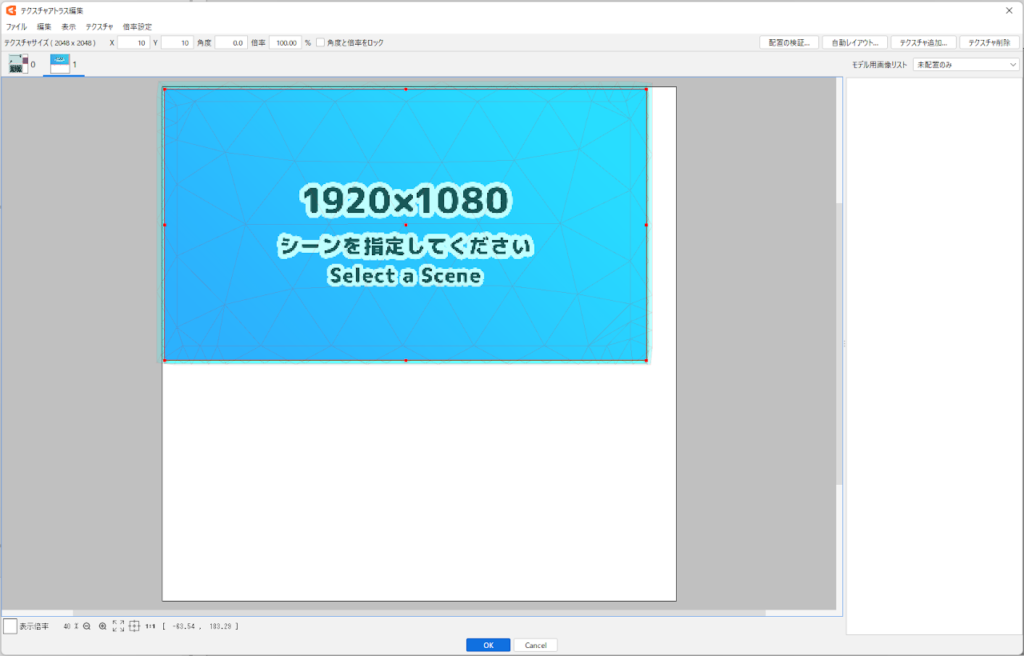
(3) Edit the Texture Atlas.
At this time in the new Texture Atlas Settings screen, there is no problem using the following settings:
- Width and height: 2048 × 2048
- Default Layout: “No placement”
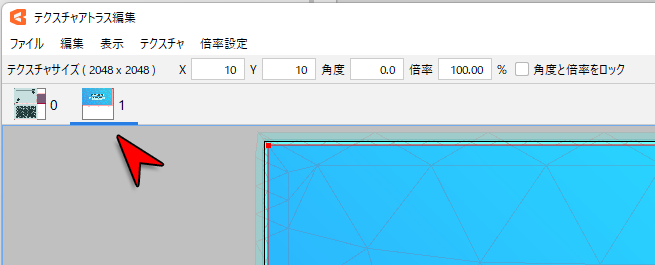
The following step is based on the assumption that the data for Live2D is placed on texture number “0.”
Place the image to be framed on texture number “1” Created by “Texture” -> “Add Texture”.
Move it to adjust the placement position to “X: 10, Y: 10.”
Note: The texture size, texture number, and placement position specified here can be any other values as long as they match the user data described below.
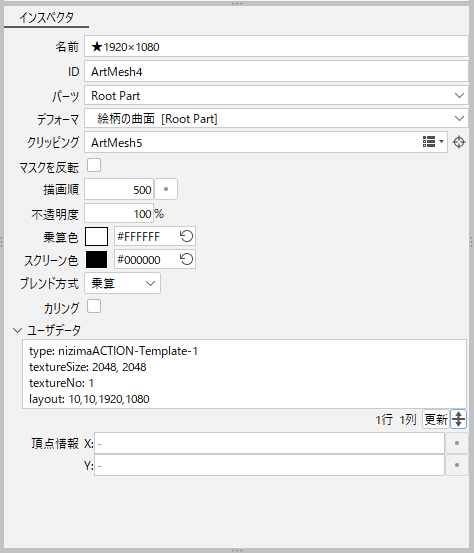
(4) Select the “☆1920*1080” ArtMesh and open the user data in the Inspector.
type: nizimaACTION-Template-1
textureSize: 2048, 2048
textureNo: 1
layout: 10, 10, 1920, 1080
Fill in the above information in the user data field of the Inspector opened when the ArtMesh was selected.
(The image to be framed is now specified as the framing destination for the scene.)
User Data Description
- type: nizimaACTION-Template-1
- The ArtMesh containing this information is recognized as an action frame asset for nizima ACTION!!.
- textureSize: 2048, 2048
- Set the texture size to the same value as that set when the Texture Atlas was created.
1024 and 4096 are also available. We recommend 2048 × 2048 as full HD (1920 × 1080) fits nicely. - textureNo: 1
-
Specifies the number of textures in the created Texture Atlas to be mapped. The value is greater than or equal to 0.
- layout: 10,10,1920,1080
-
Specify the information (layout) corresponding to the placement position of the image to be framed, in the order of X, Y, width, and height.
The width and height are 1920 and 1080 if the original 1920 × 1080 texture is placed at 100% scale.
In the alpha version, only 100% scale has been verified.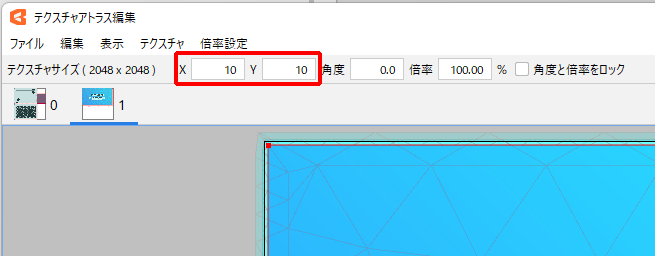
The following steps (5) and (6) are examples of Live2D action frame model production. It is not necessary to create it exactly as shown here.
(5) Create a warp deformer for “☆1920*1080” to facilitate deformation.
It is fine to transform the “☆1920*1080” ArtMesh as it is with parameters, but it is usually easier to transform it if it is placed in a Warp Deformer.
(6) Movements with Parameters
Feel free to model the “☆1920*1080” to vary according to the frame asset.
Using the repeat parameter, infinitely repeating movements can be realized.
Tip
The repeat parameter makes a repeat expression when a key is set outside the minimum to maximum range on nizima ACTION!!
For example, for a parameter that rotates from -180° to 180°, setting 190° allows rotation beyond 180° (same expression as 190° = -170°).
Creating an animation that changes from 0° to 540° will create an animation with 1.5 rotations.
Note: As of 11/26/2024
If you create motion data (.motion3.json) from other animations with values outside the minimum to maximum range for the repeat parameter in the animation function of Cubism Editor, the motion data will not repeat properly on nizima ACTION!! This will be corrected to work properly in the future.
(7) Export a MOC3 file for embedding.
There are no special settings for Live2D action frames, so export MOC3 files in the same way as normal Live2D models.
(8) Upload the folder containing the exported data to nizima ACTION!! to use it!
Drag and drop the folder containing the MOC3 or model3.json to nizima ACTION!! to display the created model (action frames).
When uploading using the “Select file” button on the Upload tab, the folder must be ZIP compressed beforehand.
▼ Click here to learn how to use Live2D action frames.
How to use Live2D action frames