5. Adding XY Facial Movement
You can download the latest Cubism Editor here.

Using the “deformer” described in Adding Body Movement, add the [Angle X] and [Angle Y] movements that turn the face up, down, left, and right.
This section explains how to add deformers and how to add movement.
Basic Tutorial List
- Illustration Processing
- Preparing to Move the Illustration
- Adding facial expressions
- Adding body movement
- Adding XY Facial Movement
- Creating Animations
Tutorial Video
The completed sample model of “Hiyori Momose” appearing in the video => Click here to download
Video Review
Here, add the [Angle X] and [Angle Y] movements that turn the face up, down, left, and right.
Once the face movement is understood, the body can be moved in the same way.
Add Deformer for Angle XY
First, add a deformer for XY to the previously created model. This section explains why adding a deformer for XY is needed.
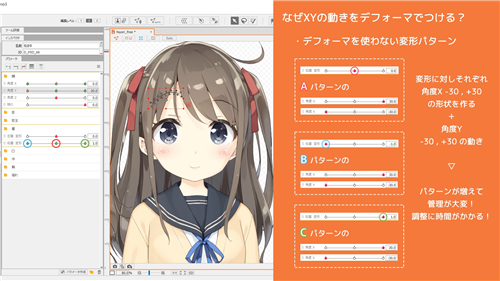
Suppose XY movement is applied directly to the ArtMesh of the eyebrow without using a deformer.
With a deformation of 0 for the eyebrow, it may appear that the X movement has been applied correctly, but with a deformation of -1, multiple shapes must be created, such as 0, +10, and -10 for angle X, and conversely, 0, +10, and -10 for angle X with a deformation of +1.
(3 ways x 3 ways = 9 ways)
In addition, because of the Y movement, the number of shapes that need to be made keeps increasing. (3 ways x 3 ways x 3 ways = 27 ways)
This would take time to create and be difficult to manage.
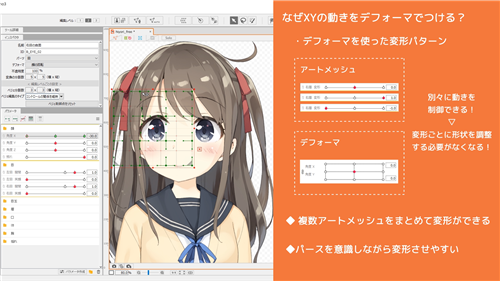
The use of deformers eliminates the need to create each shape, since parameters can be attached to the deformers.
The use of deformers also offers the following advantages.
- Multiple objects such as eyes can be deformed at once
- XY deformations can be added with perspective awareness
Deformers may seem difficult, like parent-child hierarchies, but they should be used effectively.
Create a Deformer
While it is possible to put the entire face in one deformer, it is better to make each part individually to create parallax and deform it three-dimensionally.
It is also recommended to make individual deformers for each part as it makes it easier to adjust details.
Creating a contour deformer
The method for creating a deformer is the same as described in the previous tutorial.
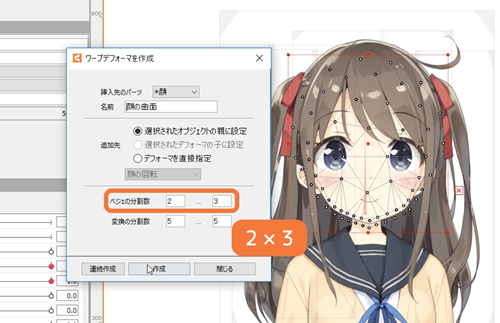
Select the ArtMesh you want to include and create a deformer. Warp deformers are used for XY.
The contour deformer should be made so that the number of Bezier divisions is 2 x 3.
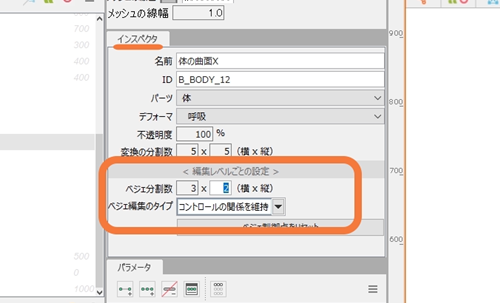
Number of Bezier divisions
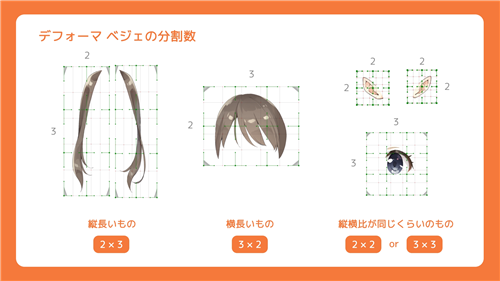
The number of Bezier divisions is recommended to be 2 x 3 for vertically long parts, 3 x 2 for horizontally long parts, and 2 x 2 or 3 x 3 for equal aspect ratios; typically, these are the 4 setups that are used.
If you want to change the number of Bezier divisions, you can do so from the inspector palette.
You can freely increase or decrease the value here.
Creating eye deformers
It is easier to create a deformer by locking the parts that are not selected from the Parts palette.
Make individual deformers for the left eye and right eye.
Select the eyelashes, eyeball, and white eye of one eye together.
You can select them from the Parts palette, but if you have locked all the parts except the eyes, you can select them all at once by dragging over them on the canvas.
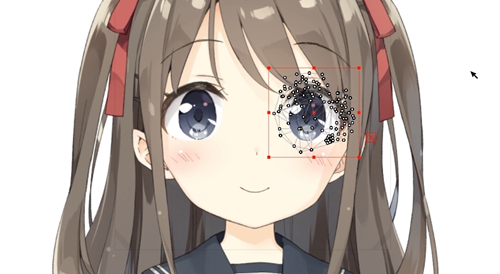
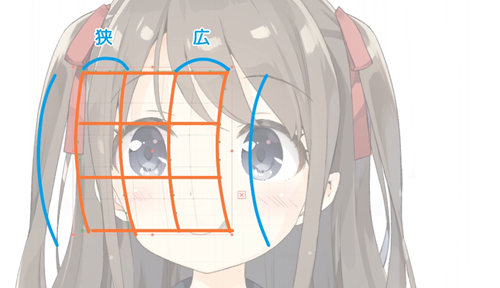
To adjust the deformation for XY more finely than other parts, make the number of Bezier divisions 3 x 3.
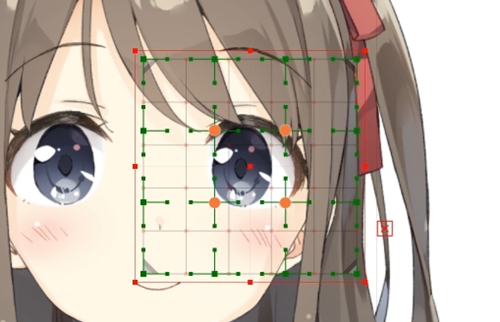
If you want to adjust the size of the deformer, you can hold down Ctrl and transform the bounding box to adjust the size without transforming the selected parts.
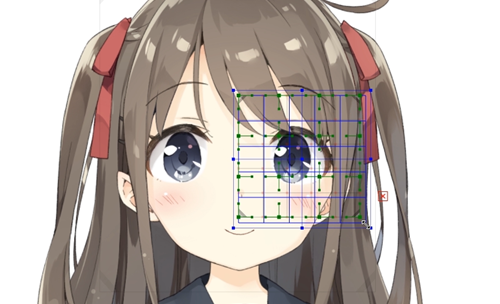
It is easier to deform if the four inner control points surround the eye.
Make a deformer for the other eye as well.
Creating a nose deformer
For the nose, it is easier to deform it by using 2 x 2 Bezier divisions for small objects such as those drawn in dots, and 2 x 3 Bezier divisions for vertically long objects with a realistic touch sharp nose.
The position should be such that the nose is centered.
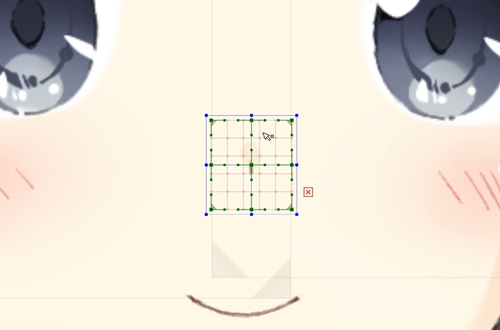
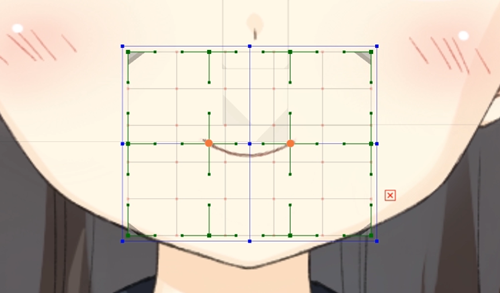
Creating a mouth deformer
Create a deformer with 3 x 2 Bezier divisions.
It is easier to deform if the control points are placed so that they are at the corners of the mouth.
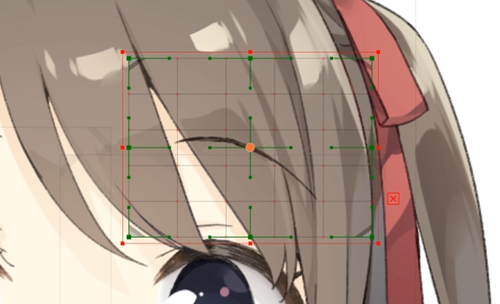
Creating eyebrow deformers
Using 2 x 2 Bezier divisions is recommended. As with the eyes, make individual deformers for the left eyebrow and right eyebrow.
It is easier to deform the eyebrows if the middle control point is in the middle of the eyebrow line.
Creating ear deformers
Make deformers on the ears as well. As with the eyes and eyebrows, make individual deformers for each side.
The number of Bezier divisions should be 2 x 2.
The deformer should be positioned in such a way that the part is centered.
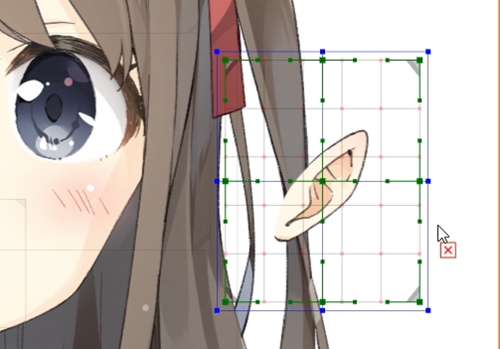
Make a deformer for the other side as well.
Creating hair deformers
For the hair, make a deformer over the swaying deformer you made last time.
With an existing deformer selected, click on Create Warp Deformer and select [Set as Parent of Selected Object] to create a new deformer, which will contain the existing deformer in the newly created one.
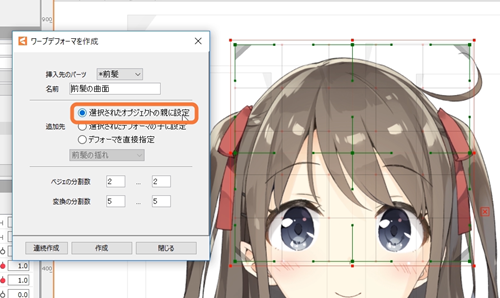
When creating a deformer, be careful that the parent deformer is not smaller than the child deformer.
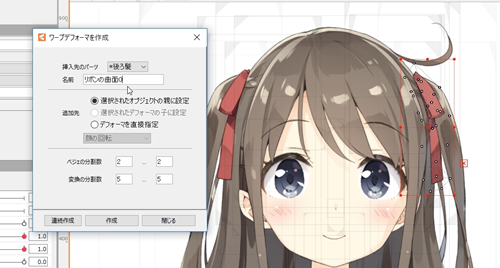
Create a deformer for each of the front, left and right side, and back hair. The number of Bezier divisions depends on the length of the hair.
It is recommended to use 2 x 3 if long or 2 x 2 if short. This time, only the bangs are made 2 x 2 and the rest are 2 x 3.
This is typically the end of the deformers for XY.
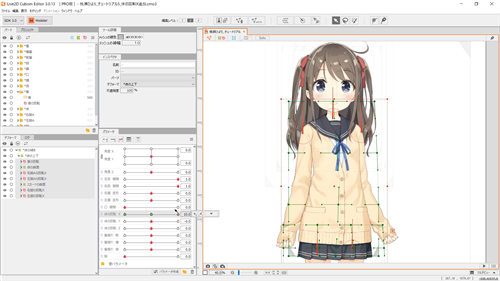
In the deformer palette, you can see that deformers are created for each part in the face rotation.
If there are parts that were omitted from being made, or if there are character-specific parts such as ribbons, make deformers for those parts as well.
Add X Direction Movement
Select the deformer you created and add three points to the [Angle X] parameter.
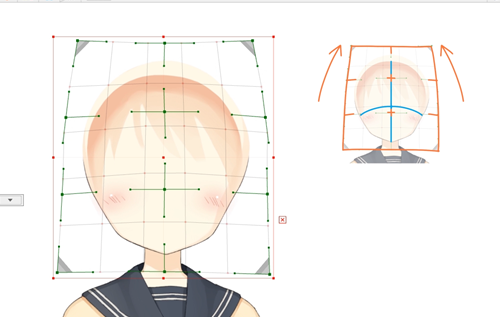
Since it is difficult to create the shape with all the parts displayed, hide the other head parts and use only the outline.
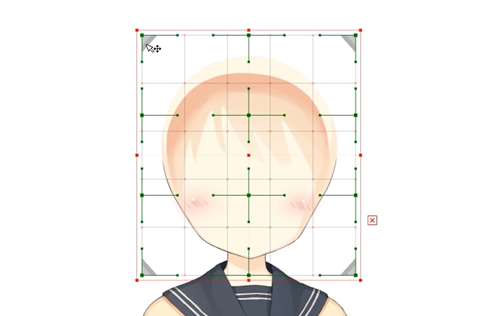
Select a contour deformer, move it slightly to the left side, and shape it.
When creating the shape, do not look too much at the shape of the part itself, but deform the deformer handles with the perspective in mind to create a beautiful shape.
Once the deformation is applied so that the back side is slightly narrower and the front side is wider, the rest can be fine-tuned to the desired shape.
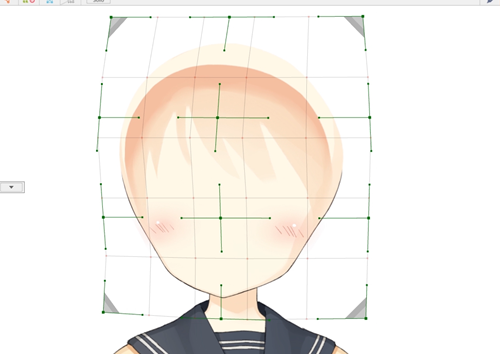
Make the movement to face the right side of the screen in the same way.
Add movements for the nose, mouth, eyebrows, eyes, ears, and hair deformers in the same way.
The trick to deformation that is common to all is to deform the deformer with an awareness of perspective so that it is slightly thinner in the back and wider in the front.
The trick is not to make adjustments by looking only at the resulting horizontal shape, but also by watching the movement of the deformation when the parameters are moved.
Add Y Direction Movement
The movement in the Y direction is added using the same deformer used to add the X movement.
Select the deformer and choose the [Angle Y] parameter to insert three points.
As with X, hide the other parts and use only the outline to add movement.
The movement is similar to the X direction, deforming the deformer while keeping the perspective in mind, so that the back is narrower and the front is wider.
Also, in the case of Y, it is best to let the deformation be such that the back side narrows a little.
Let’s add movements for the other parts in the same way.
Add Diagonal Face Movement
The deformation of each of [Angle X] and [Angle Y] has been completed, but the diagonal movement has not yet been completed, so the image will remain facing sideways even if you try to make it face diagonally.
Therefore, it is necessary to create diagonal shapes as well, but the diagonals do not need to be created from scratch; they can be generated automatically using the function.
Procedure for adding diagonal movement
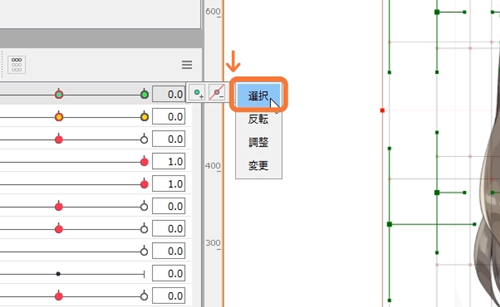
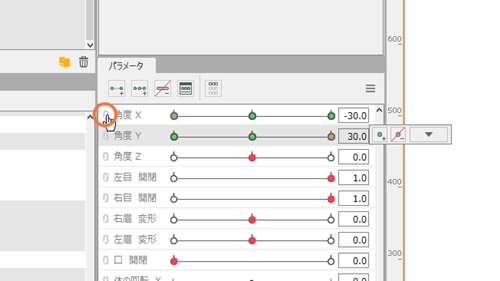
When you click on the Angle X parameter, a small pop-up appears beside it.
Hover your mouse over the far right to see the parameter adjustments, and click [Select] at the top to select all objects with that parameter.
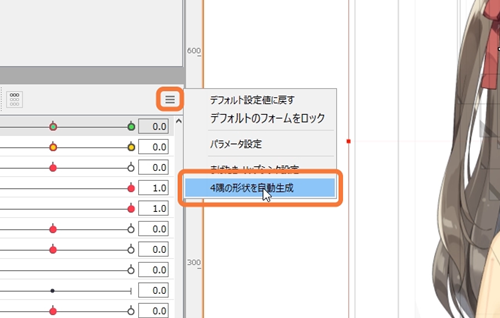
With the selected state, click on [Auto Generate 4 Corners] from the menu next to the parameter.
You will then see a dialog box below.
Confirm that [Angle X] is entered in [Parameter 1] and [Angle Y] in [Parameter 2].
In addition, make sure that the Target in the Option is set to [Selected object] and press OK.

Now a diagonal face has been created.
Click the chain icon to the left of the [Angle X] parameter to merge it with the parameter below.
Facial deformations can be easily checked in this state.
Move the parameters around and adjust any unnatural movements.
This completes adding movement.
As for [Body rotation X], it can be created by adding a deformer, similar to that of a face.
You will get a better understanding of how the deformer actually works, as well as other areas that are not explained, by checking sample models.
Also, if you have any questions about a function, please refer to the manual website for a detailed explanation of each function.
Previous section “4. Adding Body Movement” | Next section “6. Creating Animations”