Warp deformer
Updated: 02/13/2024
Warp Deformer Features
By setting the object’s parent to a warp deformer, the object inside can be deformed.
Size and opacity can also be adjusted.
Multiple objects can be deformed together in a warp deformer, which is useful for adding movement to swaying objects or changing the direction of a face.
Create Warp Deformer
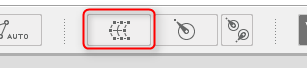
1. Click [Create Warp Deformer].
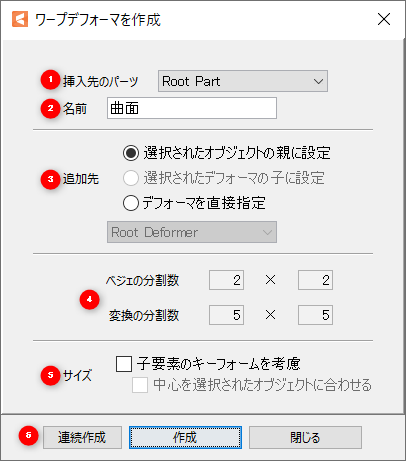
2. The [Create Warp Deformer] dialog box opens.
Enter the desired settings and click the [Create] button to create a warp deformer on the view.
| No. | Name |
Description | |
| 1 | Parts to be inserted | Select the part to insert. | |
| 2 | Name | Set the name of the new deformer. It can also reflect the name of the currently selected object. See “Environment settings” for details. |
|
| 3 | Location | Select where to add the new warp deformer. For details on how to set up a parent-child hierarchy, see “Setting up parent-child hierarchies.” |
|
| 4 | Number of Bezier divisions | Set the number of Bezier divisions. | |
| Number of conversion divisions | Set the number of divisions for the conversion. | ||
| 5 | Size | Consider the keyforms of the child elements | Create a warp deformer that takes into account all the keyform shapes associated with the child element’s objects and does not protrude from those shapes. |
| Align center with selected object | Create a warp deformer at a position aligned with the center of one or more selected objects. | ||
| 6 | Sequential creation | Create warp deformer sequentially without closing the dialog. | |
| Create | Create a warp deformer and close the dialog. | ||
| Close | Close the dialog without creating a warp deformer. | ||
3. Adjust the position and size of the warp deformer to fit the object in the view.
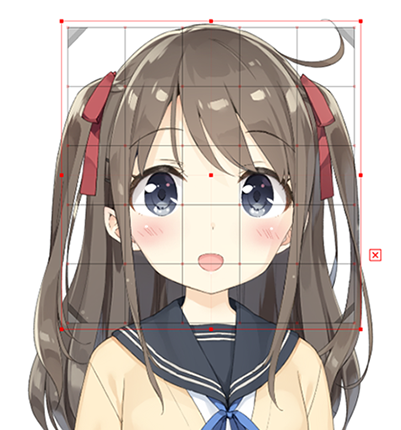
This completes the creation of a warp deformer.
Tips
If you want to adjust only the deformer size with the existing ArtMesh, use Ctrl + dragging to adjust the size of the deformer only without deforming the ArtMesh inside.
Number of Bezier Divisions / Number of Conversion Divisions
When creating a warp deformer, you can set the Number of Bezier divisions and the Number of conversion divisions.

Number of Bezier divisions
The number of Bezier divisions represents the division number separated by editable control points.
The larger the number, the more control points and handles are available for detailed deformation.
However, it is important to note that this may increase the amount of time and effort required to make adjustments.
Normally, values such as “2 x 2” and “3 x 3” are used.
Number of conversion divisions
Sets the division number for horizontal x vertical. The larger the number, the more deformations follow the deformer shape.
Normally, the setting should be set to “5 x 5” because a large number of settings may result in heavy load due to the large number of calculation processes.
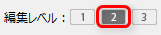
Level Edit for Deformer
Deformer editing can be performed by switching between three levels.
The default Level edit is [2].
[Level edit 1]
In this mode, only the intersections of the number of conversion divisions, the [division points], can be edited.
The control points will be hidden and used for fine adjustment.

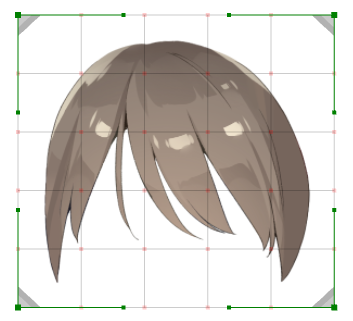
[Level edit 2]
In this mode, all of the [Control point] and division points at the intersection of the set number of Bezier divisions can be edited.
This mode is set by default.

[Level edit 3]
In this mode, all of the [Control point] and division points at the intersection of the number of Bezier divisions of a 1 x 1 (outer frame only) can be edited.
Use when you want to edit in a large frame.
Convert Warp Deformer
| 3.2 system |  |
| 3.3 system |
In warp deformers up to Cubism 2 and Cubism 3.2, when parsing to a trapezoidal shape to create a three-dimensional effect, etc., in some cases, distortion occurred.
(This was particularly true on the straight areas.)
Starting with 3.3, the warp deformer deformation algorithm has been revised to allow for more pleasing deformations.

However, if adjustments are made to accommodate distortion, such as in models created in 3.2 or earlier, the appearance may change.
This new method is available starting with 3.3, but you can select whether to use the old method or the new method, so switch according to the application.
The new method can be used with the SDK without concern, as there is no difference in operating speed from the previous deformer.
Edit Warp Deformer
By holding down a key on the keyboard and dragging, you can edit the warp deformer without affecting the children.
For more information, please refer to the chart below.
Note: For Mac users, please replace [Ctrl] with [Command].
| Shortcut | Overall editing with bounding box | Editing control points and division points |
|---|---|---|
| Drag | Transform (move, enlarge, rotate) | Move control points |
| Shift + Drag | Transform while maintaining aspect ratio | Move control points only horizontally or vertically |
| Alt + Drag | Transform near the center | [None] |
| Alt + Shift + Drag | Transform near the center while maintaining aspect ratio | [None] |
| Ctrl + Drag | Transform (move, enlarge, rotate) without affecting the objects | Move without affecting objects |
| Ctrl + Shift + Drag | Transform while maintaining the aspect ratio without affecting the objects | Move only horizontally or vertically without affecting the objects |
| Ctrl + Alt + Drag | Transform near the center without affecting the objects | [None] |
| Ctrl + Shift + Alt + Drag | Transform near the center while maintaining the aspect ratio without affecting the objects | [None] |